Is your child going through the stage when they want to tip everything out? Do they seem to tip over anything and everything in their path?
You might find this hard to believe, but the answer to get them through this stage quickly is to provide lots more filling and emptying activities in as many different ways as possible.
Children need lots of opportunities to fill and empty to learn about the properties of materials and how they work when they are emptied. They are experimenting with how things look when they are tipped up.
If you have a young child at this stage, here are the 19 best ways you can help them to learn about the concept of filing and emptying.
Filling And Emptying – Why It Happens
If your child is spending a lot of time filling and emptying, then the chances are that they are going through a normal part of child development, sometimes referred to as a schema. This particular phase is sometimes called the Transforming schema.
Your child is exploring what happens when you combine or change things or mix things together. In other words they are transforming things around them to see what happens.
This phase is referred to as the Tipping and Flitting stage. When they are going through this stage, a child will typically tip up boxes of resources and then show no interest in them once they are all over the floor, instead flitting off to the next area to do the same.
They may also tip their drink up lots of times or tip their food off their plate. They are not being deliberately destructive. (Source) (Honestly!) So, how can we help them to pass through this stage?
Get them emptying and filling as much as possible in a range of situations! The following 19 ideas will all help.
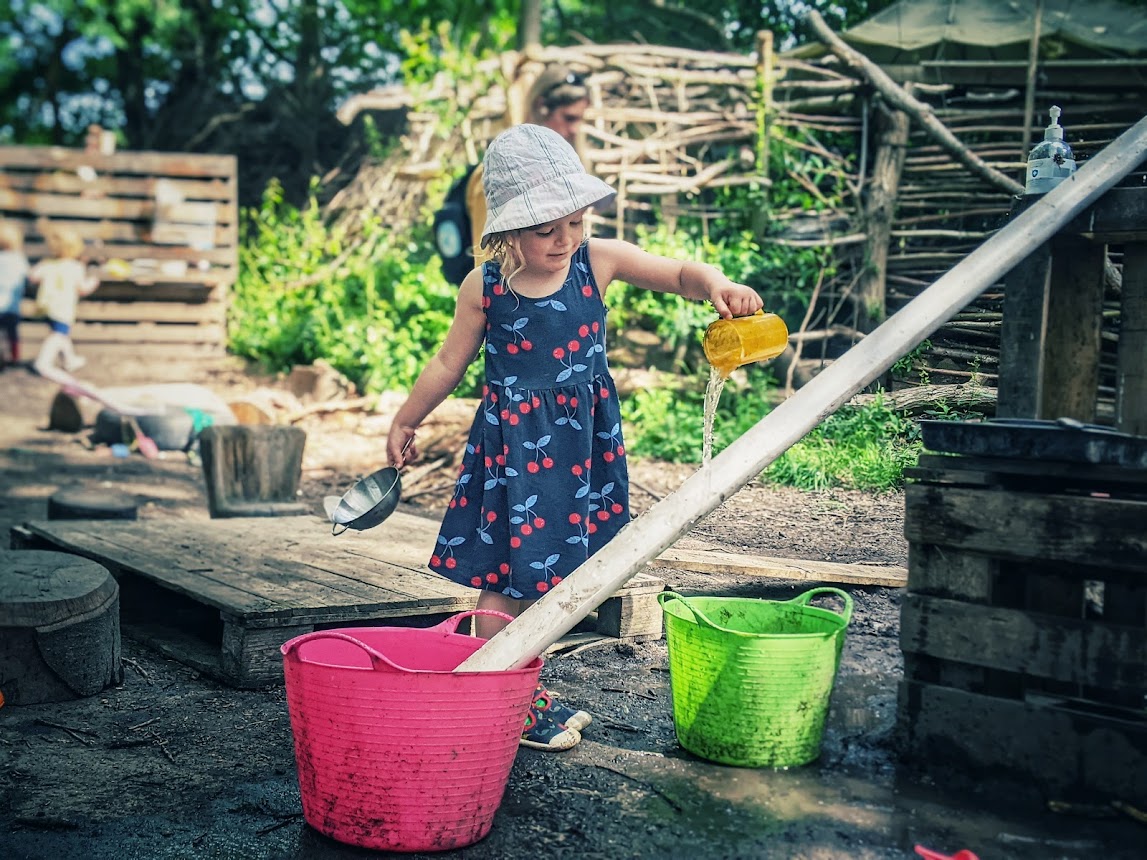
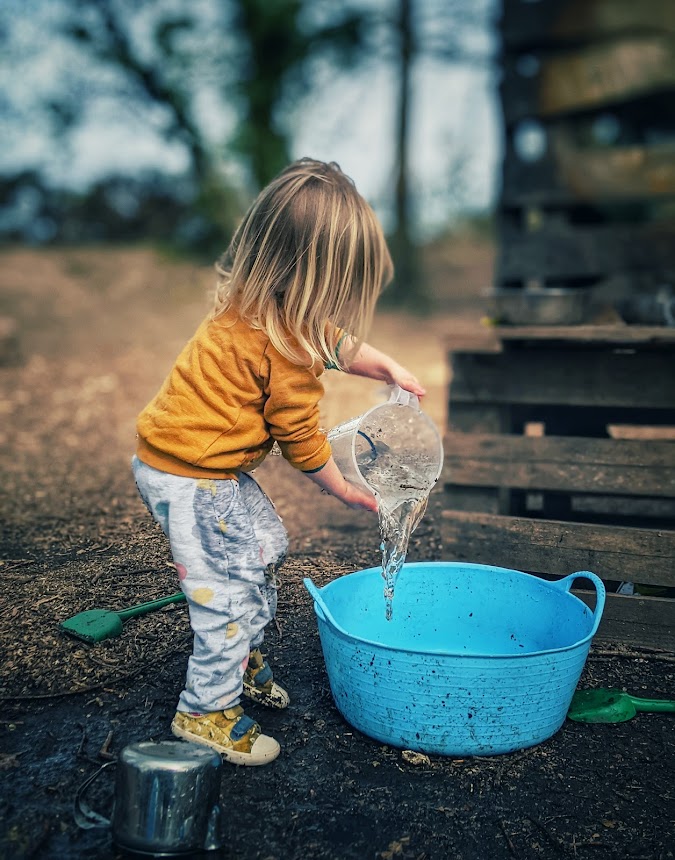
1. Water Play
Water play is the obvious place to start to learn about tipping up containers and refilling them and some toddlers will spend hours happily doing this. A water tray is great if you have one, but bath time or even a paddling pool or a washing up bowl can be just as effective.
Collect lots of different containers. Think about the different sizes, shapes and depths.
For example:
- Margerine tubs
- Yoghurt pots
- Milk cartons
- Ready meal trays
- Plastic beakers
- Ice cube trays
- Egg cups
- Plant pots
- Empty cleaning spray bottles or washing up liquid bottles
- Sieves and colanders
- Spoons and ladles
These will all allow your toddler to experiment with filling and emptying and the best part of it is, it doesn’t have to cost anything.
As your child is playing, sit alongside them and provide the words for the different containers.
Try to use words like:
narrow
wide
big
small
deep
shallow
fat
thin
full
empty
Talking about these words in play will all help to develop new concepts and will support your child’s understanding of the world as they get older.
Try adding lots of ice cubes into the water for a further dimension to their play, or some natural food colouring.
2. Washing Machine / Dryer
Help your toddler to tip the dirty clothes out of the wash basket on to the floor and show them how to fill the washing machine until it is full. Help them to understand that the clothes go in and are tipped out again when it’s finished.
You can repeat this with the tumble dryer too when the washing cycle has finished.
3. Washing Up
Let your child stand on a chair at the sink with you. Show them how you fill up the dirty cups and bowls with soapy water as you wash them, then empty them as you rinse them clean. Let your child have a try.
If they want to experiment with pouring the water, be patient and encourage them to try and keep the water in the sink.
4. Jelly
This one takes a little time to prepare, but it’s really worth the effort for the fun the children have.
Prepare 3 / 4 large bowls of jelly the night before and tip them into a large tray. (You could do this on a smaller scale if you are only playing with one child).
You can support your child with lots of lovely wibbly wobbly language like:
Wobbly
Shake
Jiggle
Soft
Squelch
Wet
I like to add cake trays, cake tins, mixing bowls and spoons to this one.
5. Bath Time
Talk together about how you fill the bath from the taps and empty it through the plug hole. If your child is in the bath, let them feel the swirl of the water as it disappears down the plughole.
If you don’t have a bath, you can talk about the water in the shower.
At bath time, provide lots of containers and empty plastic bottles (and towels!) and have lots of fun filling and emptying.
6. Going To The Shop
Whether you role play this at home or actually go to your local shop, explain to your toddler that you need a bag to fill with shopping and you need to take your pennies in a purse.
Many children struggle to understand money, as they only ever see adults using a bank card, so using real coins, once in a while is a good way to demonstrate the purpose of money, but it also teaches them about the properties of containers.
Lots of children go through a phase of collecting objects in a bag. This is sometimes referred to as the transportation schema as they will pick up objects in their bag for basket and move them somewhere else.
Try to provide a selection of bags, purses and wallets for them to play with.
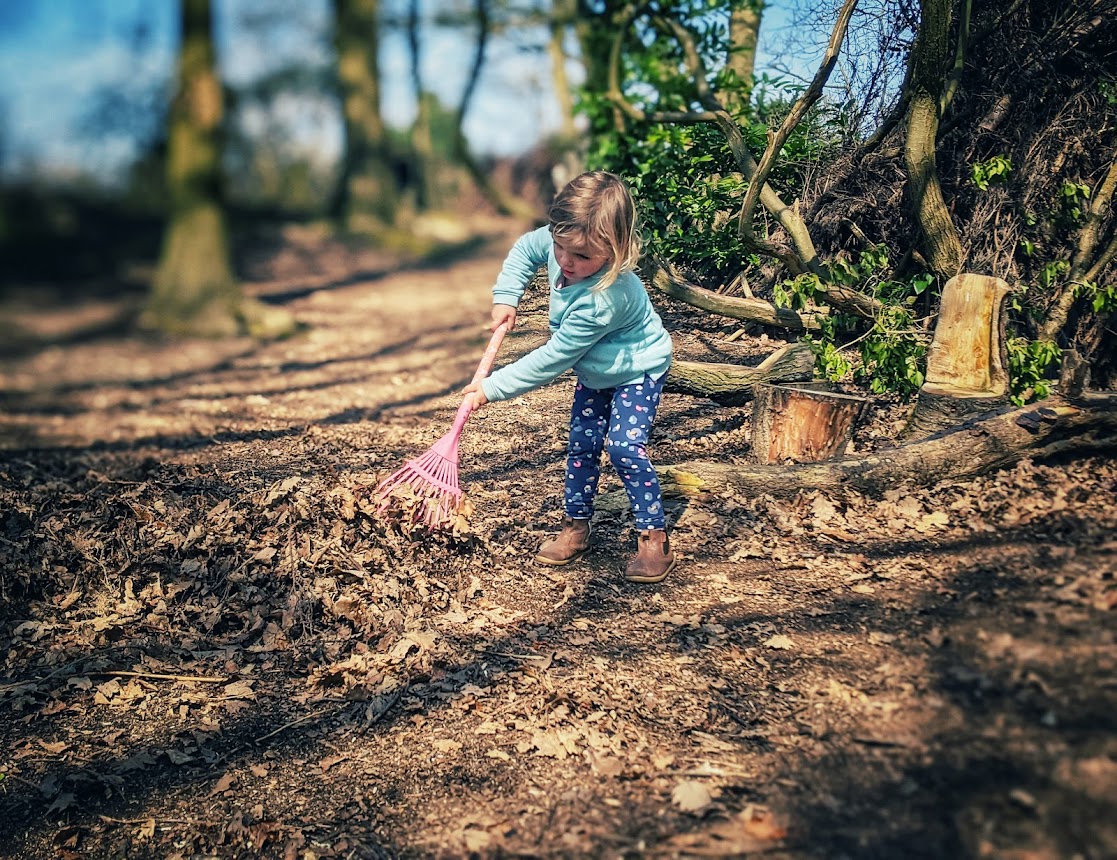
7. Backyard Tidy
There are lots of ways to fill and empty in the garden. A child’s wheelbarrow is a really good resource to have to develop this skill.
If you have Fall leaves, show your child how to scoop them up, collect grass cuttings, weeds or garden waste. Show your child how to fill and then tip up the waste. They could also transport soil from one area to another.
8. Mealtimes
There are lots of ways for your child to practice filling and emptying as you prepare a meal together.
Help them to fill a pan with water before you start cooking, fill a bowl with food, or fill a beaker with a drink. You could even fill up the scales with your ingredients before you pour them into a mixing bowl.
Pouring is a skill that can sometimes get overlooked, but it is a skill that we need as we use it everyday. I’ve found that a small plastic jug is the best way for young children to practise this skill as they can hold it in small hands.
Pour a little milk or water into their plastic jug and let them practise filling up their cup or beaker.
Expect accidents, but the more practise we allow, the quicker they will be able to master pouring themselves.
9. Sand Play
Sand play is another activity that can provide endless opportunities for filling and emptying.
If you are lucky enough to have a sand pit, that’s great. The best sand play tends to happen when the children can actually get into the sand pit themselves, and best of all is a real beach but if you can’t get to the beach, don’t worry.
You can still have lots of fun using a tray. Try to alternate wet sand and dry sand as they both have different textures and properties.
10. Wet Sand
Again, there is no need to buy expensive equipment.
Once you have collected containers to use in the water, you can re-use them in the wet sand. A bucket and spade is always a good addition.
Show your toddler how to fill and empty a bucket of wet sand, give it a little pat and turn it over to make a castle, knock it down and start all over again.
Young children will want to repeat this and that is all part of the schema.
You could also add moulds if you have any – containers that leave imprints in the sand.
11. Dry Sand
Let the sand dry out and let your child explore filling the same variety of containers with the different pouring properties that dry sand has.
Most young children love to run dry sand through their fingers. Try adding sieves and colanders to develop this further.
But there is no need to stop at sand and water. Once you have a tray, you can empty it and experiment with lots of different textures.
Here are a few of my favourites:
12. Soil
I like to use a mixture of compost and topsoil in a deep tray. A bag of compost alone is quite fine in texture, but if you add some topsoil, you can do a lot more with it.
A raised bed or a digging area outdoors is even better, but if you haven’t got one of those, no need to worry.
Recycle your containers again to allow lots of filling and emptying with the soil. You can wet the soil and leave it to dry out.
Add different sized plant pots and seed trays to your collection of containers for this one. If you do have a digging area, try digging some deep holes and ask the children to tip in some water. They will be fascinated by the water as it drains away, or makes muddy puddles.
13. Pasta
Occasionally, I come across a giant pack of value pasta in my local supermarket and when I do, I snap it up, because a tray full of pasta provides a great opportunity for filling and emptying. Recycle those same containers again.
Some children really love to sweep their hands through the pasta as it makes a lovely swishing noise. It’s also a satisfying noise when you tip containers full of it back into the tray.
Try adding tins with lids to experiment with the noise.
14. Conkers / Pine Cones
Following a lovely walk in the local park, we managed to fill our tray with hundreds of conkers and pine cones. The children spent ages filling containers with them and listening to the plopping noises as they poured them out again.
For this activity, try adding recycled Pringles tubes or wooden boxes. When the conkers are poured onto wood, they make a lovely acoustic natural sound.
15. Gravel
You can pick up a bag of small, fine, gravel from most DIY stores. You can use the gravel in a tray, or if you have a Tuff spot, this can also work well. Obviously, you will need to risk assess this for the risk benefits.
Use caution, and if your child is at the stage of putting things in their mouth, you will need to make sure they are supervised. Use a spade or a scoop to fill buckets and sturdy containers with the gravel.
For this one, I like to add toy dumper trucks, and rakes to make roads.
16. Bean Bags
Outside, or in a good space, try a bucket of bean bags. Show the children how to tip them up and count them all back in again. Depending on the age of the children, you could even sort them by size, shape or colour.
If a child just wants to tip, try to encourage them to replace the beanbags, by telling them they can have another do at tipping. If you haven’t got bean bags or soft balls, you could also try leaves in the Fall.
17. Mud Kitchen
Mud kitchens seem to be everywhere at the moment and with good reason. Setting up a mud kitchen is an ideal way to practice filling and emptying in a real life situation.
Make sure that your kitchen does have real mud, as it is a perfect texture to fill cake tins, pots and pans. You can also add water to change the texture.
Just watch your young inventors go!

18. Use Trailers
Kids love transporting pretty much any objects around the environment. Use trailers to store all the containers they have filled up, and then empty them in a different location.
19. Tidy Up Time
Tidying and putting the toys away again can often be a challenge with young children, as toddlers naturally find emptying containers much easier than filling them back up again.
You probably won’t need to encourage the tipping as much as the filling!
But it’s important that children understand that tipping and emptying containers does mean we need to fill them up again afterwards. It’s a good idea to have boxes and containers with picture or labels on if you can, so that your child understands that the stickle bricks belong in the box with the picture of stickle brick on it.
Be firm about this and set boundaries.
By eighteen months, many toddlers are beginning to understand that certain objects fit into containers so if you make it into a game and have lots of fun, they will be more likely to join in and start to help.
Have Fun
I hope that’s given you a few ideas to get started. Use your imagination!
If there is anything else you can thing of that you can pour and empty, give it a go.
We once had an excess delivery of rice crispies to our school by mistake, so we tipped a few boxes of the cereal into a tray and let the children play with them, crunching and popping them, filling, scooping and emptying them. The cereal was light and airy and the children loved packing it into containers, pretending they were working in a factory.
Keep it fun and remember, the need to empty is usually a phase and children will pass through it in time. Have fun!