The concept of symmetry is something that young children can begin to explore through practical activities, even before they can really put into words what it is. It is definitely better to start with experimentation with objects, rather than give them symmetry worksheets, printables or folding pictures.
What are the best symmetry activities for kids? Some excellent ideas to get children started with symmetry are:
- Making Loose Parts Faces
- Making Models
- Using Geoboards
- Mirror Books
- Making Loose Parts Butterflies
- ‘Seeing Symmetry’ Book
- Drawing Or Model Making Next To A Mirror
- Using Loose Parts Next To A Stick
- Building Half A Person Outside
- Paint Printing Using Objects
Read on to find a detailed illustrated description of these activities that will help you introduce and teach symmetry to young children in the most engaging and child-friendly way.

1. Making Loose Parts Faces
Babies and toddlers begin to understand symmetry by looking at faces. A face is usually a reasonably symmetrical thing, and we come to ‘know’ this even though children couldn’t put it into words often.
Creating your own faces is a great way of exploring symmetry in a context that they understand.
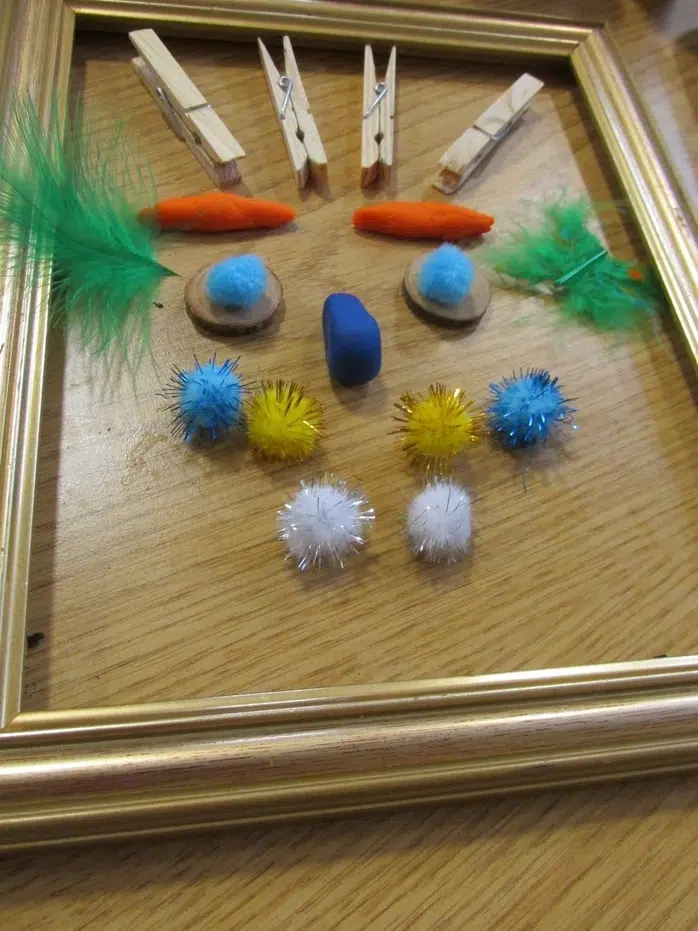
My favorite way of creating loose parts faces is to use a picture frame. This gives the children a base and structure to work inside.
To go with it, I would set up a ‘tinker tray.’ I usually use something like a baking tray with different sections.
Then simply fill the sections with assorted loose parts. Some good examples could be things like corks, bottle tops, feathers, pompoms, wood slices, leaves, bolts, and pebbles. Just whatever you have to hand or is readily accessible. If you’d like to find out the full guide on what kind of materials to use for loose parts play, then check out this guide of at least 100 ideas.
It is also nice to use something for the base of the face. In the past, I have used a silver cake base. Or play dough. Just something to give them a face outline.
To create the faces just get the children to use the loose parts and make a character. The symmetry will often happen automatically when it is a face as it is an in-built understanding. If it doesn’t, however, you can talk about how to make them look the same on one side as the other – like our faces!

It is great if they give them a character name! A funny voice or back-story really helps as well.
You can make goodies, baddies, family members, characters from stories – just whatever they like.
2. Using Geoboards
Geoboards are fantastic for all sorts of learning in the early years, including teaching symmetry.
You can buy geoboards, or you can easily make them yourself using pieces of wood with screws inserted into them. I like to use colored rubber bands on geoboards, but you can also use things like hair bobbles or loom-bands.
They are brilliant for fine motor, and you can also explore a range of art and math skills.
To use them to explain symmetry, you pick a line of screws near the middle of the board. It may be a good idea to put a piece of string down that line, so the children know that is the middle.
Then you build some shapes on one side of the line. For example, using the rubber bands you can make a square and a triangle. The idea is then to try and copy the exact same shapes on the other side of the line.
The easier way to do it is to create the shapes right next to the line, and then the copied shapes will be touching them on the other side.
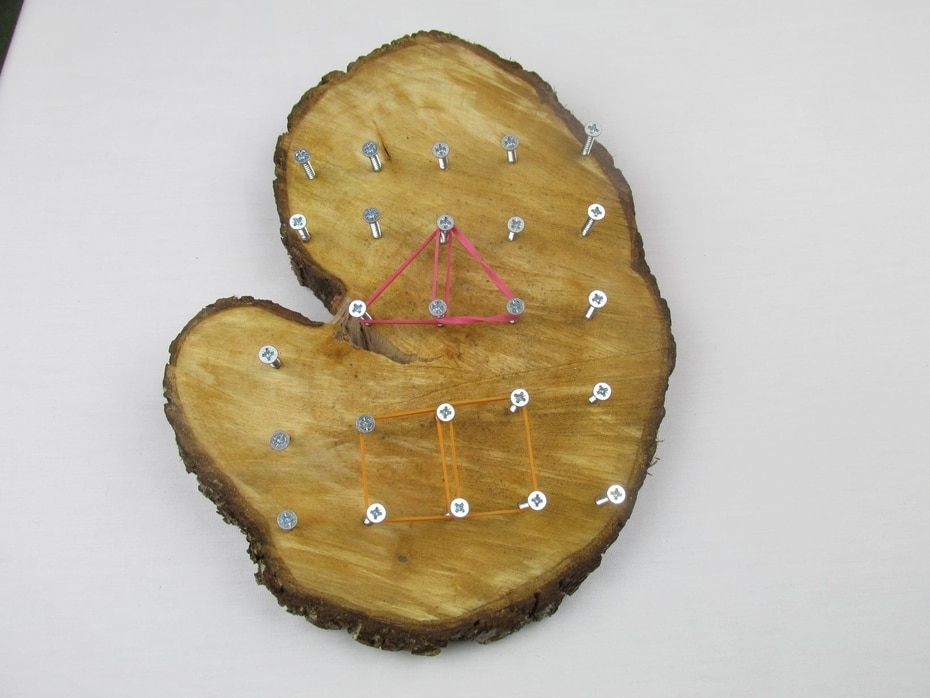

The harder way is to create shapes further away from the line.
Don’t get stressed if they don’t do it exactly right! This activity is harder than most of the other symmetry activities in this article. However, children really like fiddling with geoboards, and this just gets them started with an understanding of what symmetry is.
This is just one of many geoboard activities you can try. Take a look my in-depth guide of 16 geoboard games you can play.
3. Making Models
This is another really natural and simple activity, that children often bring an element of symmetry into already without any adult intervention.
Making models is fantastic fun, and you can use so many different materials and create so many different themes.

Using play dough is a good way to do this, and the tinker trays that we used for the portraits.
You simply make a model, and whatever you put on one side you put on the other as well.
Good examples are things like aliens. So many children love space, and aliens are so fantastic for counting and early math skills.
Build different numbers of antennas, legs, heads, arms, and the like – and just copy them on the other side.
Other great models for teaching symmetry are things like vehicles, insects, characters, buildings, and animals.
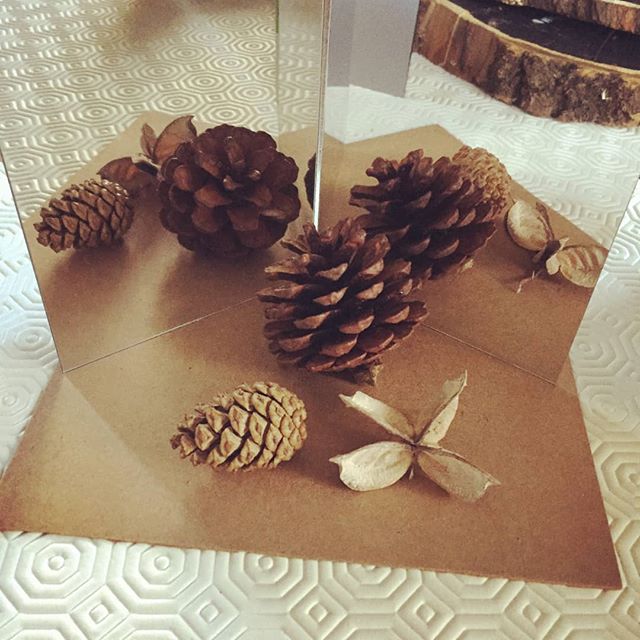
4. Mirror Books
These are one of my ultimate favorite resources!
To make a mirror-book you simply need two thin mirrors that you tape together so that they form a right-angle.
These are a brilliant resource to create curiosity, and that element of awe and wonder.
They can be placed anywhere throughout the setting – on a secluded shelf, in a little nook, or on a table-top. Again, they are great when used with tinker trays.
The idea is that children place loose parts in whatever array or pictures they like in front of the mirror book. The mirror book creates a spectacular visual mandala, with multiple lines of symmetry. It is a great exploration of how symmetry works, and great for communication, and getting children excited and talking.
This is really sowing the seeds of an understanding in the children’s minds through exploration.

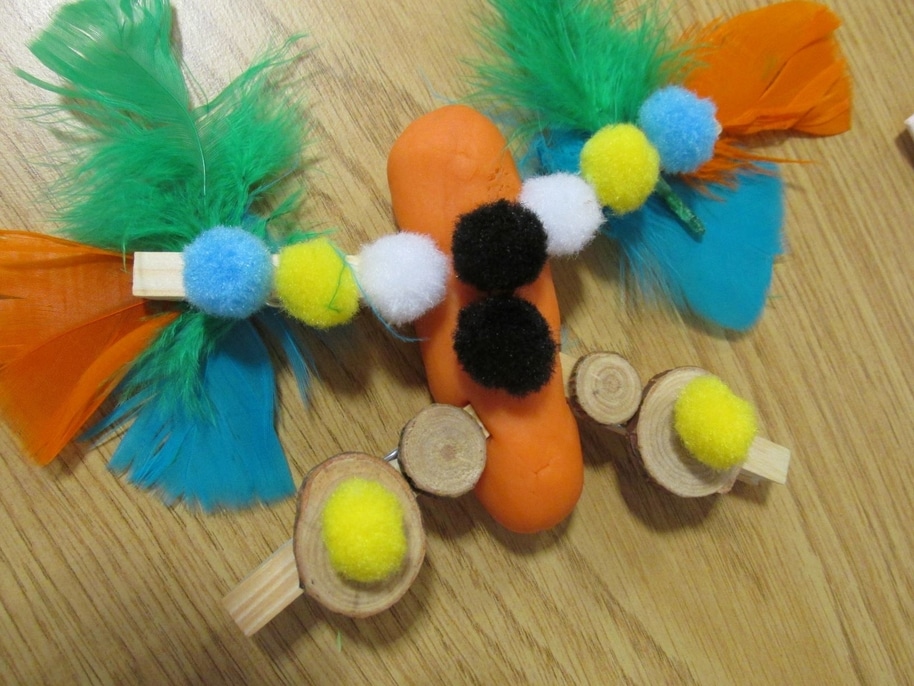
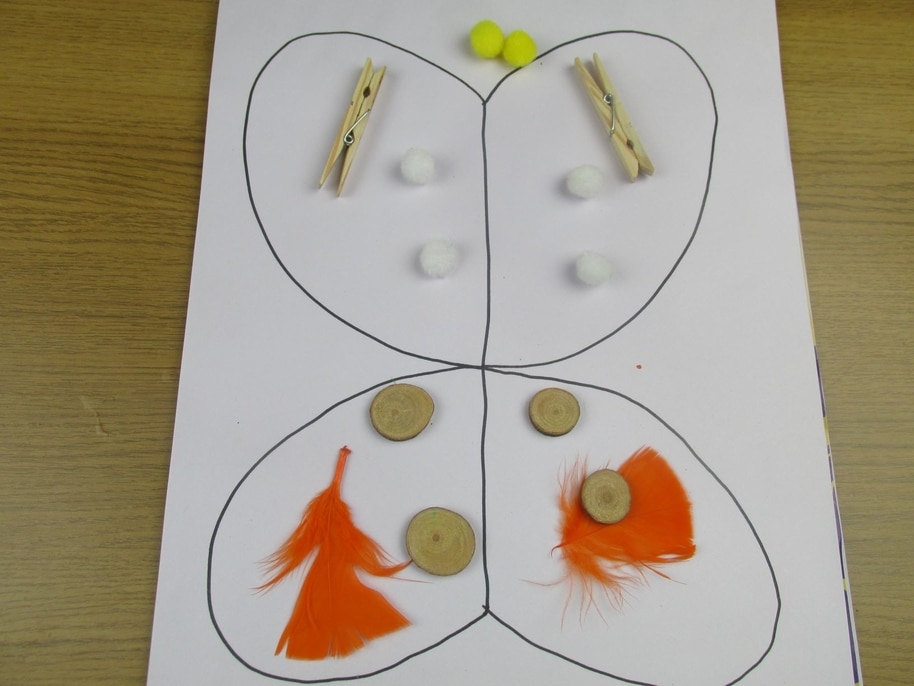
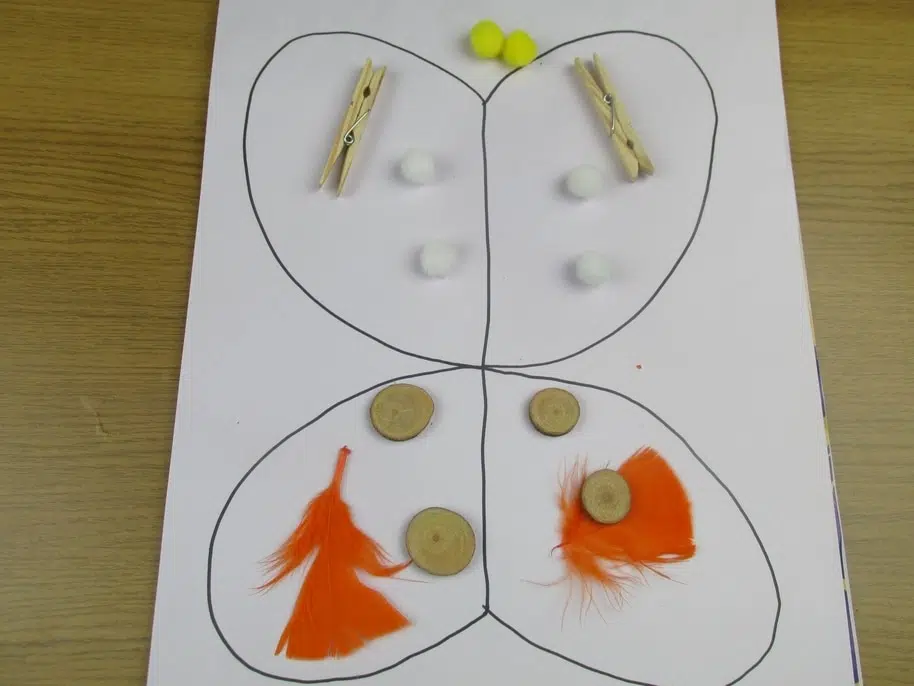
5. Making Loose Parts Butterflies
Butterflies are one of the great staples of teaching symmetry. Children just ‘get’ the idea that one wing looks the same as the other.
There are many ways of creating butterflies – paint printing being one of the favorites.
Another great idea is using loose parts. Have a big outline of a butterfly drawn out. It can be drawn on big paper, or I like to use the big black chalkboard boards that I have created, with a chalk outline drawn on.
Have a central line down the butterfly, or draw a body (whichever you prefer).
Using a tinker tray of loose parts you simply create a spectacular pattern on one side. Then either another child tries to copy it on the other side, or you just try to copy it yourself.
It is easier to do one element at a time than try to copy it. However, just let the children go for it! Problem-solving and working things out for themselves is a crucial function of these types of provocations.
You could do a huge one on the floor, with many children working together.
Alternatively, little tiny ones are a good introduction, that only allows for a few loose parts.
These provocations are excellent for counting and simple math problem-solving.
To find out a list of the 40 ultimate loose parts activities (of which is one) then check this article out.
6. Seeing Symmetry Book
There are several picture books that I have seen that deal with the concept of symmetry, but this one is certainly my favorite.
It is called Seeing Symmetry by Loreen Leedy.


It is less of a story, but more a visual demonstration of what symmetry is.
There are many stunning symmetrical pictures, such as the owl on the opening title page. The owl is copied symmetrically across two pages, and so is all the writing and headings, which are written normally on the left, and in reverse on the right.
This book explores what symmetry is, and also shows many examples of where we find it in our environment.
There are pictures of animals, buildings, and elements of nature.
The book really hammers home the message, and is a good way of brining the concept of symmetry into words.
The book is also an excellent starting point for some of the other symmetrical activities outlined here.
7. Drawing Or Model Making Next To A Mirror
This one is very simple to set up, and great for children to just get started with exploring the concept of symmetry.
A simple way of doing it is to attach a mirror to the side of a box.
Then the children can explore building, making or drawing things next to the box. It is a great way to symmetry taking place spontaneously.
The next step is to create half of something, and let the mirror complete whatever you have done by creating the other half.
A simple example would be to create half a face. Look in the mirror, and you’ve got a whole face. Half a butterfly would be a good introduction. You could draw it or use loose parts.
Just have an experiment and see what they come up with!
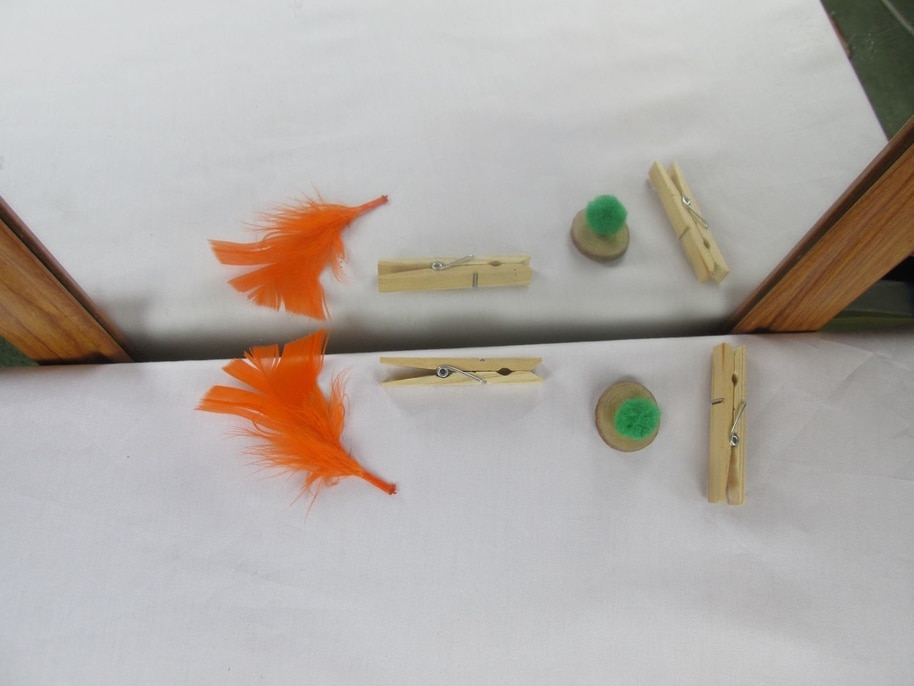
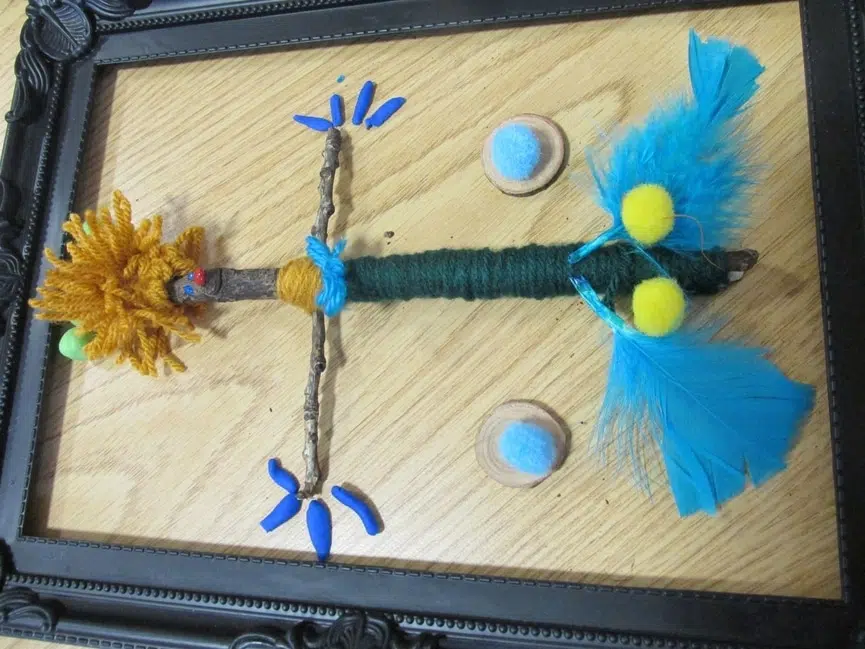
8. Using Loose Parts Next To A Stick
This is a great provocation to try after you have already had a go of something the Mirror on the Box Activity (Number 7). When children have seen that you can make half of something that will be completed in the mirror, they can then have a try of making half of something on one side, and then completing the other half themselves.
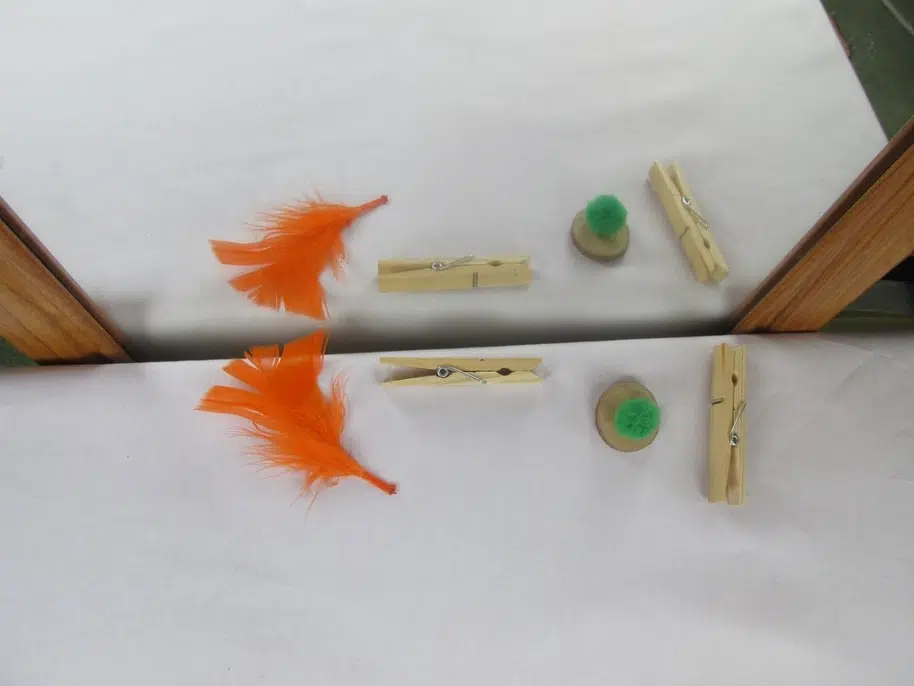
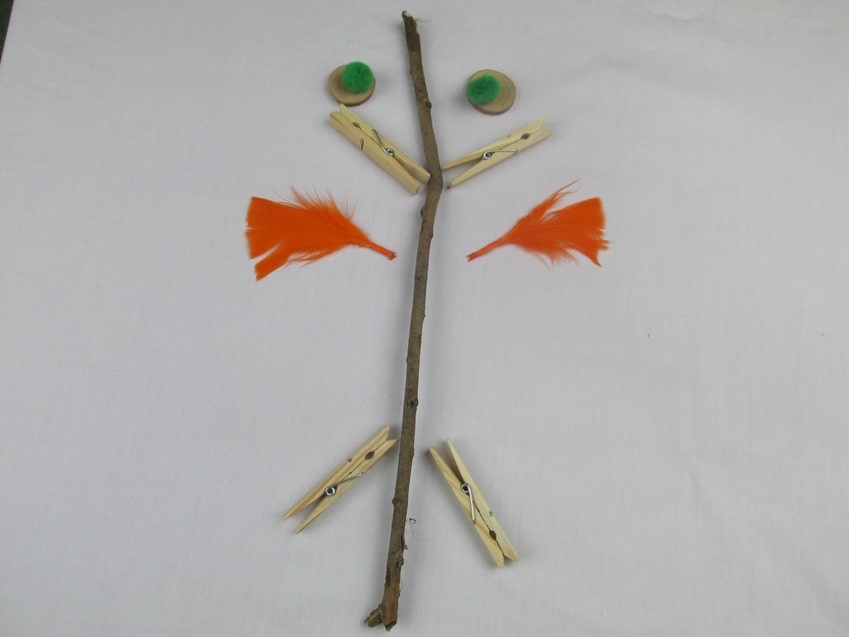
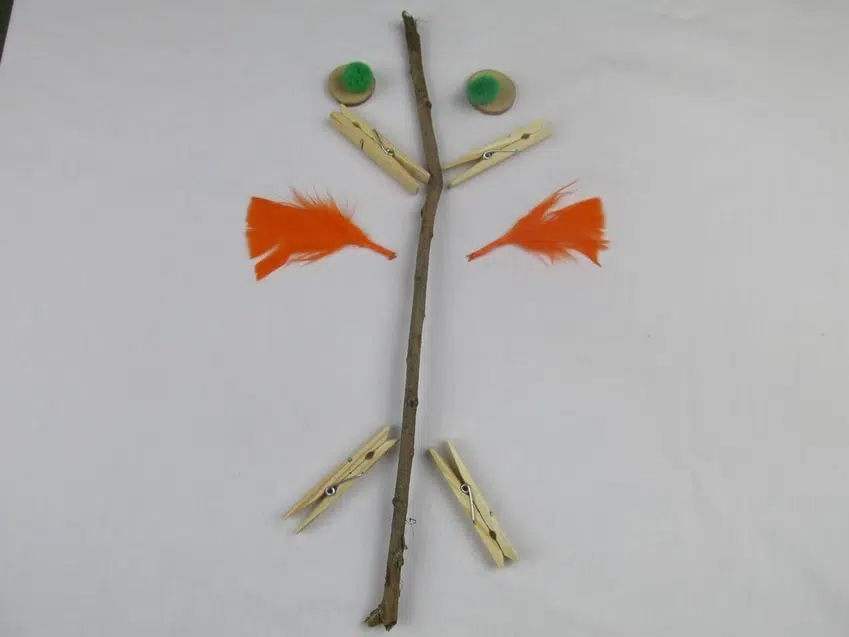
Get a long straight stick and lay it down vertically. This is the central line of symmetry.
Then you create something on one side of the stick. Use loose parts from a tinker tray again.
You could build half of a face, or half of a building or vehicle.
It could be abstract as well – a pattern, or an array of loose parts.
Then attempt to recreate the same pattern or half-picture on the other side of the stick.
This provocation can be done in pairs. One child can be creating on one side the stick, and the other trying to copy. This generates a lot of talk and cooperation. Loose parts play like this has a huge number of benefits. To read the most important 14 benefits of loose parts play then check out this article.
If you do a giant version of this provocation, then lots of children can work on it at the same time.
9. Building Half A Giant Outside
This is a great provocation for using outdoors with natural loose parts – things like sticks, leaves, conkers, reels, and building blocks. Just whatever you can find in the outdoor space. To find out many more outdoor loose parts activities then take a look at this.
There is a simple way to do it, and a trickier way.
The simple way is for the adult to draw the silhouette of a huge giant on the floor with chalk. Draw a central line down the center of the body, from the top of the head down to the feet.
Now children ‘build’ the giant. Whatever they place on one side – for example, 4 conkers for hair – they try to copy on the other side.
There are harder ways of trying this game out. One harder variation is just draw a central line on the floor with chalk and nothing else. Then, once again, they try to build the giant on one side, and copy it on the other. This will create a much more random creation, and really get them thinking.
10. Paint Printing Using Objects
This is a beautiful old classic idea, and definitely one of the simplest and best ways of exploring symmetry.
Have large pieces of paper that are folded in half. The idea is that you only paint on one side of the paper.
You can use different loose parts dipped in paint to create patterns and textures. Then you fold over the paper, and the image prints symmetrically on the other side.
Once again, the next step is to try to paint or print half of something on one side of the paper. It could be half a face, or the classic – half a butterfly!
Then fold it over, and hey presto! You have a spectacular symmetrical image.
Conclusion
Symmetry is a concept that even very young children can explore. It is easier just to experience it in a range of engaging ways before you ever need to talk about it in detail.
By taking part in a range of symmetrical provocations, children develop a core understanding of what it is, and they can build on this understanding in the future.
Good luck with these symmetry ideas, and if you try any of them out why not share this post and leave a comment below!
If you’ve found this article useful, then why not take a look at one of these: