Learning to put spaces in between words takes a huge amount of time for most children. It is a really abstract concept for them, and they are getting to grips with lots of other parts of early writing at the same time.
When they begin writing, children will be learning the formation of the letters and listening to the sounds in words, all on top of using finger spaces as well!
How do you teach spacing in between words?
To teach how to space in between words, start by getting children used to clapping and chanting sentences. Make fun out of spacing by letting them create spaces with pompoms or sweets! Next get them to use their finger placed down in between words.
That was the short answer, but to be honest there is quite a bit more to it than that. There is a full process that I think it is a good idea to go through. This process starts with oral learning, moves on to fun games to introduce spacing, and then moves to lots of practice of putting ‘finger spaces’ in between words.
This article is meant for both educators and parents. There is no reason you can’t do any of these things at home to support your child.
Read on to learn the full process!

Starting Off With Spacing
I think it is important to know that the process of putting spaces in between words when you write starts with a child understanding that a sentence is broken up into words.
This sounds obvious! But it really isn’t when you are young.
Some good early games to develop this understanding include:
Clap The Sentence
Give the children a simple sentence, such as ‘Brush your teeth.’ All chant it together whilst clapping – ‘Brush-your-teeth.’ I also get them to count afterwards, so it goes a bit like ‘Brush-your-teeth. 1-2-3!’
You can get them to hit drums or instruments as they hit the sentence as well.
Repeat with lots of different sentences! You can try doing silly voices, like saying like a T-Rex or witch. They really enjoy that!
This game sounds like it has nothing to do with spacing in between words, but honestly this kind of thing is the first step. Children start to see that language is not one continuous string. It is broken up into chunks!
These kind of early games are the bedrock of early writing. To find out more, I really would recommend you check out my essential practical guide to 9 rhythm sticks games.
Other good games for this chunking up of language include:
Kung Fu Sentences
You all pretend to be kung-fu masters! Bow to each other. Then give them a move to try out (e.g. a block), and then get them to say the sentence whilst doing the move to each word. E.g. ‘Go on the bus!’
Kung fu is a wonderful game for teaching many early literacy skills. One example is oral segmenting, and if you want to find out more about that then check my essential guide on what it is and how teach it.
Building Sentences With Cards
This is a bit trickier, and the children have to be able to read at least a few sounds, and be beginning to sound out words.
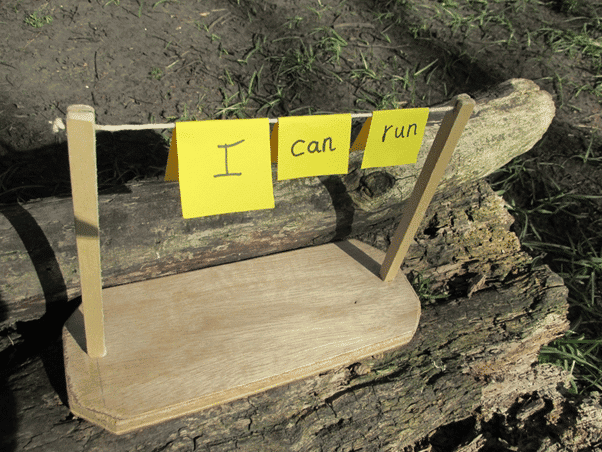
Give them some word cards and try to build a sentence.
A nice way of doing this is on a washing line or one a coat hanger, with some words written on pieces of card. (See the picture below)
If you want to check out some similar phonics games to this, then take a look at my complete practical guide to washing line phonics.

Next Step – Making Spacing Into A Game
It is important to make pretty much anything fun if children are going to absorb it quickly and effectively. Putting spaces in between words is certainly no exception!
Creating spaces can be fun!
Good ways to try this include:
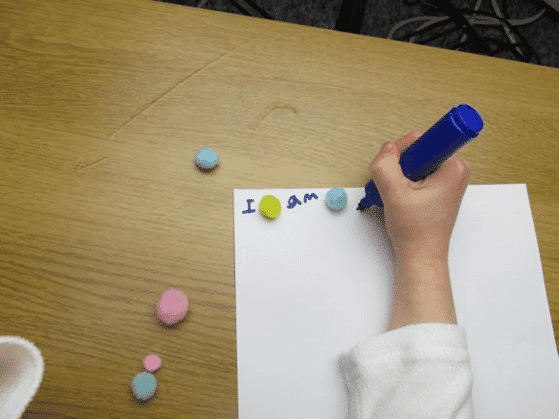
Using Pompoms
You quite simply get the children to write simple sentences, but all put pompoms between each word. It will look a bit like this:

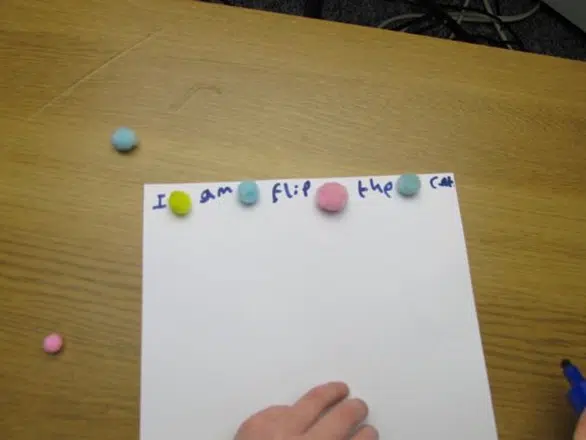
This makes the process very visual. Children can really see what is going on, as well as it being a physical process as well.
Another way of trying this kind of game is using:
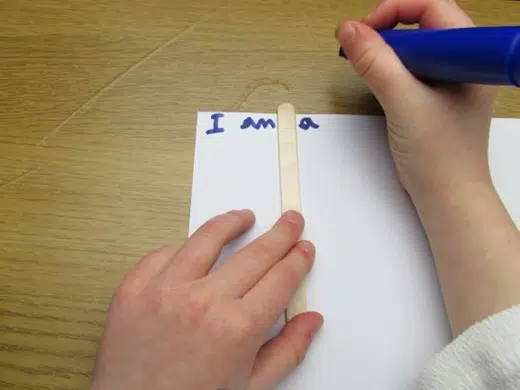
Lolly (Popsicle) Sticks
This is the next step to putting something physical in between every single word on the paper.
Instead you use the lolly (popsicle) stick to place in between every word. Popsicle or lolly sticks can be used for so many exciting early years activities. Some great ones can be found in these 10 lolly stick fine motor activities.

I have also seen people use similar things, such as:
- Laminated hands with pointing fingers
- A mini-magic wand
- A Halloween thumb or finger
All these things once again make it fun, and just get them started with the process.
I wouldn’t use any of them over an extended period. They are a way of getting them going, and bringing life to process before you transition into the next part of learning to space.
Use Sweets
Good things could be M & Ms, or smarties, or something similar to that.
It’s probably best if you let the children eat them at the end as a bit of a reward!
Any fun visual idea like this is again good as a once off to get the children thinking about the process of spacing. Again, I wouldn’t do this over a course of days or weeks!
Consolidating And Practising The Skill
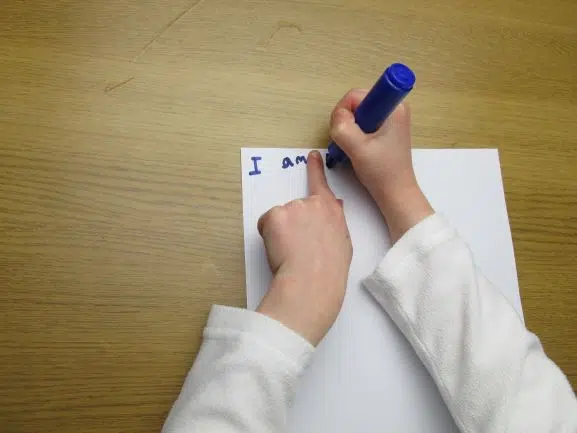
The next stage of spacing, is the one that children will be using and practising for a long time – finger spaces.
The process is really well known and simple. You basically write a word, put your finger down, then write the next word after it. Repeat, repeat, repeat.

Some children get the idea reasonably quickly, and some will take a huge time to master it, sometimes years.
There are definitely some ways you can speed the process along, and get them really thinking about it and later mastering it.
Some top tips include:
Top Tips For Finger Spaces
- Model how to do it! Every time you write something as an adult with a child/the children watching, slowly model how to write a word, put your finger down, and write the next. Mention finger spaces every time you do them!
- Encourage and praise! If a child actually does a finger space, let them know how proud you are. Success breeds success
- Show the work of children off to others if they are using finger spaces. Photocopy a big version, and mark on the amazing finger spaces.
- Give rewards – do a finger space and get a sticker or whatever else you use
- Remind, remind, remind
- Later you may be able to get older children to review their writing when they have done to check for their own finger spaces
This stage of spacing is definitely the long one. Practising this skill takes a long time, and is a hard slog.
The more positive you can be, and the more chance they will have of getting into good habits and adding finger spaces to their work.
A Few Things To Beware
There are a few strange habits some children get into during this process of learning to use finger spaces, and it is a good to nip in these the bud pretty quick whenever they occur.
Some things are:
- Using massive finger spaces (e.g. 3 or 4 inches). This is too big! It only needs to be one finger, not a whole hand (you can tell them)
- Using finger spaces in between letters, not just words. This is very understandable, as the difference between a word and a letter takes a bit of getting used to. Using some of the clapping and chanting games may help. Also modelling examples of finger spaces used well by others, and lots of adult modelling should help the process
- Using tiny finger spaces. Just practice making them bigger. This is normally easier to fix than issues 1 and 2 (with probably 2 being the biggie)
Final Stage
When children are at the stage when they always write with spaces by putting their finger down on the paper, the last stage is that they will stop using their finger at all, and just know to leave a space in between words.
Phew! When they have reached this stage, you know that the skill has become learned knowledge, and there should now to be no problem in them continuing in this way for the foreseeable future.
Conclusion
Writing with spaces in between words is a tough and long process. It starts before children even pick up a pencil or pen, and carries on often for at least a couple of years before becoming second nature.
By making the process fun, visual and active, you can speed it along, and get children mastering this crucial early step in writing.
If you have have found this article useful, then why not try one of these: