Learning to write is a huge process that takes many years. There are distinct stages that children go through, and there are many strategies to help them on the way.
One of the best of these in the early days are pre-writing patterns.
These cover the whole stage of progress in between beginning to mark-make and, later on, writing words.
But what are pre-writing patterns?
Pre-writing patterns are different types of lines such as zig-zags, waves, or spirals. They are used by children when they are starting to get structure into their mark-making, moving beyond circles and dots. They are a bridge between the earliest mark-making and later writing letters.
I would say that pre writing-patterns are something that children should be trying for a long time before they attempt writing letters.
They offer so many benefits in a fun and achievable way.
Yet there is a lot to know about! How do you introduce pre-writing patterns? How can you make them fun? How can you get children interested and wanting to have a go? What order should you teach the patterns in?
I will answer all of these questions in this article, and hopefully more! This guide is also included as part of my best-selling book ‘Squiggle, Fiddle, Splat – 101 Genius Fine Motor and Early Writing Activities.’ (You can check it out on Amazon here).

What Pre-Writing Patterns Are
‘Pre-writing patterns’ are also known as simply ‘writing patterns’ and also sometimes as ‘handwriting patterns’ (particularly simple handwriting patterns are the same as pre-writing patterns.)
They are a collection of lots of simple types of lines. Examples are things like circles and a line of dots.
Pre-writing patterns have multiple benefits for getting children engaged in early mark-making, and let’s take a look at some of them now…
The Benefits Of Pre-Writing Patterns
Structure
Pre-writing patterns help children to get a level of structure into their mark-making.
They encourage them to begin moving mark-making tools in different directions and in different formations.
Seeing writing patterns modelled provides images and a template in their minds. It gives them a guide.
Big Or Small Scale
One of the beauties of writing patterns is that they can be done both on a small and a big scale.
This is good news, because at this early stage of development children are developing both their fine motor and their gross motor at the same time, and there is definitely a link between the two. (To check out the many differences between fine and gross motor then take a look at this).
Writing patterns can be done in the air, or with paint brushes on fences, or with all sorts of other large equipment.
They help develop movements in their core, arms, shoulders and wrists, as well as helping them coordinate fine motor skills in their fingers and hands.
Introduce Different Movements
Trying to copy them gets their arms and hands moving in ways they will not have experienced before.
They will introduce some of the following movements:
-Writing horizontally
-Writing vertically
-Going anticlockwise
-Writing clockwise
-Creating curves and loops
-Creating straight lines
-Creating circles and other shapes
-Can be done on a big scale or small
-Can be done in a range of exciting and fun ways
-Use loose parts and other objects
Are Achievable
Writing patterns can be extremely simple. This is great as children are able to do them, boosting their confidence and self esteem. Early success is crucial with fine motor activities, and can lead to many benefits (check out the 21 most important benefits here).
There is an order to follow (which I will set out shortly). They start really easy, but can grow increasingly more complex (if required).
When To Use Them
Pre-writing patterns are the phase of writing in between very early mark-making (i.e. ‘scribbles’ and dots), and later on using letters.
The time to use them is basically all the way between these two points. This can be quite a long period (many months or years), and is dependent on the child.
Start to use them when a child has become confident at making simple marks. These will often look like a ‘scribbly’ line, circles or dots.
Introducing pre-writing patterns in a fun, enticing, and active way will give you a much higher likelihood of success.
The Main Writing Patterns – The Order
There is an order from easier to harder. This is not set in stone, but I would say that it looks something like this:
Step 1 – Circles And Dots
This is what many children start with anyway in their mark-making, so it is good to follow the order of nature.
Dots can go in different directions – e.g. horizontal or vertical.
The same with circles – they can be drawn in a line in different directions.
Circles and dots can be big or small!
Step 2 – Straight Lines
The simplest straight lines to try are vertical or horizontal.
However, you can definitely expand to diagonal lines as well.
Once again, you can model these kinds of lines in a sequence, such as a line of vertical lines, or a line of horizontal lines.
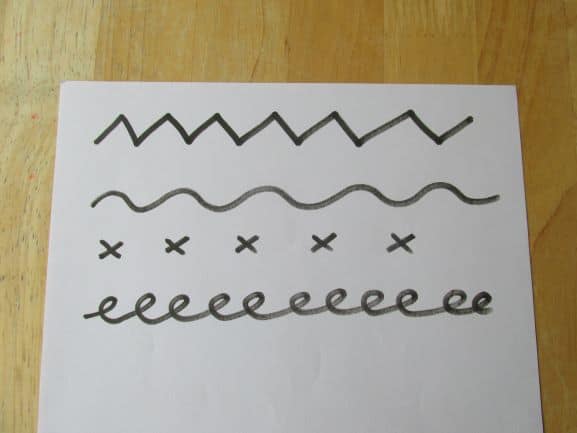
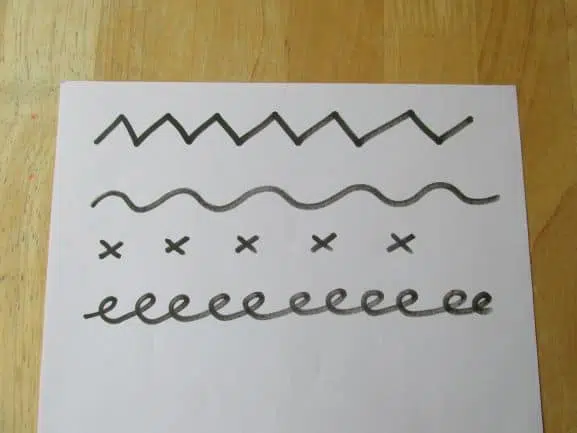
Step 3 – Curved and Changing Lines
The most common of these are:
Zig-zags – These are normally quite achievable for most children
Waves on the sea – A wiggly line that can be shallow or more pronounced.
Springs – These are more difficult and really expand their spatial awareness. It is a continually curving line that interlocks over itself.
Crosses – Another very achievable one. Great for treasure maps – and x marking the spot.
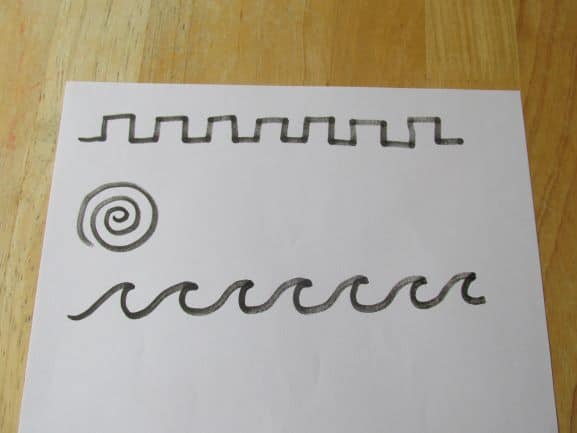
Step 4 – More Complex Lines
Turrets on a castle
Spirals
Complex wave patterns – These look like lifelike waves. They are great for beginning to form simple handwriting patterns.

Step 5 – Some Simple Letters
You can definitely incorporate some letters into writing patterns later on. Particularly the simpler ones to write are best for this.
This is letters like ‘o’, ‘l’, and ‘I’.
Adult Led Ways To Teach Them
OK, so we’ve taken a look at what they are, the benefits, and the order to go in, but how do you actually teach them.
The key to introducing them is to make it engaging and multisensory. Some excellent ways to start off are some of the following:
Skywriting
Skywriting is basically drawing imaginary patterns (or letters later on) in the air. It is brilliant for gross motor, as you want to make the patterns as large as you can.
Get the children to bend their knees or stretch up tall as they are doing them, and use huge sideways movements as well.
The simplest way to do it is that you model how to do some patterns yourself, and the children copy. You could draw them on a huge piece of paper on the wall, or on a board. Alternatively, you can just do them actively in the sky and the children copy.
I think skywriting works really well if you use something exciting to do it with. For example, you could use:
• Ribbons – These are really exciting
• Torches – Turn the lights down low, and use these like ‘superhero lazers’ in the darkness
• Streamers
• Using some kind of finger puppet on your fingers
Another trick that works really well is to do it to music.
Put on some kind of pumping disco track, and get the children doing the patterns to the music.
For example, as you do a zig-zag, start from one side, and do one line up, then one line down, for each beat of the music.
A good trick is for the adult to go backwards. If you model by down the writing patterns from right to left, then the children will copy you like a mirror. They will go from left to right, which is definitely what you want!
I do a writing pattern from as far as I can reach on my right all the way to as far as I can go on my left.
Then I sweep back to the start and repeat.
Big Surface Modelling
Another great way to get them started is by trying out writing patterns on some kind of huge surface. Children at this age should never be confined to small pieces of paper, or lined worksheets.
This could be a giant piece of wallpaper on the floor, or it could be chalks on the ground outside.
Once again, music in the background is really exciting for this, and really channels their focus.
Model how to make a range of marks, and get them all copying on the big surface. Using two hands is a good trick for this. Many young children do not decide which hand to use to write until as late as 5 (sometimes later), so opportunities to use two hands are welcome.
Use Exciting Substances!
Mark-making in an exciting way is definitely the way to go to hook their interest. Stimulating curiosity is one of the key ways of motivating young children (find out the 15 best strategies for motivation here).
You can try to get them making marks in any of the following:
• Shaving gel
• Shaving foam
• Porridge oats
• Glitter (if you don’t mind a bit of a mess!)
• Mud or other types of dirt
Once again you can use two hands. You could also use mark-making implements to write into the substance, such as a big pom-pom (as a random example).
Child-Led Games To Play
Ideally the children will be inspired by any adult-led introduction to writing patterns to then go off and try the skills out independently. This is where higher level learning will take place (if this happens).
Some great ‘prompts’ to encourage them to mark-make include:
Wrapping Paper
Any wrapping paper that you can find that has different patterns and lines on is great for mark-making. For example, this wrapping paper:
They love writing over the top of it, or copying it to make their own. This is great at Christmas when you have elves in the grotto trying to make wrapping paper for santa.
Secret Codes
Children love anything to do with secrecy, top secret missions, codes – and anything else like that.
The more you can get these things into your provision (or what you’re doing at home) the better.
Some code games they like include:
• Using invisible ink pens
• Copying ‘code’. This could just be cards with mark-making patterns on. It’s great if children have something like a superhero box to put the code in when they’ve done it. This could be something simple like a shoe-box with a slit in it, with a superhero symbol on the box
• Writing messages in places like dark dens, or under tables
Loose Parts
Loose parts are fantastic for stimulating open-ended play, and can be linked to mark-making in several ways.
For example, have large writing patterns drawn on a surface, and allow them to use loose parts to build the lines.
To find out a full list of the ultimate 40 loose parts activities then check this out.
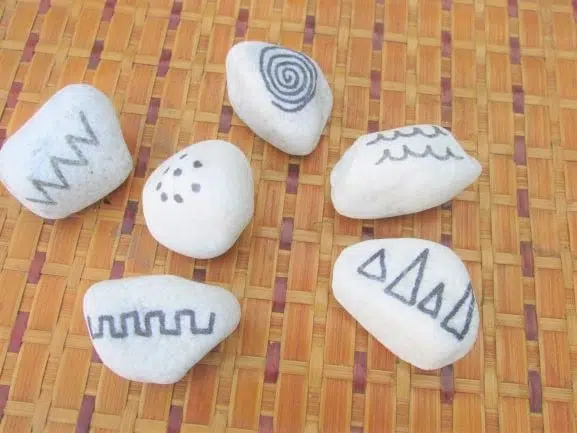
Mark-Making Stones
These are very simple to prepare. Get some stones and draw some mark-making patterns on in permanent marker:
These stones are a great stimulus for mark-making. You can use them with different writing tools and different surfaces.
You can also use them as a brilliant aid for independent storytelling. (Check out my article all about story-stones and the best ways to use them here).
Exciting Mark-Making Tools
Jazzing up what they actually mark-make with can make a massive different.
Some exciting things to write with include:
• Sticks in mud or sand
• Pens with pictures stuck to them – it can be things like superheroes
• Fruity smelling pens (just be careful of those that might suck them)
• Painting with unusual objects, like carrot sticks or feathers
Writing On Different Surfaces
The bigger the better is a general rule for the surface, such as wallpaper, the ground, fences, old sheds, and chalkboards.
It also helps to have surfaces in interesting places. For example stick paper under a table, have a chalkboard to write on in the construction are, have pallets painted with chalkboard paint outside. Any other ideas like this to bring an element of curiosity and intrigue to the provision is the way to go.
Artists Linked To Pre-Writing Patterns
One great way to initially ‘hook’ children’s interest in writing patterns is to use famous artists.
There are many that incorporate simple patterns, lines and shapes in their work. These can be replicated through drawing, art, transient art activities, and also by using things such as loose parts.
Some great artists for this include:
Jackson Pollock!
This is a perfect artist to show to even very young children.
His trademarks are squiggly lines, and lots of splashes of colour as well. Demonstrate what his painting looks like, and then explore different ways of trying this mindset out.
Activities linked to it could be either adult-led, or child-led, and some good ideas are:
• Use pipettes or turkey basters to squirt colored water onto huge pieces of wallpaper or bed-sheets on the ground
• Drizzle paint straight out of the tubes
• Roll balls covered in paint around in trays
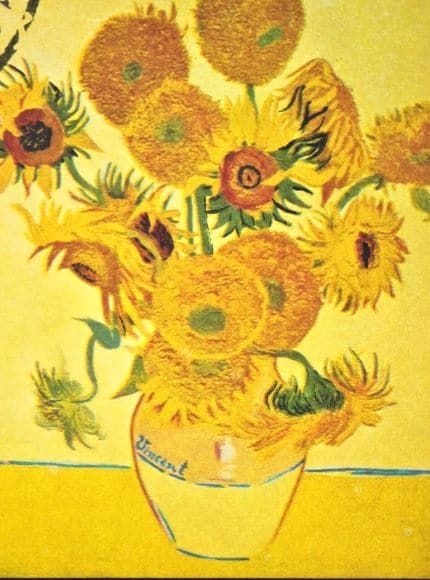
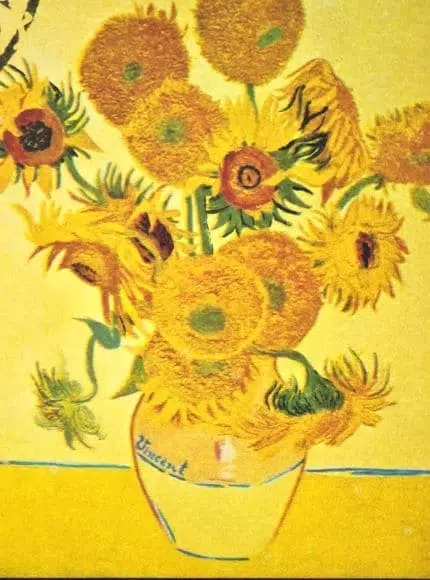
Van Gogh
He is particularly good for swirly lines, and also circles, zig-zags, and spirals. It all just depends on the painting that you find.
Children really enjoy the sunflowers paintings, that have many circles, triangles, and straight lines in them:
One brilliant one for mark-making inspired art is ‘Starry Night’
This contains a range of straight lines going in different directions, spirals, swirls and circles.
Beautiful activities linked Van Gogh paintings include:
• If you know an adult that wouldn’t mind doing this, why not give them a fake beard and they come in and pretend to be Van Gogh. There is nothing more exciting than a real-life demo of art activities than from the artist themselves
• Creating starry sky huge team paintings using pens and chalks and squiggly lines.
• Create loose parts transient art pictures with gems, colored stones, or collage materials
• Create paintings and drawings of the children’s own interpretations
Kandinsky
Google Wassily Kandinsky, and you will see the range of art-works that he created that are fabulous for mark-making.
Many of his works include circles, different geometric shapes such as rectangles and triangles, spirals, zig-zags, and all sorts of others as well.
Activities you can try out include:
• Collage using different shapes
• Loose parts using geometric shapes – such as punk cogs, or wooden shapes
Miro
Joan Miro created many colorful and child-friendly images containing a range of mark-making lines.
Some paintings contain crosses, squiggles, shapes, loops, and many more. A beautiful starting point for art-led mark-making.
Books Linked To Writing Patterns
Another good strategy to introduce writing patterns is to use books.
There are many that contain multiple writing patterns in their illustrations, and these can be used as a starting point for different activities.
Some examples of these include:
Cave Baby, by Julia Donaldson
In this book the baby finds a pot of paint, and creates loads of writing patterns across the wall of the cave in which he lives.
He paints a cross, a spiral, a zig-zag, a squiggle, and a few others.
Clearly a book that has been created with writing patterns in mind, this is definitely a brilliant one to try.
My Mum And Dad Make Me Laugh, by Nick Sharratt
This is a fantastic book for repeating patterns (take a look at the best 21 patterns activities here).
However, it is also excellent for mark-making patterns as well. Every page of the book contains multiple visual patterns and marks, all brightly colored.
There are horizontal and vertical lines, there are dots, circles, spirals – all sorts going on.
Owl Babies, by Martin Waddell
This beautiful simple book has many lines in the illustrations.
For example, there are the multiple circles in the eyes of the owls. There is the feather patterns on the owls, and on their wings. There are lines on the trunks of the trees, and lots of simple leaf lines.
Pointing these out and trying to copy them in different activities really can go a long way.
Top Tips For Writing Patterns
• Go in order! Start with the easiest pre writing patterns, and try more difficult ones when they get good at those
• Introduce them in a multi-sensory ways
• Use books and famous artists as a ‘hook’
• Allow them to use them in both adult-led and child-led scenarios
• Offer huge amounts of praise and encouragement to keep children focusses and wanting to do it
Foster Young Writers
If you’re looking to get a full system of how to inspire motivation and success in early writing and fine motor, then check out my online course – The Start Write Launchpad.
This online video course is available to both single users, and whole teams, and includes the following:
- Multiple strategies to target harder to reach learners, boys, and SEN
- The ultimate online course and community for creating an EYFS launchpad for lifelong writing success
- Flexible online training that you access at a time and place that suits you
- 2.5 hour intensive online video course
- A step-by-step guide of the actions to put in place to inspire outstanding progress in fine motor & mark-making
- Customer’s only mastermind group
- At least 100 road-tested ideas to motivate all learners
- Turn lack of interest into motivation, curiosity, and passion
- Create outstanding learning activities on a minimal budget in a short timeframe
- Ideal for either individual users, or as a whole team package
You can check out the full inspirational system, The Start Write Launchpad here.
Squiggle, Fiddle, Splat
If you want a full toolkit of the most inspirational fine motor and early writing activities, then check out my best-selling book Squiggle, Fiddle, Splat – 01 Genius Fine Motor and Early Writing Activities.
You can check it out on Amazon here.
Conclusion
Writing patterns are a huge and crucial phase in early mark-making. Luckily they are fun to try, and can be incorporate in many exciting adult-led or child-led learning experiences.
Fire up children’s curiosity about mark-making at this stage, and you will empower them to become confident writers later on.
If you have found this article useful, then I would recommend that you try this one: