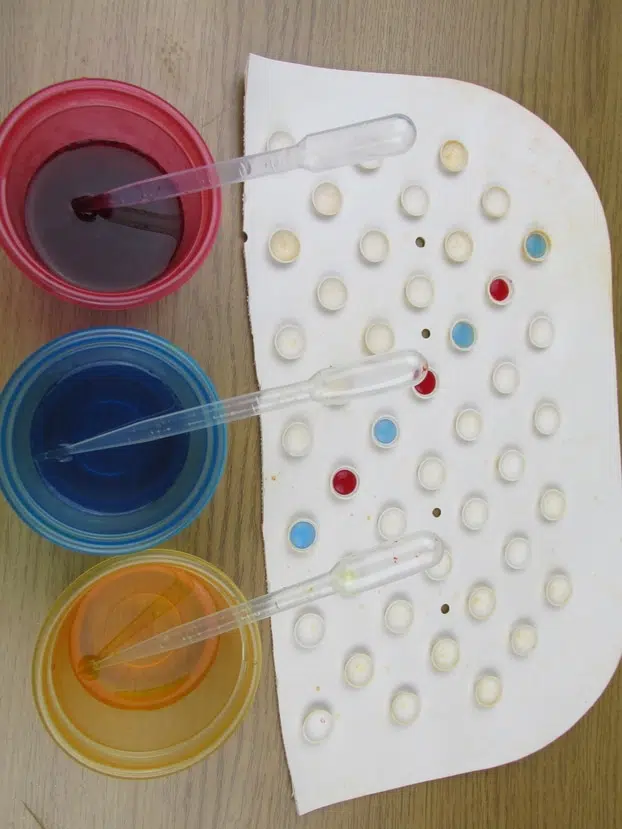
What a fantastic thing a pipette is. Cheap, plentiful, and so simple to use.
Pipettes develop numerous skills in young children. They are particularly fantastic for fine motor. They are also excellent for developing skills of enquiry and communication. However, in this post we will see learning take place in many other ways, including math and literacy.
But what are the best pipette activities for kids? Some of the best pipette activities involve a tiny bit of paint in water. You can squirt paint onto cotton wool, bath mats, oil, cotton pads, or ice for numerous different effects, and to develop many different skills.
I have been using pipettes with children for close to ten years, and in this post you will find my favourite tried and tested activities.

First, What Are They Learning?
You may well wonder what children are learning by doing activities with pipettes.
A huge amount!
The pipettes are great for developing fine motor. By their design they encourage children to squeeze them using a pincer grip – i.e. using two fingers and a thumb, just the same grip that you use to hold mark-making tools such as pens and pencils.
Even if they are gripping the pipettes in a slightly different way to this, they will still be using some of the muscles that you use when you write.
Pipettes are also great for coordination. By injecting colour and squirting into objects and items, children learn to control their movement and aim the utensil that they are using.
Pipettes are also brilliant for talk! Communication is arguably the most important driver behind many early years activities, and any way of developing talk is a huge bonus.
They are also fantastic for developing curiosity and enquiry. Many of the activities below are exciting even for adults, let alone children. Awe and wonder is a common theme running through all.
Now, on with the activities…
1. Bath Mats
The first activity uses another humble and simple piece of kit – a bath mat! You can either use a whole bath mat (and to be honest that is what I would usually do), or you could cut the bath mat up into smaller pieces if lots of children are going to trying the activity at the same time.
The idea is to have the bath mat upside down on a flat surface, so that the suction pads are pointing upwards.
Then have a few different bowls of water with a tiny bit of coloured paint mixed in. I would probably use the three primary colors – red, blue and yellow.

The idea of this activity is simple. You suck up some coloured water and inject it into the suckers.
Some children find this quite addictive, and will keep going with this for a significant amount of time.
It is not as easy as it looks squirting the liquid into the suckers! It requires focus and dexterity.
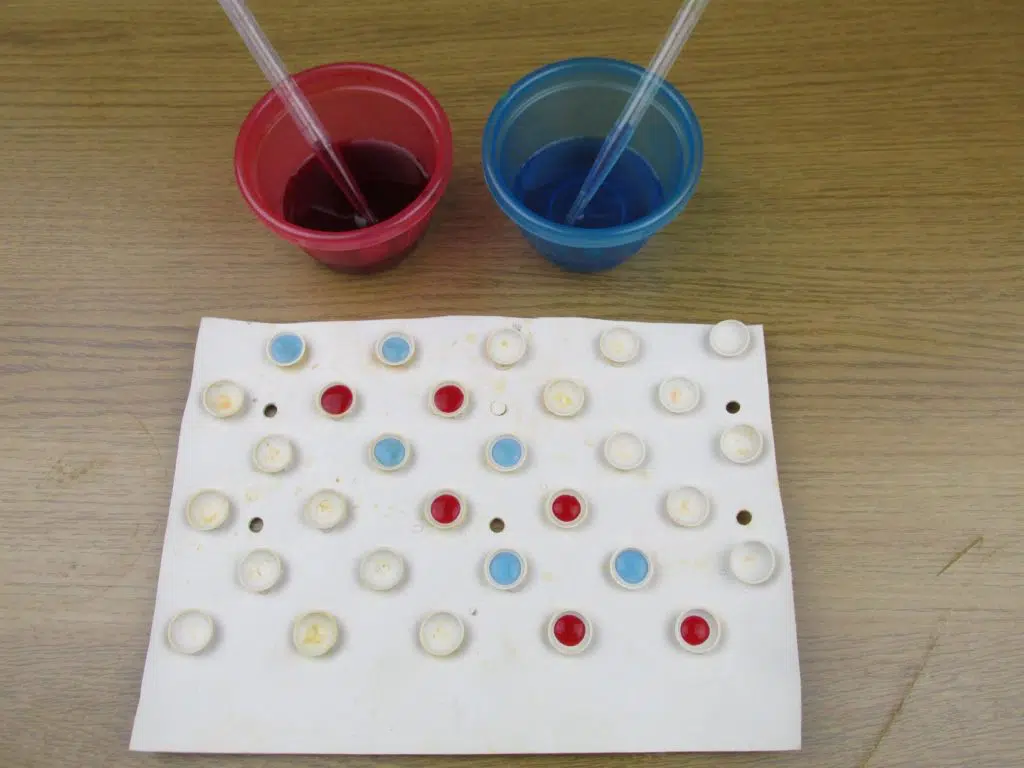
2. Five Frames
The next couple of ideas are variations on this amazing bath mat idea. The first is to create five frames.
Five frames are basically a fantastic visual way of introducing number bonds to five. It is basically a grid with five sections in a line. You can draw five frames on wood, with chalks on the ground, on a whiteboard, or on a whole lot of other things.
In this case, we are going to use a bath mat!
Simply cut out a strip of bath mat so that there are five suction pads in a row. You now have a five frame.
Then get some different colours of water. I would pick two colours – e.g. red and yellow.

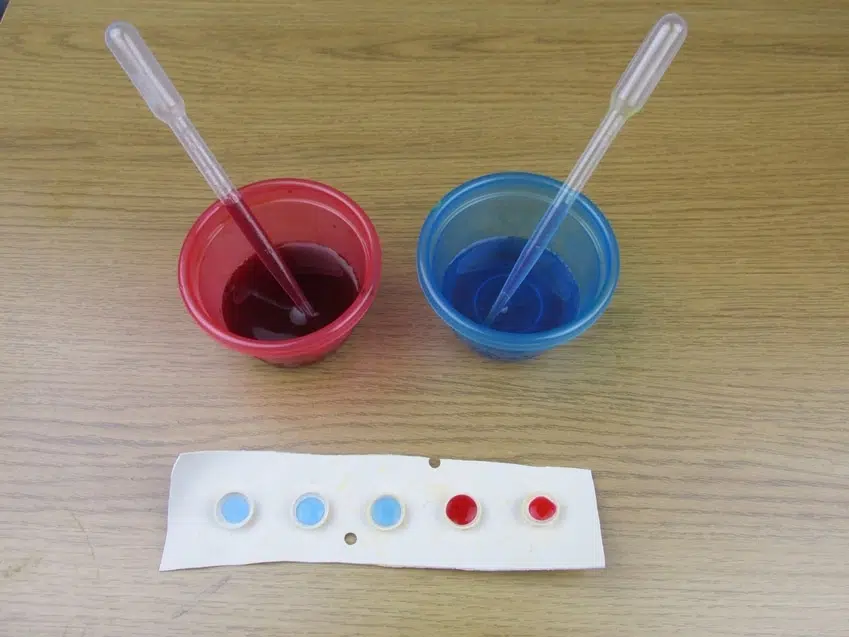
Then you get the children to squirt different combinations of colours into the five frame. For example, you could have two red suckers, and then three blue. That would be 2 add 3. Or it could be 4 add 1.
Just pour the solution into a bowl or tray after every go and start again.
A fantastic way to explore number bonds, develop simple counting, and begin to understand different visual ways of adding.
3. Ten Frames
This is the obvious next step to using ten frames.
Ten frames are probably generally well known and used in education than five frames. They are simply a grid of ten sections, usually two rows of five. If you want to find out the full guide of what a ten frame is, and the best ways to use them, then take a look at this.
The idea that underpins the popularity of ten-frames is that our number system is based around the number ten. This has developed out of the simple fact that humans have ten fingers. If we had six fingers, almost certainly the number system we use would be based around that.
By putting objects and items onto ten frames, children will start to experience mathematical concepts in the context of ten.
Some concepts that are brilliant on a ten frame include:
- Adding
- Number bonds
- Seeing what a number looks like in the context of ten
- Doubling
- Subtraction
With the bath mat ten-frames you can try all of these strategies. The two I use the most on a ten-frame, are creating single numbers, and number bonds.
To create a single number, e.g. 6, just squirt coloured water into that number of suction pads.
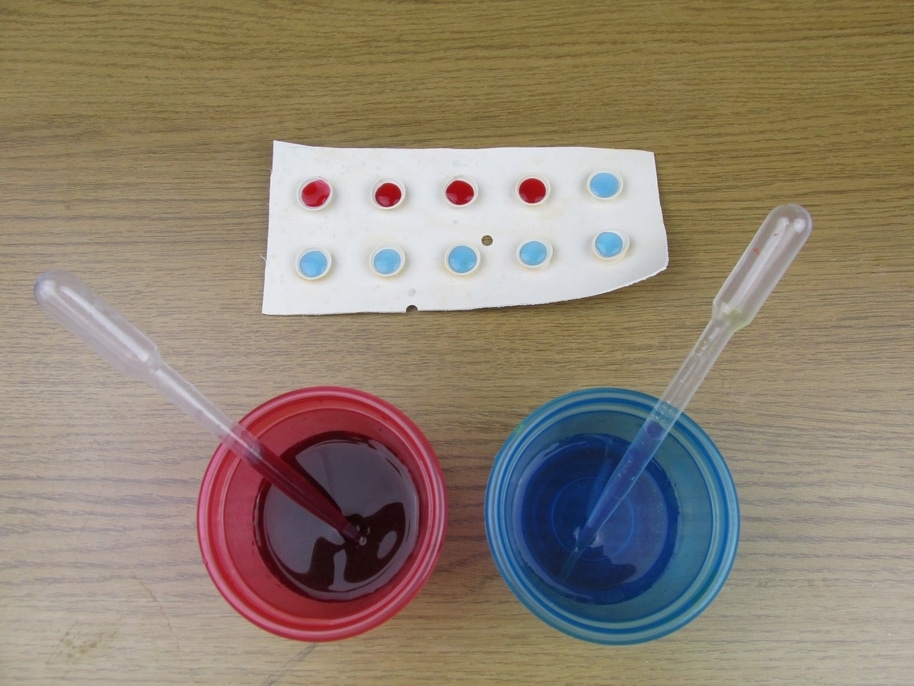

To create a number bond, e.g. 4 add 6, simply squirt 4 of one color and then 6 of another.
This activity mixes all the enquiry and fine motor with excitement.
4. Repeating Patterns
This can be done on a whole bath mat, or you could possibly cut them into long thin strips if you thought this might be easier.
The easiest way to create a repeating pattern is to first pick two colors, e.g. red and blue. Simply squirt red into the first sucker, and blue into the second, red into the third, and continue this process.
Some children find this more challenging than others. Some simply don’t see visual patterns, and if this is the case, please don’t panic! There are other ways of creating patterns than just with colours.
However, for those that do ‘get’ this way of creating patterns, there are ways of extending them and making the activity more challenging.
You can add a third colour, so a pattern would be something like red, green, yellow, red, green, yellow…
Alternatively, the pattern could go something like red, red, green, red, red, green.
Try extending the ones that can do it, and see how far you can go.
5. Connect Four
This is more challenging, and I probably wouldn’t attempt this with children under the age of about six.
However, from then on this could be a fantastic and inspiring activity, mixing fine motor with concentration and tactics.
Simply use a square piece of bath math as the connect four board.
One player squirts one colour, the other player squirts another. Simply take it in turns to squirt your colour until you have four in a row. You could make it harder to be five in a row, as this version of connect four does not last as long as the standard version where you can only fill the board up from the bottom.

Connect Four is also a great activity to do outside with a grid chalked on the floor and different objects. To check out more games like this then take a look at Outdoor Maths Games – 50 Ideas That Work.
6. Colour Mixing
One more idea that uses bath mats, and this is colour mixing.
Primary colours work well for this, as then you get clear colors and children can talk about the process and what they have created.
Simply half-fill a suction pad with one colour and then fill it up with the next. If it was red and blue, for example, it does change into a vivid purple.
This activity is great for generating talk. You will also see the children expressing what they see as they engage in the process side by side with others.
7. Cotton Wool
The big long sheets of cotton wool are perfect for this. The idea is lay the sheet flat in a big tray or tuff-spot.
Then use the pipettes to squirt multi-coloured water all over the cotton wool sheet.
The cotton wool is very absorbent, and colour spreads out and ‘blooms’ like little flower buds. It is a very evocative and beautiful artistic experiment.
Children will be fascinated, and again it generates description and excited talk.
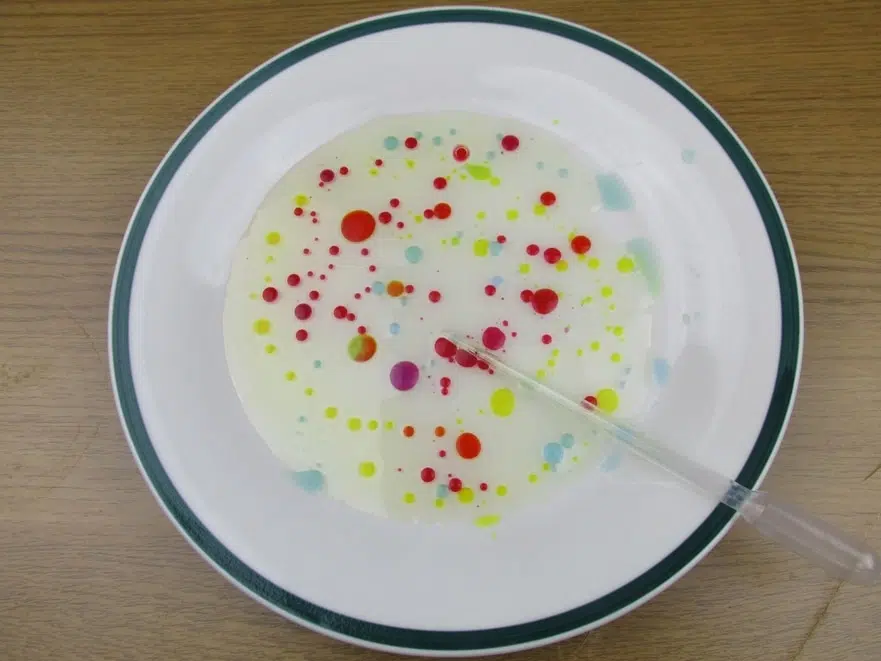
8. Oil On A Plate
You can either do this on a big scale or a smaller scale. The big scale is good if you don’t mind too much mess, and you also don’t mind spending a fair bit of time washing and cleaning up after activity.
The small scale is great for a much less messy activity, and not much preparation or tidying up.
So small scale:
Get some paper plates. Pour some oil into the plates. You don’t need very much oil, just enough to cover the bottom of the plate. Also any oil seems to work, so something cheap and cheerful would make sense rather than some beautiful virgin olive oil.
Once you have the oil on the plate you now squirt different colors onto the surface. The colored water and oil of course keep separate, and they form these magnificent multi-coloured blobs all over the plate.
You can swirl the pipette around through the blobs and create smaller and larger ones. Color mixing is possible as well, by squirting different colours into the blobs that are lying there.
A fantastic art activity, that really has that element of awe and wonder.

Big scale:
For those of you brave enough (and with a bit of time after it is over), you basically do the same activity but in a water tray (with the water drained), or in a big tray or tuff-spot.
It is a beautiful and spectacular sight done in this massive communal format, but it’s just a bit tricky to clean up all that oil.
9. Ice Painting
This idea is fantastic in the deep of winter when there is lots of ice to hand, or alternatively when you either make ice in a freezer, or buy it in from a supermarket.
This works either as a slab of ice, or cubes, or with crushed ice.
You drop colored water over the ice and explore what happens. The colours run together, and shimmer like crystals. A very beautiful and evocative art activity.
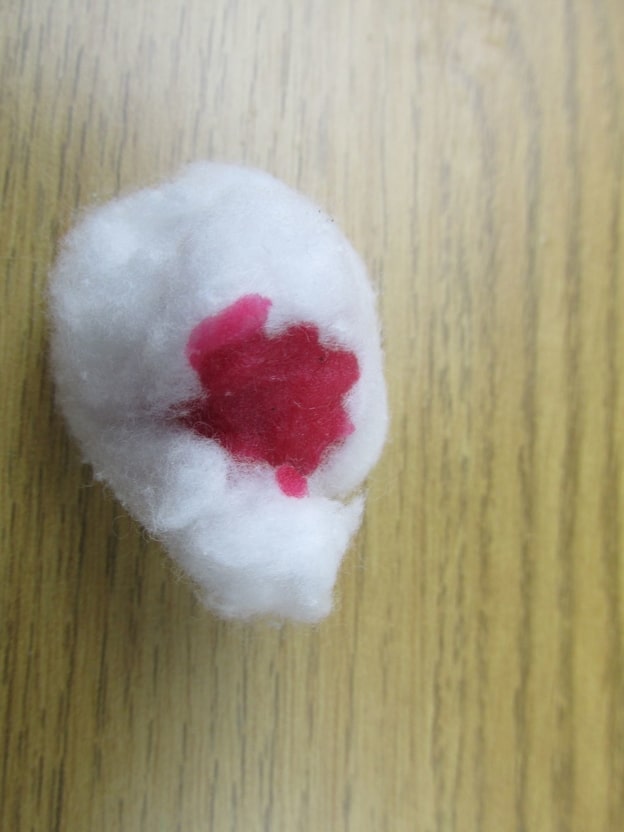
10. Cotton Wool Eyeballs
This is a simple and gruesome activity! Great for children that love anything to do with eyeballs, and the sense of macabre that they summon up.
Get some cotton wool balls, and, yet again, pipettes with colored water. Suck up some water and inject it into a cotton wool ball. This becomes the colored pupil, and you have created a gory eyeball!
Sometimes the color from the pupil runs a bit as well. This is even better! This looks like goo oozing from the eyeball, or a blood stained effect. Gorgeous stuff!

11. Jackson Pollock Painting
There are few artists that inspire early years art better than Jackson Pollock. All that dripping, swirling, spattering, and energy is exactly what art at this age is all about.
To create a Jackson Pollock using pipettes, get some different colours and just fire it a large piece of paper!
This activity contains both fantastic gross and fine motor skills combined. To find out 12 differences between fine and gross motor skills then check this article out.
You may want to show them how to do swirls with pipettes, and how to squirt at both close range and from high up. These two ways of squirting produce quite radically different results.
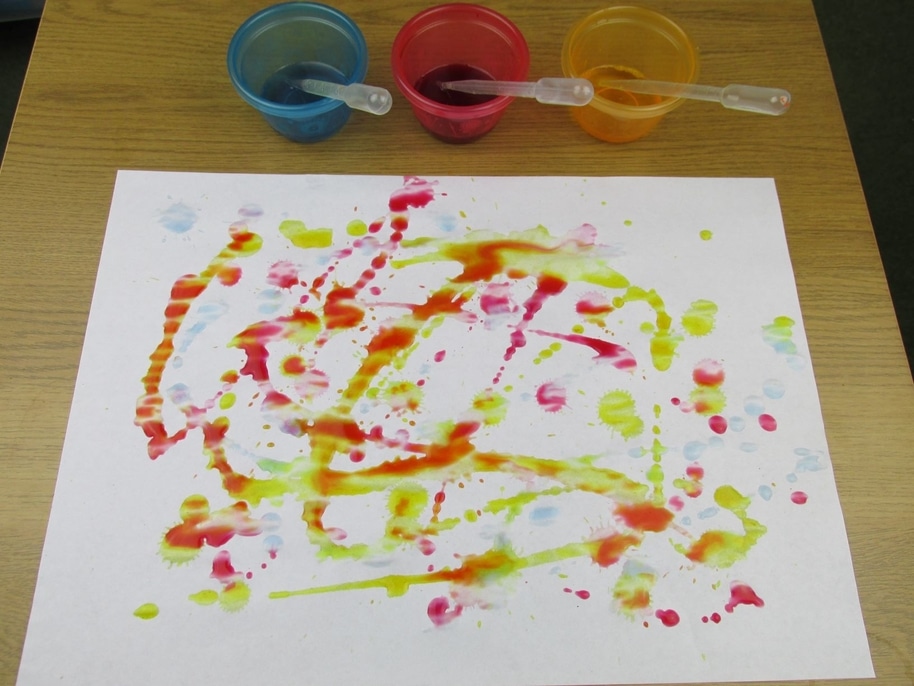
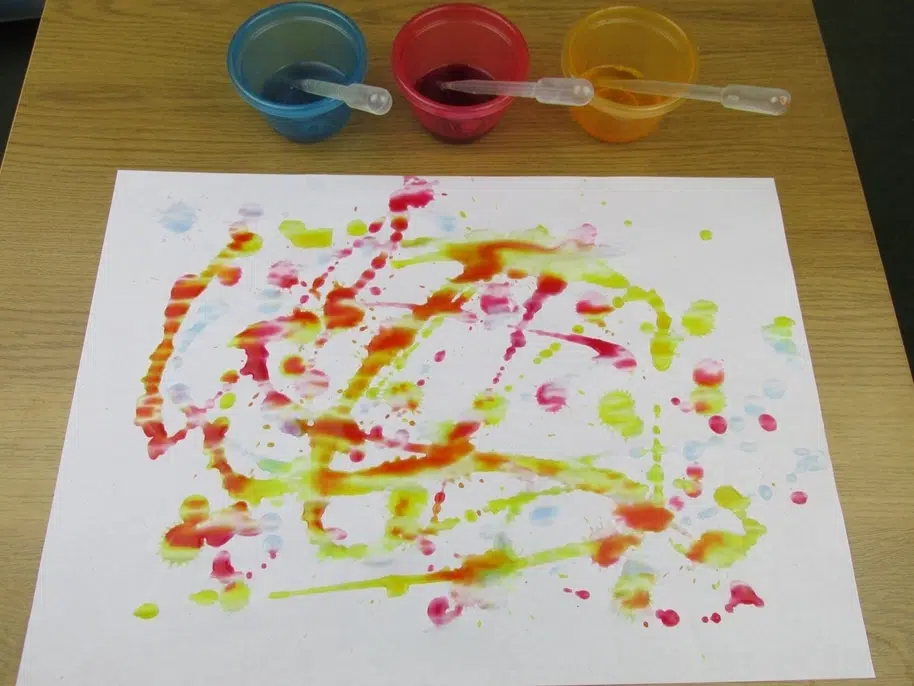
Huge pieces of paper would be good for this, or wallpaper taped to the floor. If you can find thick paper (like wall paper), or paper that is reasonably absorbent, then so much the better.
However, as with any art activity, it is the process rather than the outcome that is the most important part.
12. Dropping Color In The Snow
If you are ever blessed with a good amount of snowfall, then you take advantage of it by using pipettes!
Get out there with pipettes and colored water. When you squirt onto the snow then you will see the way the snow sucks up the colors. Also the colors blossom and bloom, and will mix together in different ways if you squirt colors in close proximity.
So engaging and exciting, but brilliant for fine motor at the same time.
13. Fizzy Ice!
This is a magnificent science experiment that is super for generating talk and enquiry.
Mix together a solution of vinegar and baking soda. Then get some ice. Again, it could ice from outside, or you could freeze or buy it. I have heard that smashed ice works especially well for this.
Squirt the vinegar and soda solution on the ice. The ice will fizz, with an audible sound.
Fantastic for stimulating multiple senses, and also getting the children really listening to the world around them.
14. Kitchen Roll
This is a classic pipette activity of the repertoire.
Kitchen roll is amazing at absorbing the colors, and letting the drops spread out, merge and bloom.
Roll out many sheets of kitchen roll in a tray, tuff-spot or water tray.
Then you drop a range of multi-colored dots of paint all over its surface. The paper really gets those colors blossoming like spring flowers.
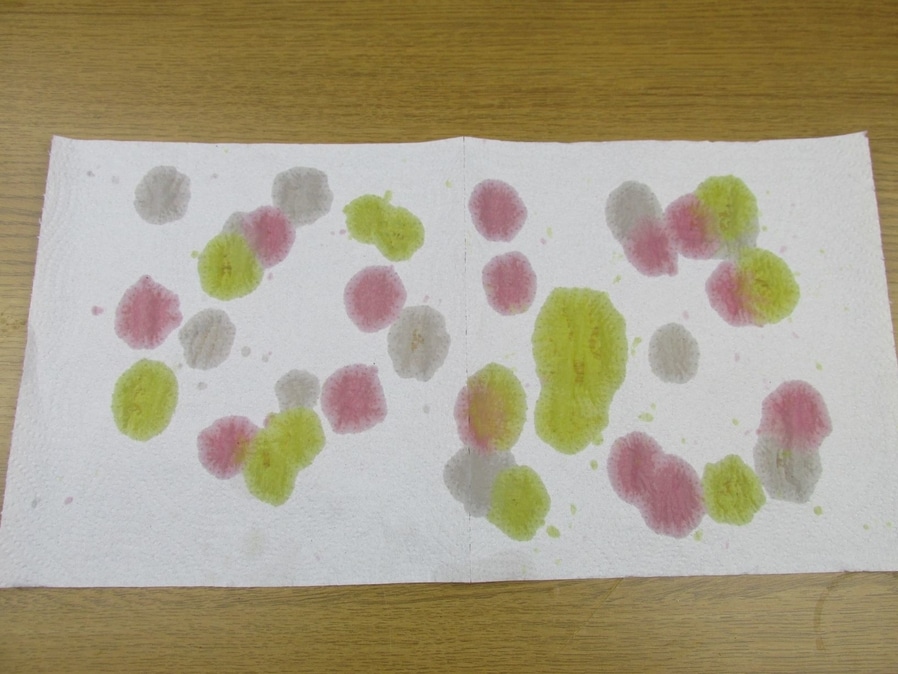

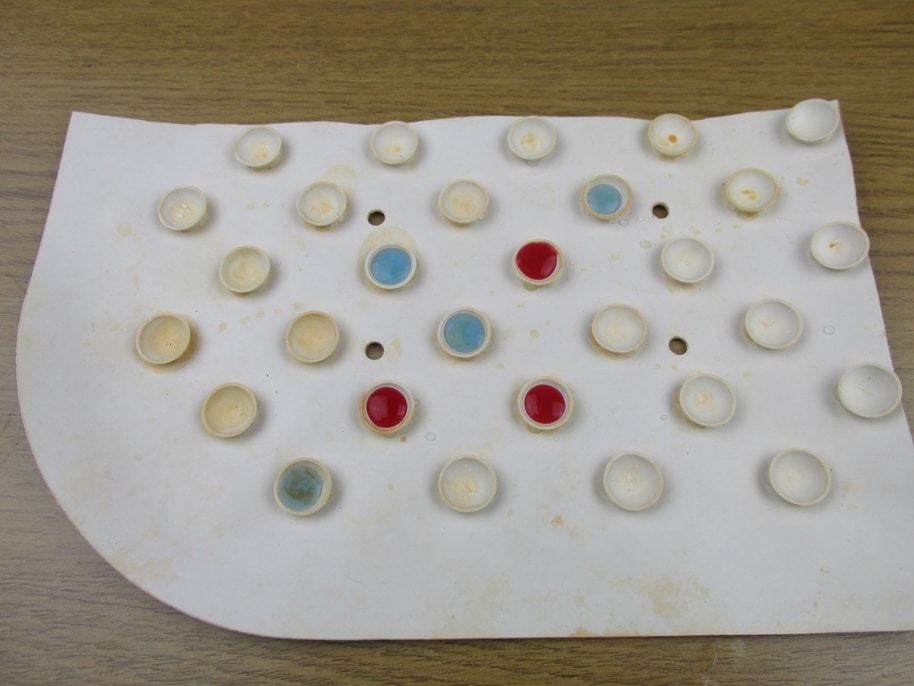
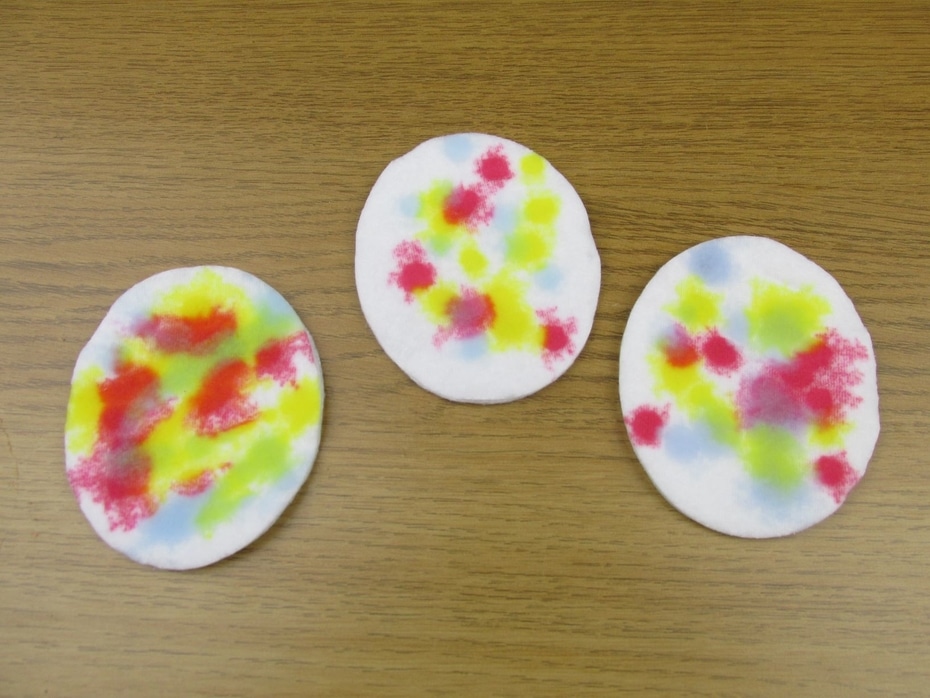
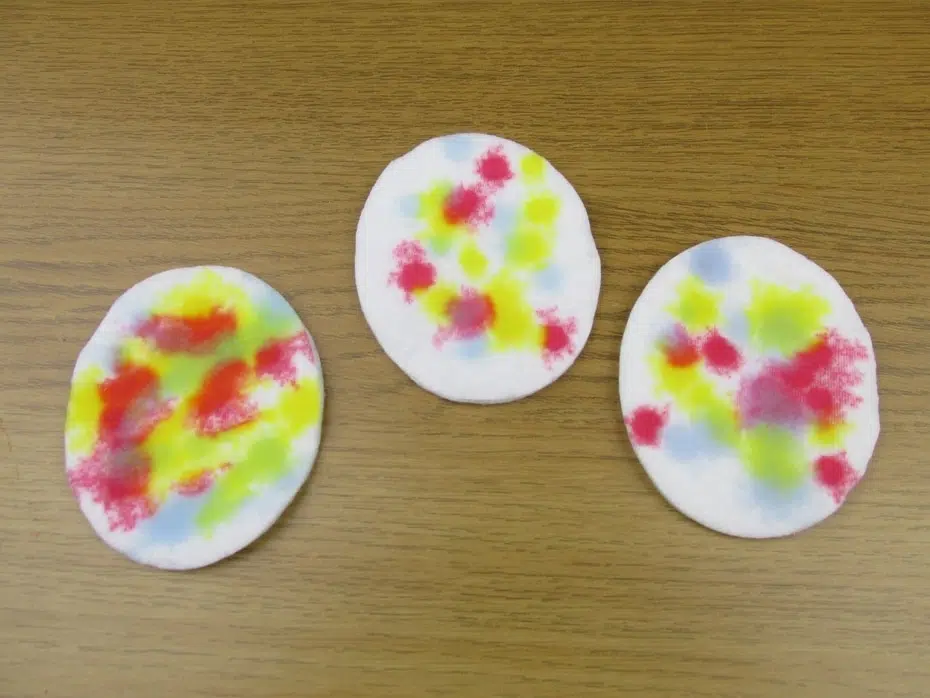
15. Easter Eggs
I created these chance one time, when I had hoped to do the earlier activity I mentioned using cotton wool sheets, but the sheets had sold out in the supermarket, and all they had left was these pads.
Simply get some pads (which luckily are usually shaped like Easter eggs).
Squirt a range of colors onto the pads. They hold the color really vividly, and you can also mix colors really effectively. The pads go dappled and multicolored like an Easter egg, and are a great Easter craft.
16. Drip Paintings
These work best if you have an easel, particularly one where you can slant the paper to something like about 45 degrees.
With the paper like this, you drop different colors onto the paper. The colors merge, and drip down the paper. It creates a beautiful effect, and one that really taps into that sense of enquiry and wonder that children possess
Conclusion
So there we have it! My all time favourite collection of pipette activities.
Please have a go of some of these, and if you do, why don’t you leave me a comment below to tell me how you got on.
Good luck!
Related Questions
What tools can you use for fine motor art? You can develop fine motor skills through art by employing painting with small items that encourage children to use either a pincer grip, or at least finger and thumb. Small items such as vegetable sticks, feather, pegs, and cotton buds can be used to paint and mark-make.
What does fine motor mean? Fine motor is the coordination of small movement with the eyes. It is usually exhibited by small muscular movements of the hands and finger.
How do you improve fine motor? Children will improve their fine motor skills through a range of engaging activities involving small items. Good examples include threading, drawing, constructing, interacting with zips and buttons, and playing with small items such as beads or pasta shapes.