A phoneme frame is one of the best resources to use to get children beginning to read and write words. They are a simple idea, but an extremely effective one.
What is a phoneme frame?
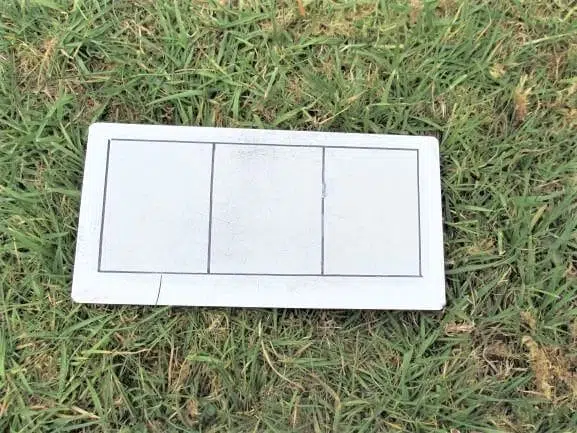
A phoneme frame is a rectangular grid with several squares side by side. It is used for reading and writing simple words in early phonics. They are used for splitting up the phonemes (sounds) of words, one phoneme per box.
For example, the word ‘dog’ would be written ‘d-o-g’, with one phoneme per three boxes.
Phonemes are very simple to create and use. But what is the big idea? And how do you introduce them? How do you make them? How do you use them?
This article answers these questions and many more.

What Phonemes Frames Are
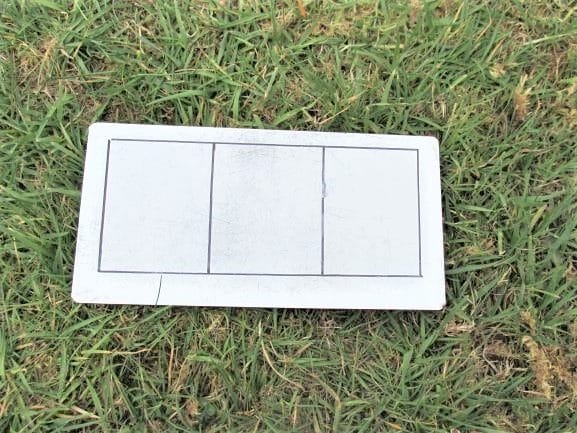
As stated before a phoneme frame is simply a grid of boxes. There really isn’t much more to it than that!
Probably the most common phoneme frame you will see has three boxes in a line. These phoneme frames are ideal for splitting up the sounds in CVC words – (‘consonant vowel consonant’ words). Examples could be ‘dog’, ‘pig’ and ‘van’.
You also get phoneme frames that have 2 boxes for words such as ‘it’ and ‘at’ (VC – vowel consonant words)
You also get some with four boxes, or even five or more. In theory, a phoneme frame could be as long as was required to fit in a word in the English language.

What Do Phoneme Frames Achieve?
The big idea of a phoneme frame is to add structure to building words. In particular they provide:
- A really visual structure for children to ‘see’ how words are made of sounds
- A simple physical structure to help children build words on using things like magnetic letters, or things like stones or shells with sounds written on
- A great way to explore the initial, middle and end sounds in words
- They are simple to make and use
- They are versatile, and you can use them with children that are at different phonic stages.
They are great for all children, but particularly those that are visual learners, and also those that are kinaesthetic and like building and making words.
To an extent being visual and hands-on is good for all children.
What Is A Phoneme?
In case you are confused about the terminology ‘phoneme’, just a quick note on that.
A phoneme is the sound that a letter makes. For example, the letter ‘t’ is called ‘tee’, but its phoneme is ‘t’. This is the sound that you make when you say the letter. For a full guide on what a phoneme is and how to teach it check this out.
Some schools and parents will call phonemes ‘sounds’ and to be honest that’s fine. Most children understand what you are talking about whether you call them sounds or phonemes, and the two words are interchangeable in this context.
Now we’ve got that out of the way, let’s move on to what you put in a phoneme frame…
What You Put In A Phoneme Frame
The big idea is that you fill the phoneme frame with the phonemes of a word. This is not the same as the letters from a word (as you now know). So for example, the word ‘chain’ could be written in a three box phoneme frame as ‘ch’-‘ai’-‘n’.
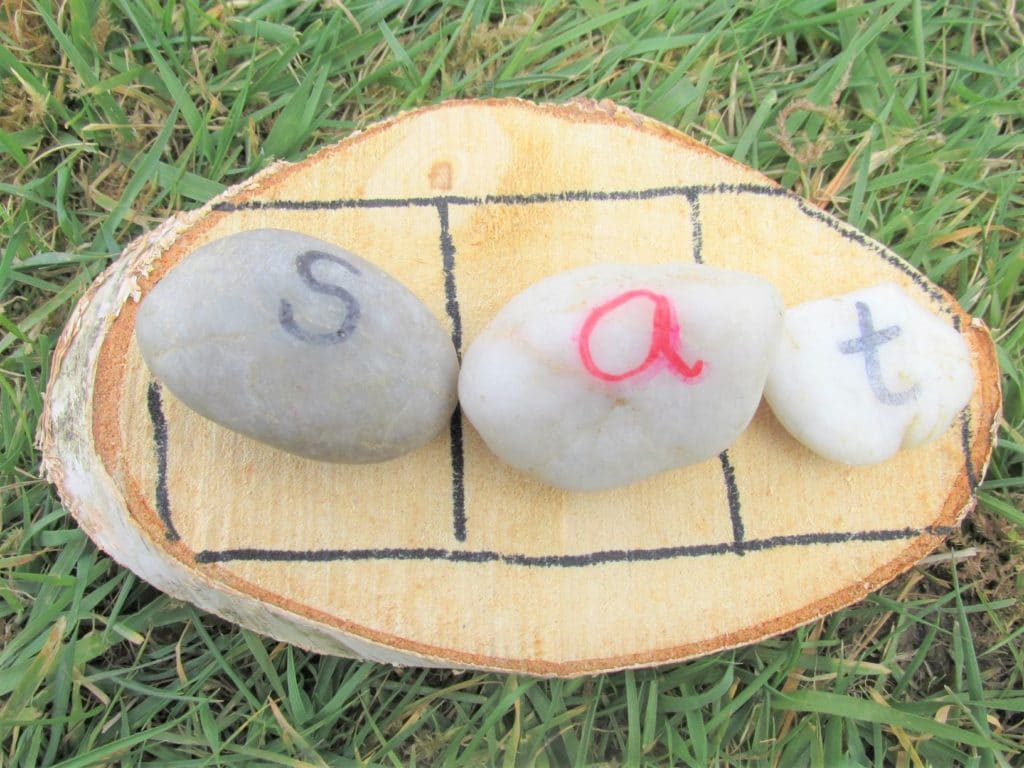
The word ‘sat’ would be put into a three box phoneme frame such as this:

The word ‘cooker’ could be put into a four box phoneme frame – ‘c’-‘oo’-‘k’-‘er’.
That’s basically what you do.
The phoneme frames really help children to segment words without missing out any sounds. If you’re not sure what segmenting is then check my essential guide to what it is and how to teach it. They help them to read them as well, by adding visual structure when they are trying to blend.
Before Using Phoneme Frames
The key with any type of phonics is doing things at the right time. If you start when children are not ready it becomes a much more long-winded exercise.
There are a few things that children should ideally know and be able to do before you start with phoneme frames. These are:
- Know at least a few sounds by sight
- Be beginning to blend and segment. They don’t have to be great at this, but at least starting to do so with support. To find out a full rundown of what blending is, check this out
- Be able to join in with simple listening games
- Be able to join in with simple games involving rhythm, alliteration and instruments
How To Introduce Phoneme Frames
Phoneme frames are best to be introduced in an adult-led context, although there is later on a lot of scope for using them in play scenarios, and in independent contexts.
Here are a couple of games to get started…
1.Build A Word
This is an excellent way to start. Both the adult and the child/children have some phoneme frames. Everyone has the same letters to put on the frame.
A top tip – Use the first few sounds that they will learn, often ‘s’, ‘a’, ‘t’, ‘p’, ‘i’ and ‘n’. With just these few letters you can make hundreds of words!
Say what word you are going to make, and then try sounding it out. For example, ‘sat’. Sound it out ‘s-a-t.’ If you want to learn more about segmenting, then I would definitely check out my article on the best 16 Segmenting Games.
Then put the first sound on your phoneme frame. See if the children can copy. Keep on encouraging them to say the phonemes and sound them out.
Then put the second sound on, then the third sound. See if they can all copy and sound it out together. Repeat with other simple words.
2. Sound Out Words Together
This is a slightly harder extension of the first game above.
In this one you:
- Say a word
- Sound it out
- Then encourage the children to try and build it themselves, doing lots of sounding out and prompting as necessary.
3. Write Letters In The Frame
Another way is to start with phoneme frames on whiteboards, with erasable pens. It is good if you have boards with phoneme frames on. You can buy these, or easily make them yourself by drawing a phoneme frame onto a whiteboard with a permanent marker.
Then you:
- Say a word
- Sound it out
- Get them to try to write it, once again really encouraging them to sound out the words and try to write the letters
How To Make Phoneme Frames
Often very simple phoneme frames on laminated card or whiteboards will work great, but it can also be an idea to make exciting ones in different ways. This really helps the children’s engagement, and gets them interested and curious.
It’s good if you can sometimes:
- Use some natural materials
- Use random objects
- Have an exciting theme
- Provide opportunities inside and outside
Here are some excellent ways of making phoneme frames:
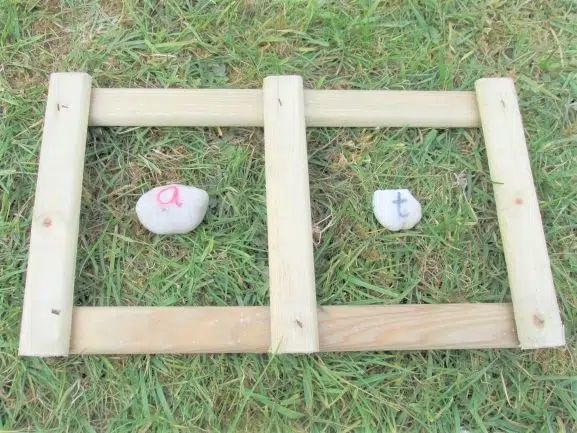
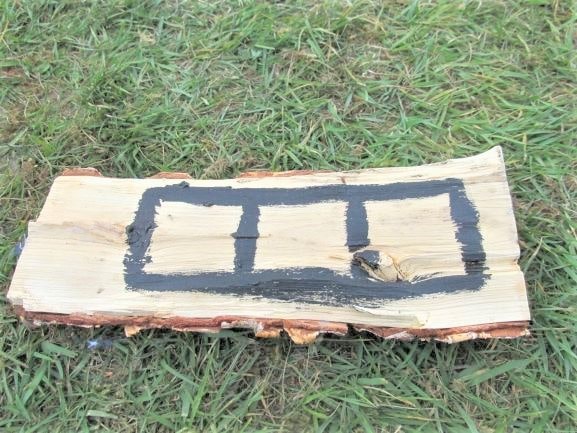
1.Wood Slices
Any type of log or wood slice would be great for this. All you need is something like permanent marker to draw on them with, or you could potentially use acrylic paint to create phoneme frames.
I once painted a phoneme frame onto an old stump of a tree that had been chopped down in the school outdoor area. Children made words using shells with sounds on.
I recently found some wood slices that look really beautiful as phoneme frames with some stones I got from a hardware store:
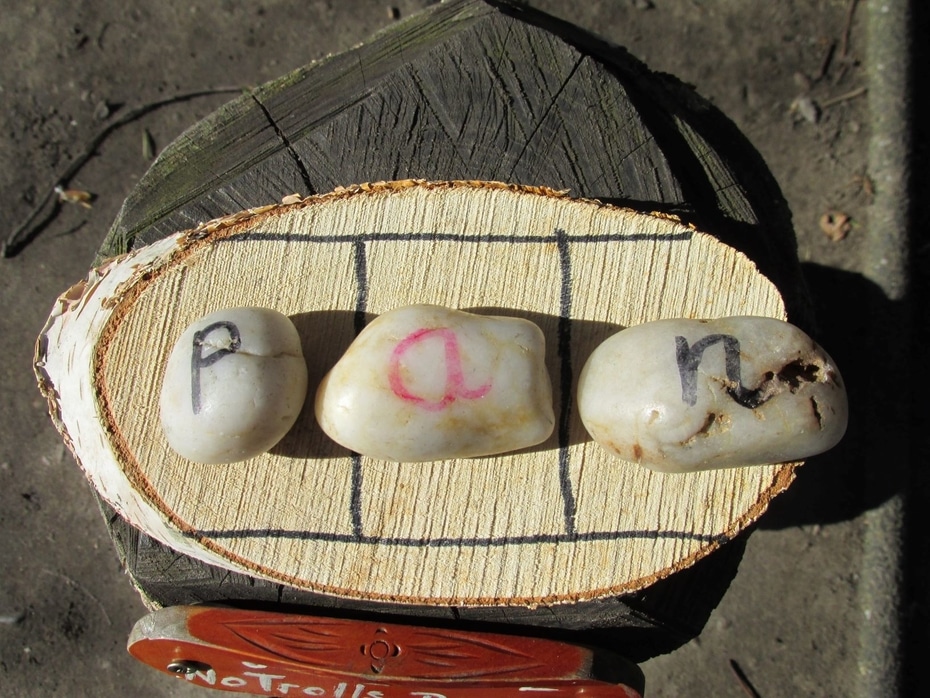
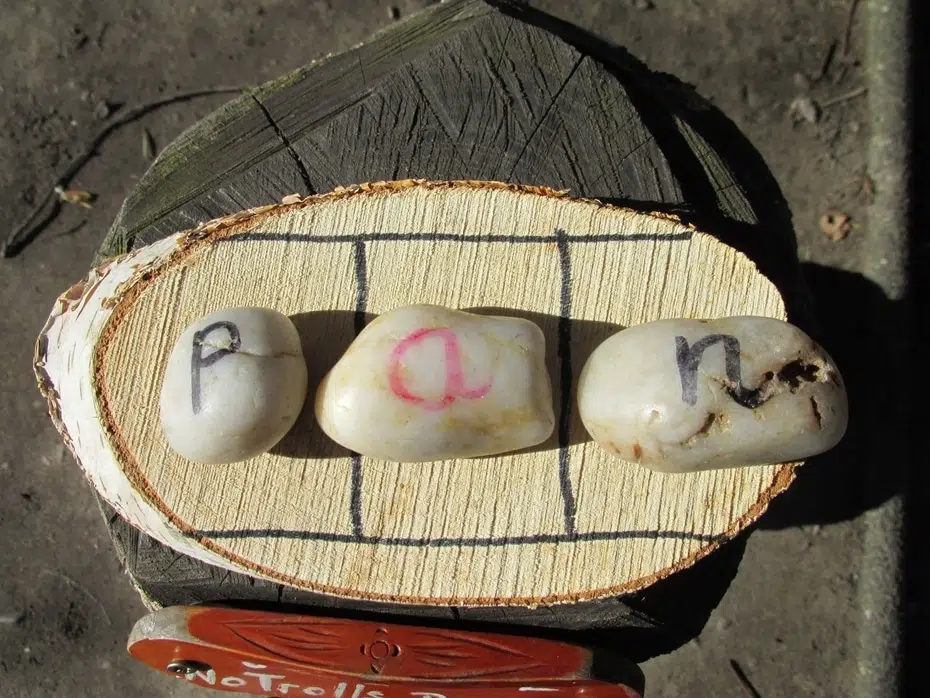
The stones are color coded – the consonants are black and the vowels are red. If you go black, red, black you always make a word, either real or silly. You could potentially paint the sections of the grid black, red and black to make that visual point.
You could also write letters on many different loose parts. To find out the kinds of resources that are great for loose parts play, check out my article about the top 100 materials.
2. Planks Or Palletts
These are great for big outdoor phoneme frames.
They are great for using with whatever odds and ends you have lying around with some sounds written on. Good examples for objects to use could be:
- Bottle-tops
- Corks
- Stones
- Shells
- Wood slices
- Leaves
3. Lolly (Popsicle) Sticks
Glue them into a phoneme frame shape with PVA glue. These take a bit of preparation but are great for using with gems or shells with sounds on.
Lolly (popsicle) sticks are also great for all sorts of fine motor games.
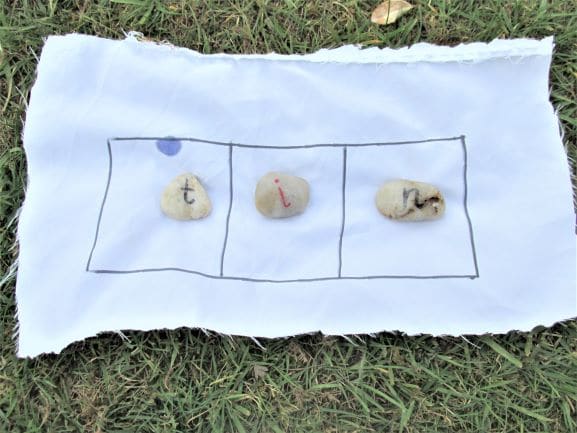
4.Sheets/Material
Random pieces of material or sheets are a really cheap and interesting way of providing a space to create a phoneme frame. Just draw on them with permanent marker.

5.Draw/Chalk On floor
Quite straightforward this one! Just chalk phoneme frames on the floor. They could be small ones for individual children to use, or you could make a giant one.
6.Use a trellis
This one takes a bit of DIY. All you need is a small wooden trellis, ideally with square-shaped sections. Simple saw it up so you have a 3-box phoneme frame. Ideal with outdoor phonics equipment like sounds on leaves or stones.
If you have a big trellis you could make lots of phoneme frames, or ones of different sizes -e.g. 2 boxes, 3 boxes, 4 etc
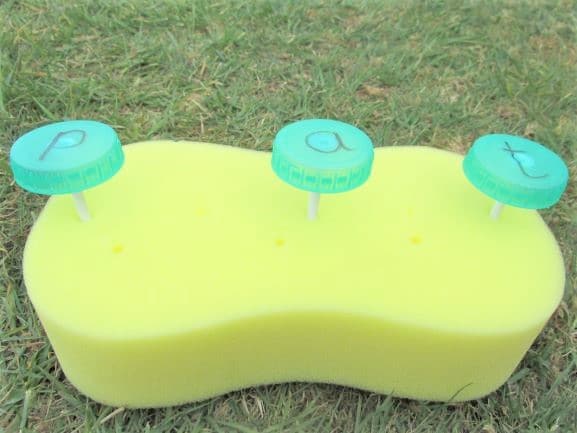
7. Golf Tees
This is very imaginative, and great for fine motor as well.
Simply stick three golf tees in a row and you’ve got yourself a phoneme frame! Good things to stick them in are: the ground, a sponge, a box, or plasticine.
Some good things to balance on the golf tees include:
- Bottle tops with letters written on
- Polystyrene art balls
- Golf balls with letters on!
- Ping pong balls (though these are a bit trickier!)

How To Use Them
There are many ways to use phoneme frames, both adult-led and independent.
Adult Led
- Build the word – children try to copy a word and sound it out
- Give them a word and they build/write it in the frame
- Give them a word, and give them two letters in the frame. Can they work out the other phoneme. This could be initial, middle or end sounds.
- Create lots of words that start with the same phoneme
Independent
Here are some games that children can do more by themselves, particularly with some of the more exciting phoneme frames ideas:
- Have a challenge sheet – Have some kind of large piece of paper somewhere near a phoneme frame. If this has the same theme as the phoneme frame then great! For example, you could have a ‘treasure map’ on the wall with some treasure words, e.g. ‘pin’, ‘mat’, and ‘mop’. Then children try to make these words with gem letters on a frame.
- Let them create words and record them. They could write them down on paper, clipboards or whiteboards
- Pictures and sounds – have some pictures of simple words that they can try to build. For example, it could be a picture of a ‘pot’, ‘cat’ and ‘sun’. They pick a picture and try to build it on the phoneme frame.
- Talking tins – these are little tins that you can record words on. The idea is you record a word on them. The child comes along, presses it and writes down the word.
- Detectives – The children find words in books and build them in phoneme frames, sounding them out as they go
Next Steps For Phoneme Frames
Phoneme frames are very versatile, and you can use them throughout the phonic phases.
Here is roughly the order I would go in:
- Start with 3 box phoneme frames. Even though it may sound easier to start with 2, I think a lot of children seem to find the 3-box ones easier. I don’t really know why this is!
- After they have become reasonably confident with the 3-box phoneme frames, I would then introduce the 2-box. These are for words like ‘it’, ‘an’ and ‘if’.
- The three box phoneme frames are great for simple CVCs, and they then become excellent later for using all 44 phonemes in the English language, in words such as ‘thick’ and ‘pain’.
- Move on to 4-box phoneme frames when children begin to tackle words with adjacent consonants in them such as ‘just’, ‘lift’, and ‘next’.
- You can expand to 5-box, 6-box and beyond. There really is not limit!
There does come a point, however, later on in phonics when phoneme frames begin to lose their power. By this period children will be hearing the sounds independently, and be able to write words without the need for visual structures.
Top Tips For Using Phoneme Frames
- Do lots of modelling of how to use phoneme frames to start off
- Use simple games, and expand as they get more confident at using them
- Use natural resources and exciting types of phoneme frame
- Start when they know a few sounds and are at least beginning to blend
- Both write and build words
- Use different phoneme frames as you go through the phonic stages
Conclusion
Good luck if you try out using phoneme frames! They can be used just as easily by parents at home, as educators at school. With just a little imagination and using them in simple ways, phoneme frames are one of the best ways of getting children building and reading words.