

After children have mastered blending individual sounds (the alphabet), it is time to extend their knowledge to more complex sounds such as digraphs and trigraphs.
Having taught Phonics for many years in different schools, I have discovered amazing strategies to help kids improve their phonics skills as long as they practice blending every day.
Young learners learn to decode words quickly and unlock the magic of reading and language. Teach blending sounds in a fun, interactive and structured way using the resources we will list below.
Digraphs
Digraphs play a crucial role in improving kids’ reading and writing skills by introducing them to distinct sound patterns and vowel sounds in the English language.
Also called phonemes, digraphs are pairs of letter sounds that work together to represent a single sound. Instead of each letter making its individual sound, they combine to create a new sound.
Children should increase their phonemic awareness skills as they begin reading and blending continuous sounds.
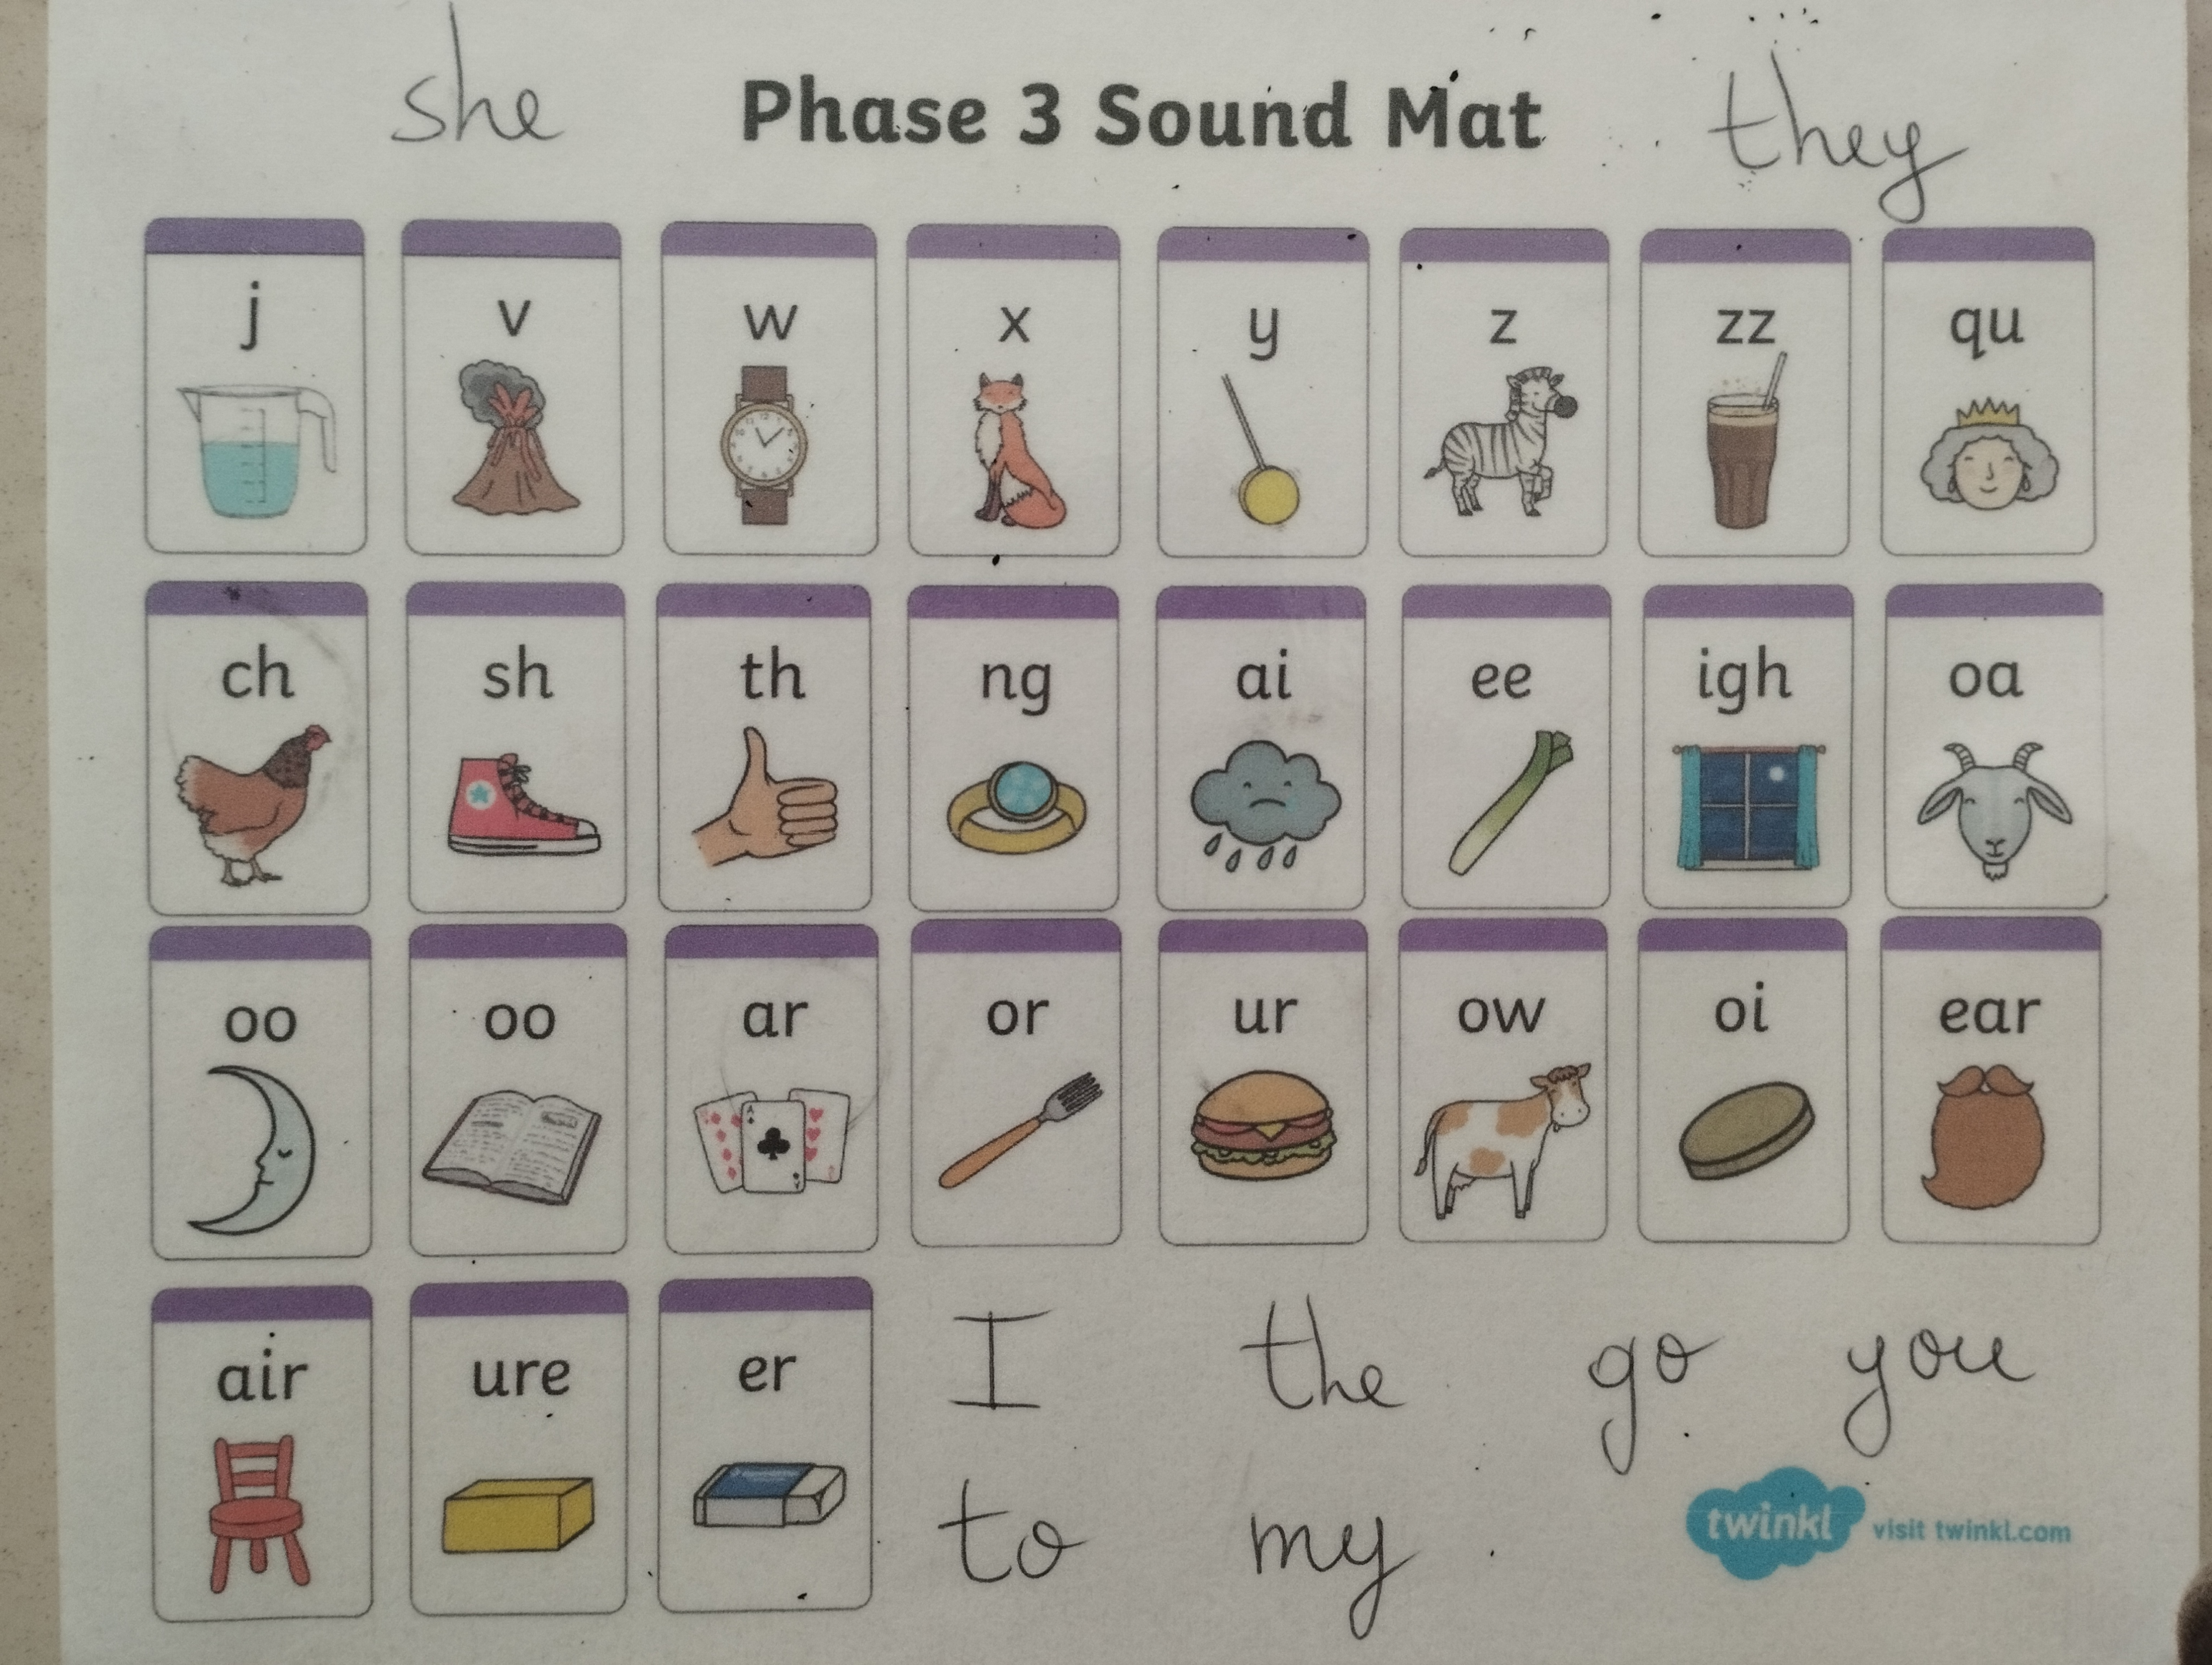
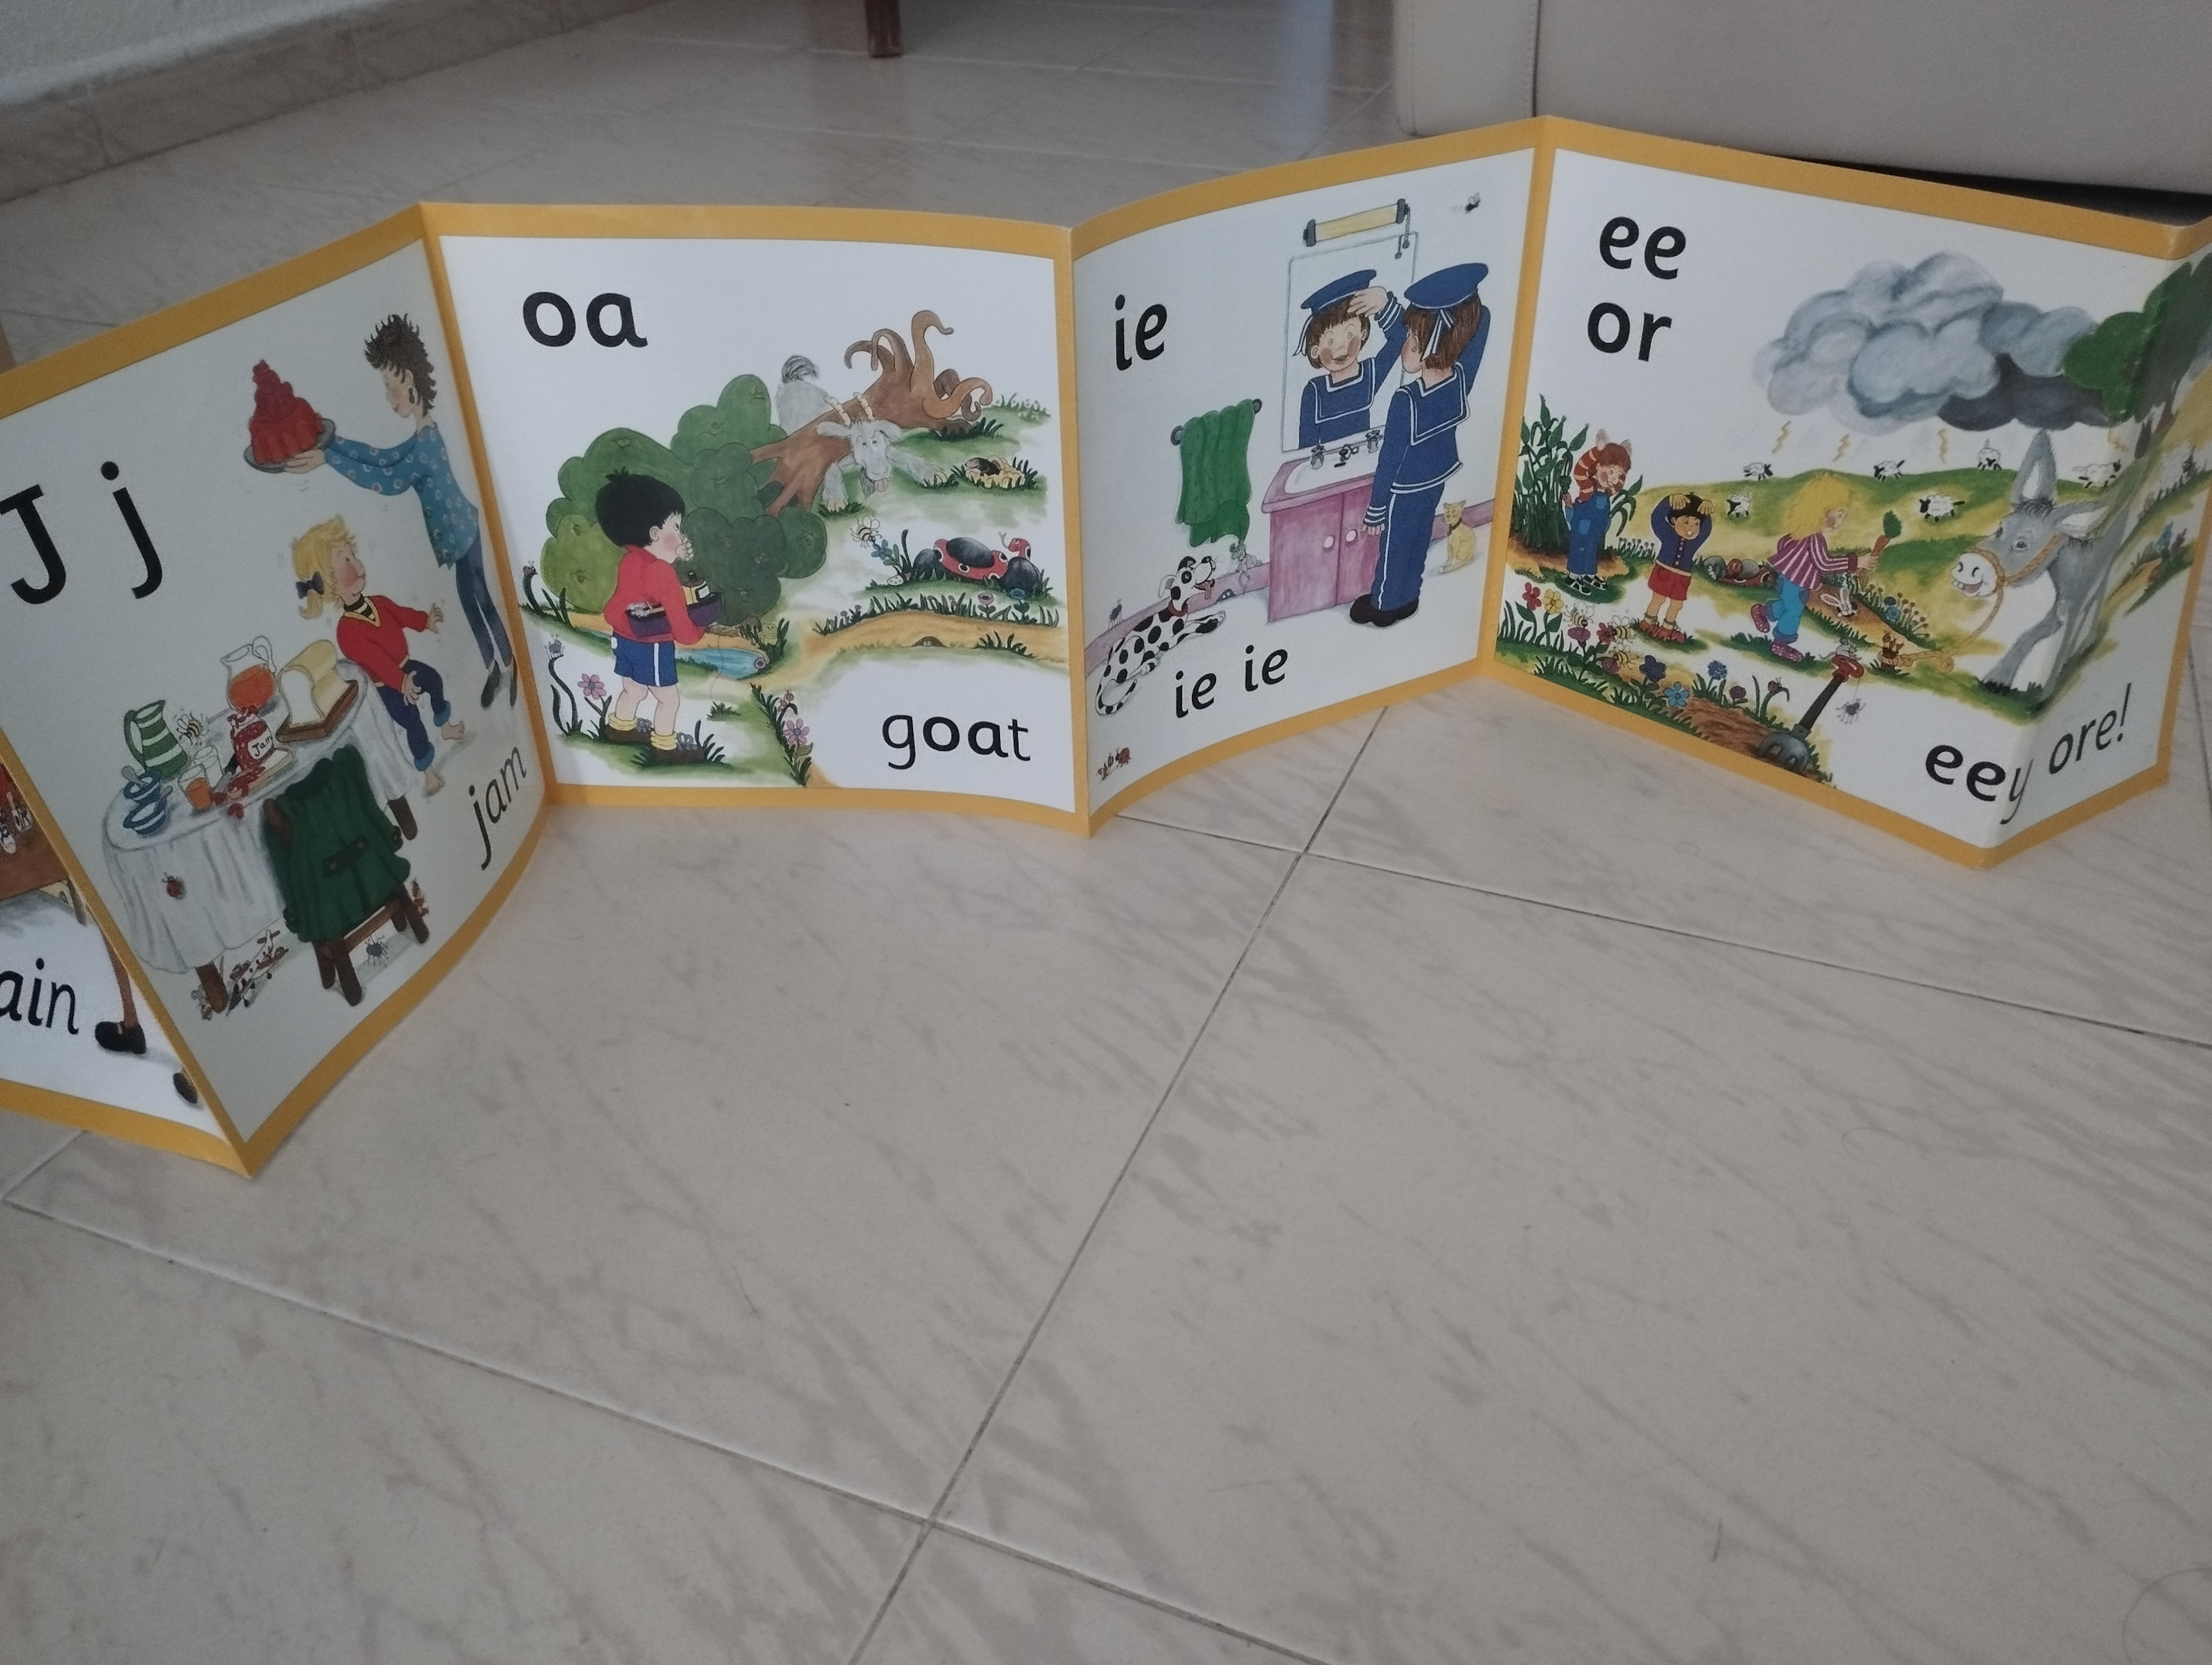
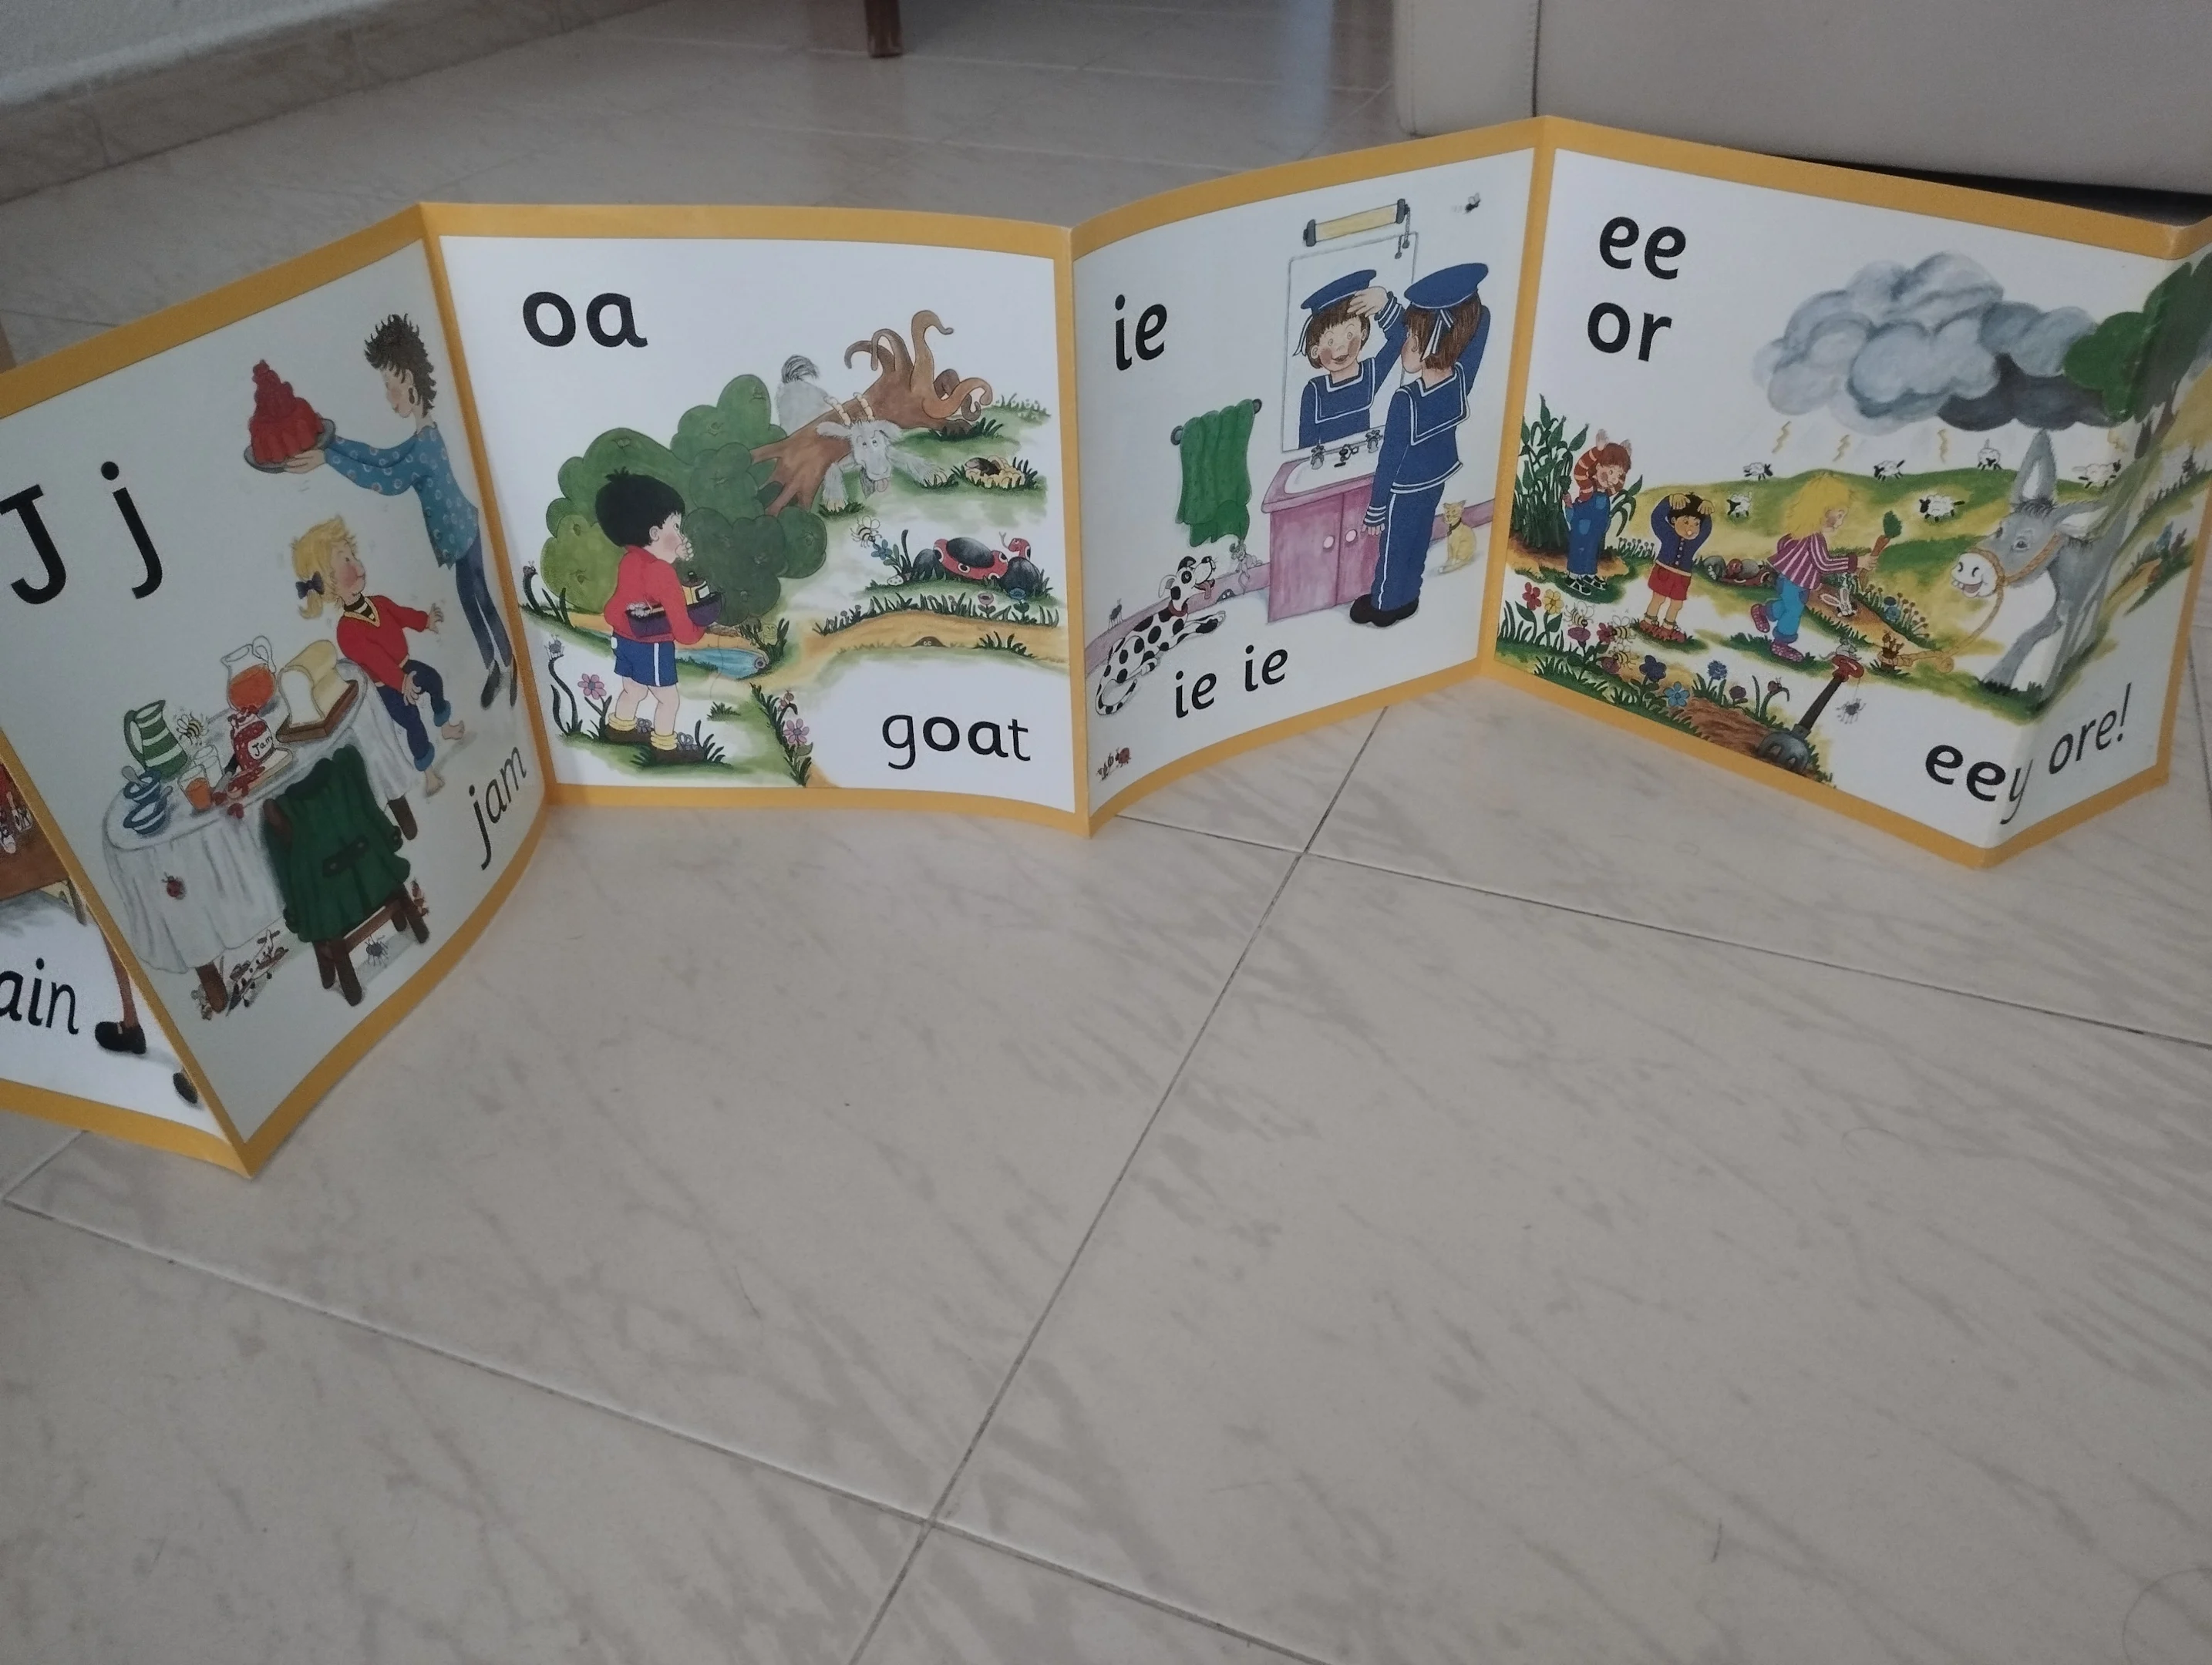
English has many digraphs that children need to recognize, read and write out: ch, sh, th, ng, oa, ai.
Teach blending sounds as a way to help students read. When they start to recognize and decode individual sounds and apply them to unknown words, they enhance their ability to read and understand words more accurately.
If you look at the Phonics mats in the pictures below, you can see the main digraphs which can be taught in any order.
How to Teach Blending Sounds
Teach students to blend sounds using a multi-step approach.
Begin by introducing the concept of two letters creating a single sound, using visual aids like flashcards to illustrate examples like “sh,” “ch,” and “th.”

Introduce a few flashcards at a time so as not to overwhelm the children. Teach the individual sounds by saying the sound first then asking children to repeat it. You can use different voices to make it more fun eg. a squeaky voice, a deep voice, a whisper, a booming voice, etc.
The flashcards and sound repetition should be practiced every day, and visual representation should also be used to accompany each sound, word or sentence.
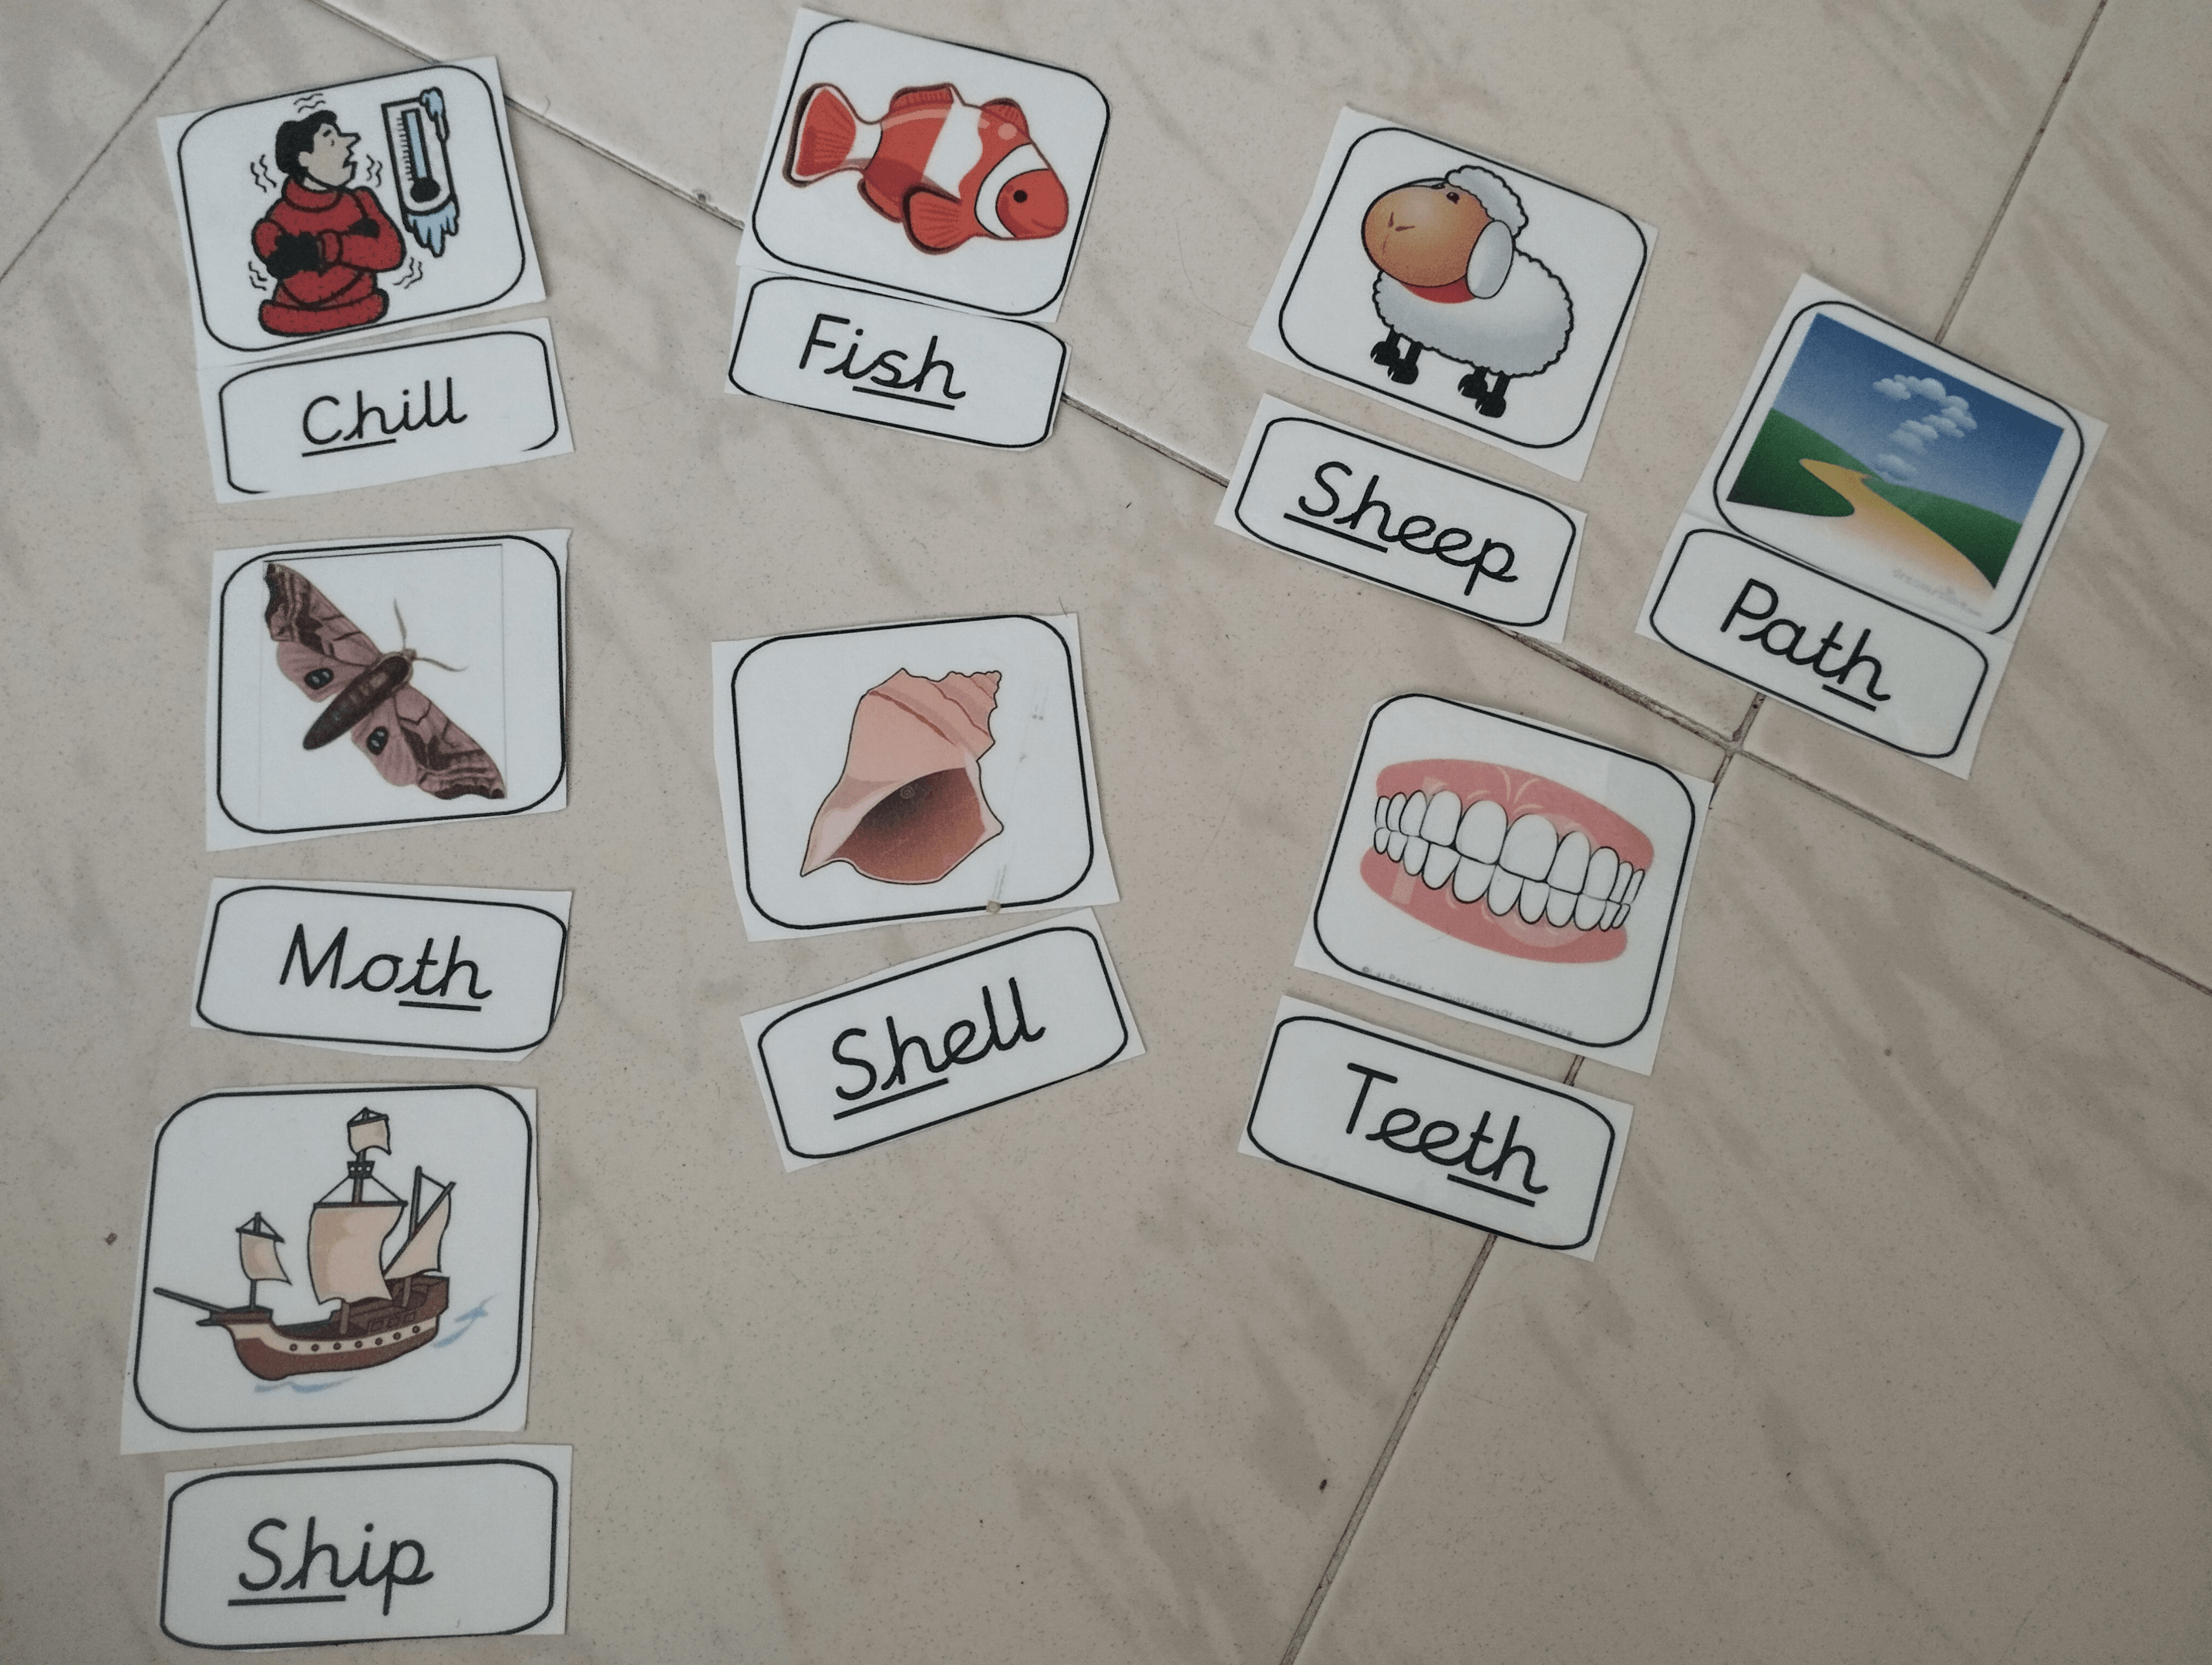
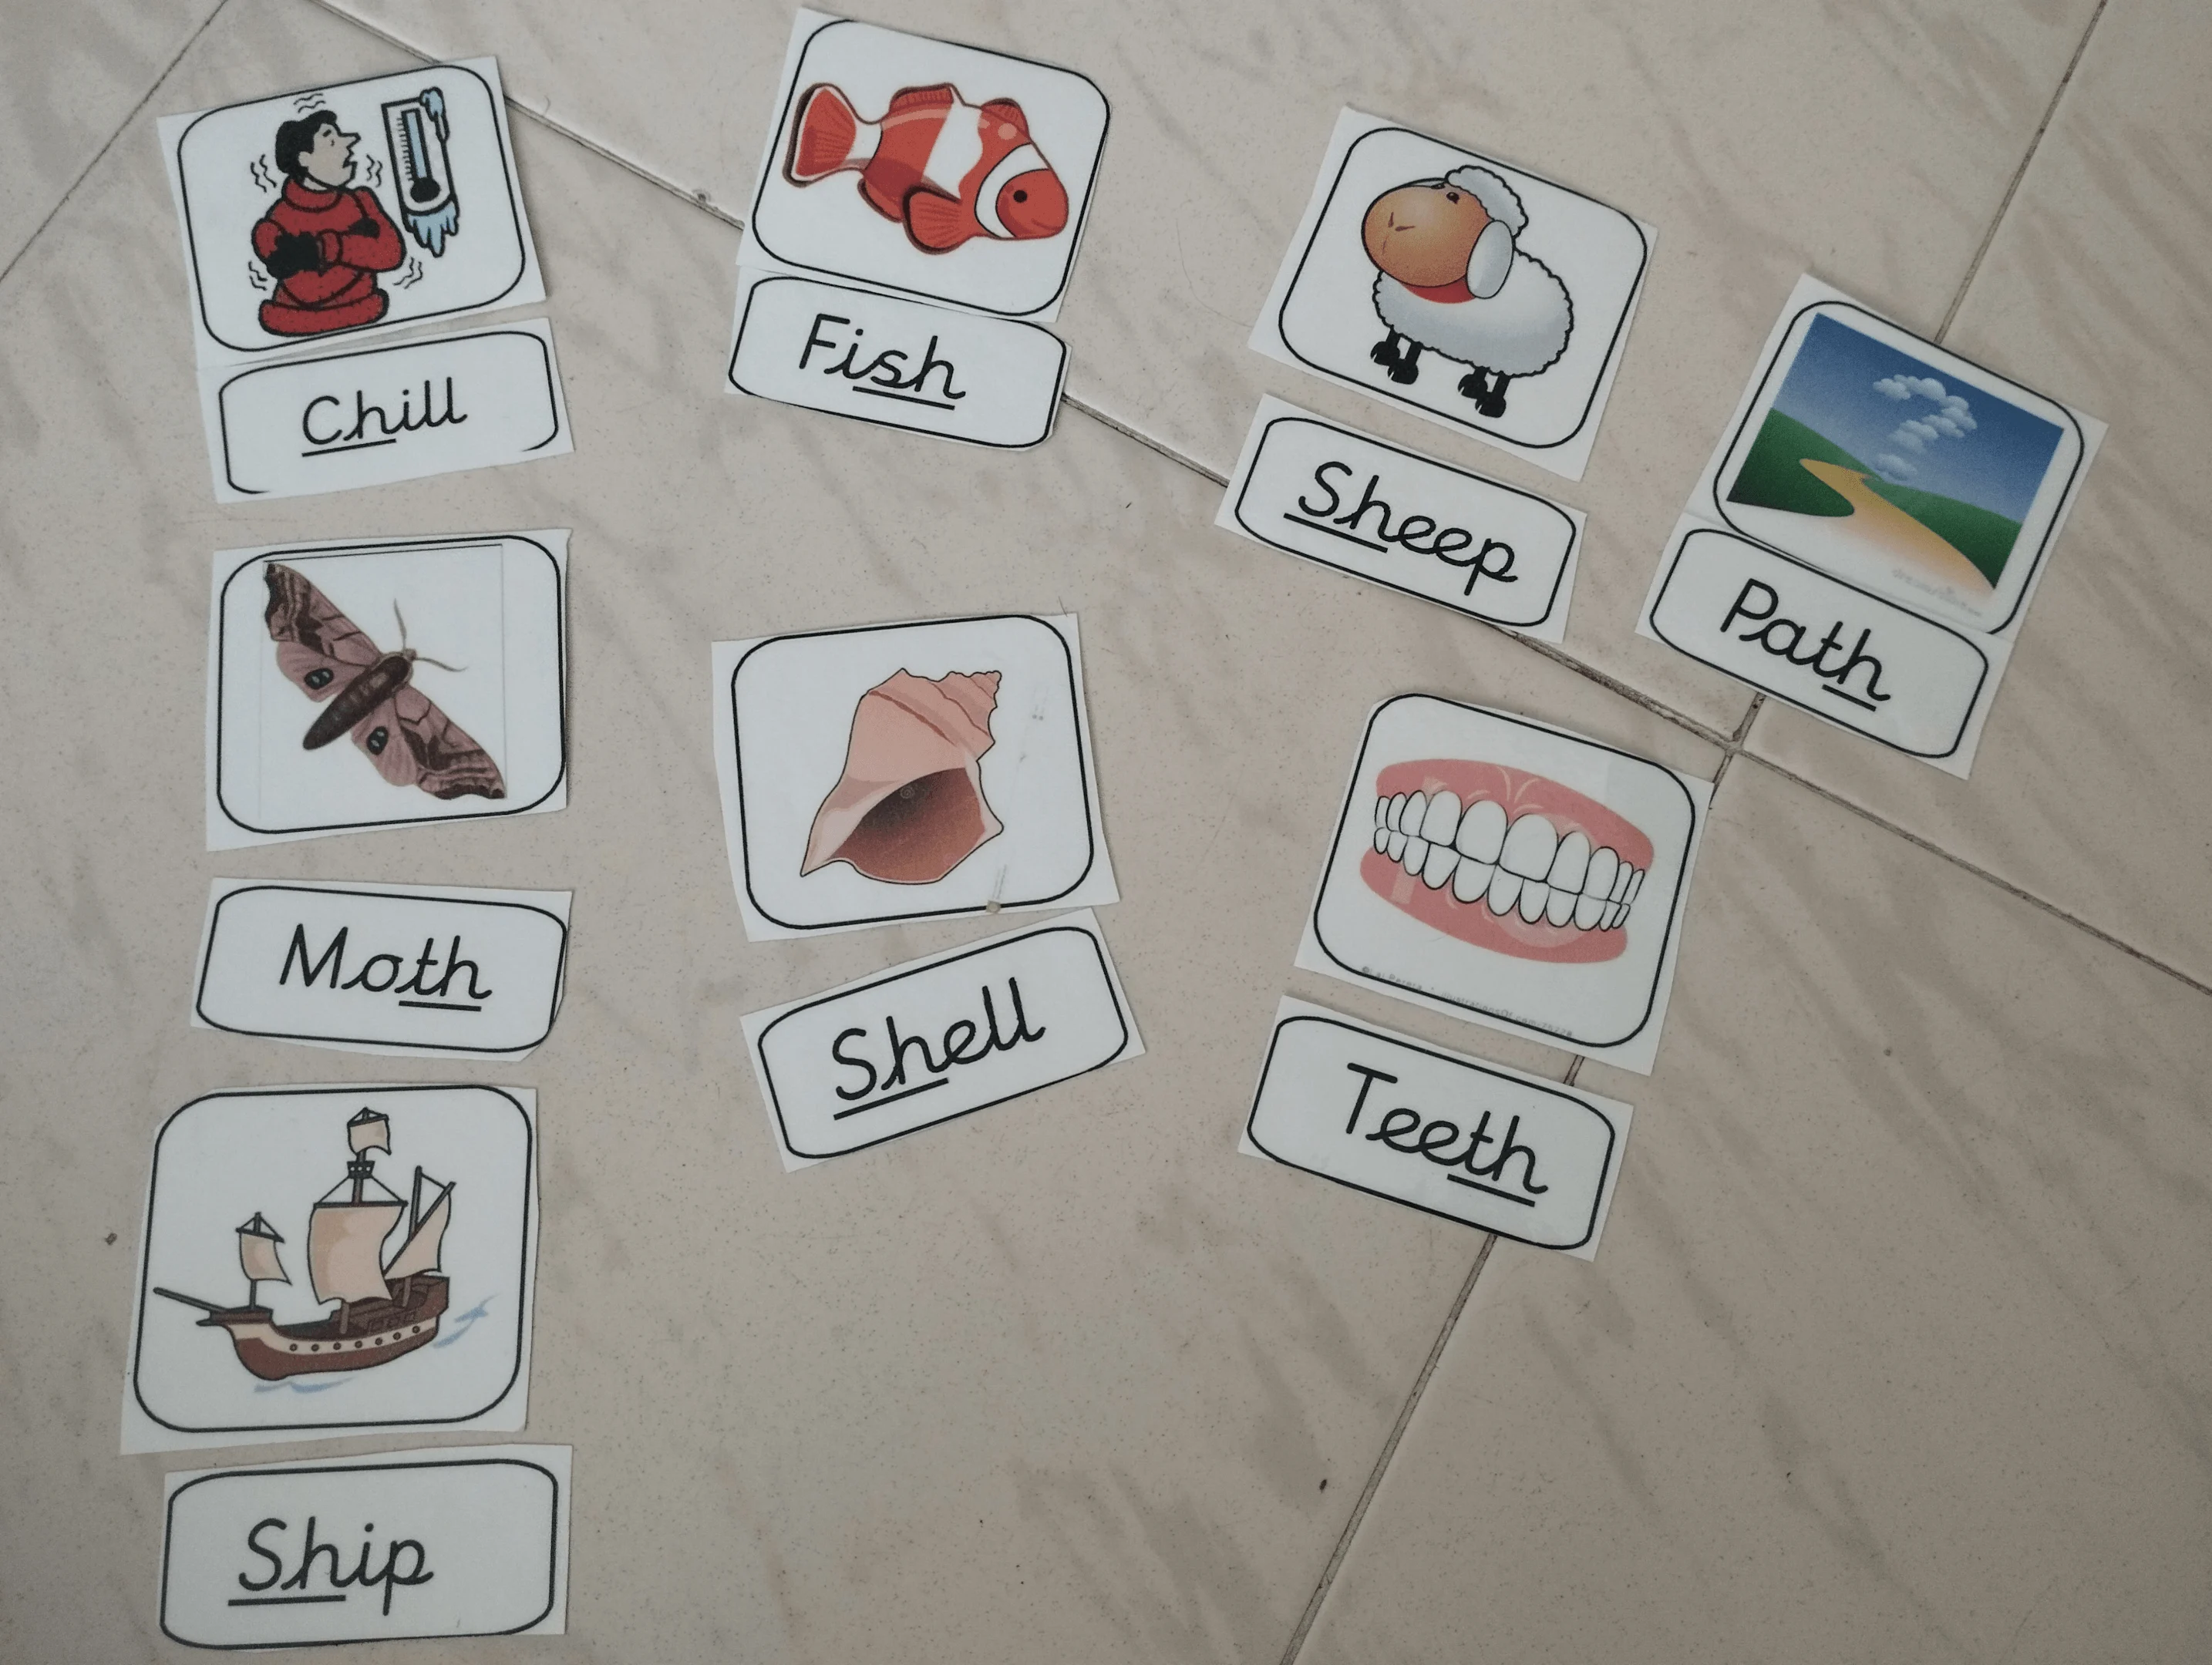
Teach blending and segmenting by modeling it yourself when reading words. Segment the word into individual sounds, for example: sh-ee-p or b-oa-t.
Then, model how to blend the sounds by reading the full word slowly, accentuating the sound segmentation. Children should practice blending every day until they can recognize words and master oral blending.
The final step is the children attempting to write the blended word they have read. Ask them to first think of a sentence using that word, say it out loud so they don’t forget it, and then model writing it on the board.
TIP: Make sure the sounds you want them to use are clearly visible so they can copy them if they need to write words or sentences.
CHALLENGE: Ask children to identify isolated sounds in words. For example, can they identify the final sound? What sound does the word ‘children’ begin with?
Online Reading Games
Teaching blending sounds becomes easier when you use the internet resources available to you. Blending and segmenting can be consolidated with online games where children can play phonics games for free. Struggling readers benefit from the repetitive aspect of these games. Their blending skills improve and their confidence skyrockets.
Phonics Bloom
Phonics Bloom has a great variety of blending activities. The games you have to pay for are clearly labeled “subscribe to pay.” These games help children to repetitively practice blending all the sounds which builds fluency in their reading.
Phonics Play
Another great free platform where some blending activities are rife. What’s great about Phonics Play is that the games include some nonsense words, which children should recognize as not real words. This is a great way to teach students that words hold meaning.
Oxford Owl
Oxford Owl has an amazing selection of free storybooks for different levels where children can also listen to the story being read and complete some comprehension activities after finishing the book. You have to go to the ebooks tab to look at the selection of books.
Twinkl
Twinkl is a resource website where you can print off hundreds of games and activities. It is not free; you will have to subscribe, but it is absolute gold for teachers and parents who teach phonics. You can use the Twinkl resources to complement the teaching steps mentioned above. Most of the pictures in this article are taken from Twinkl.
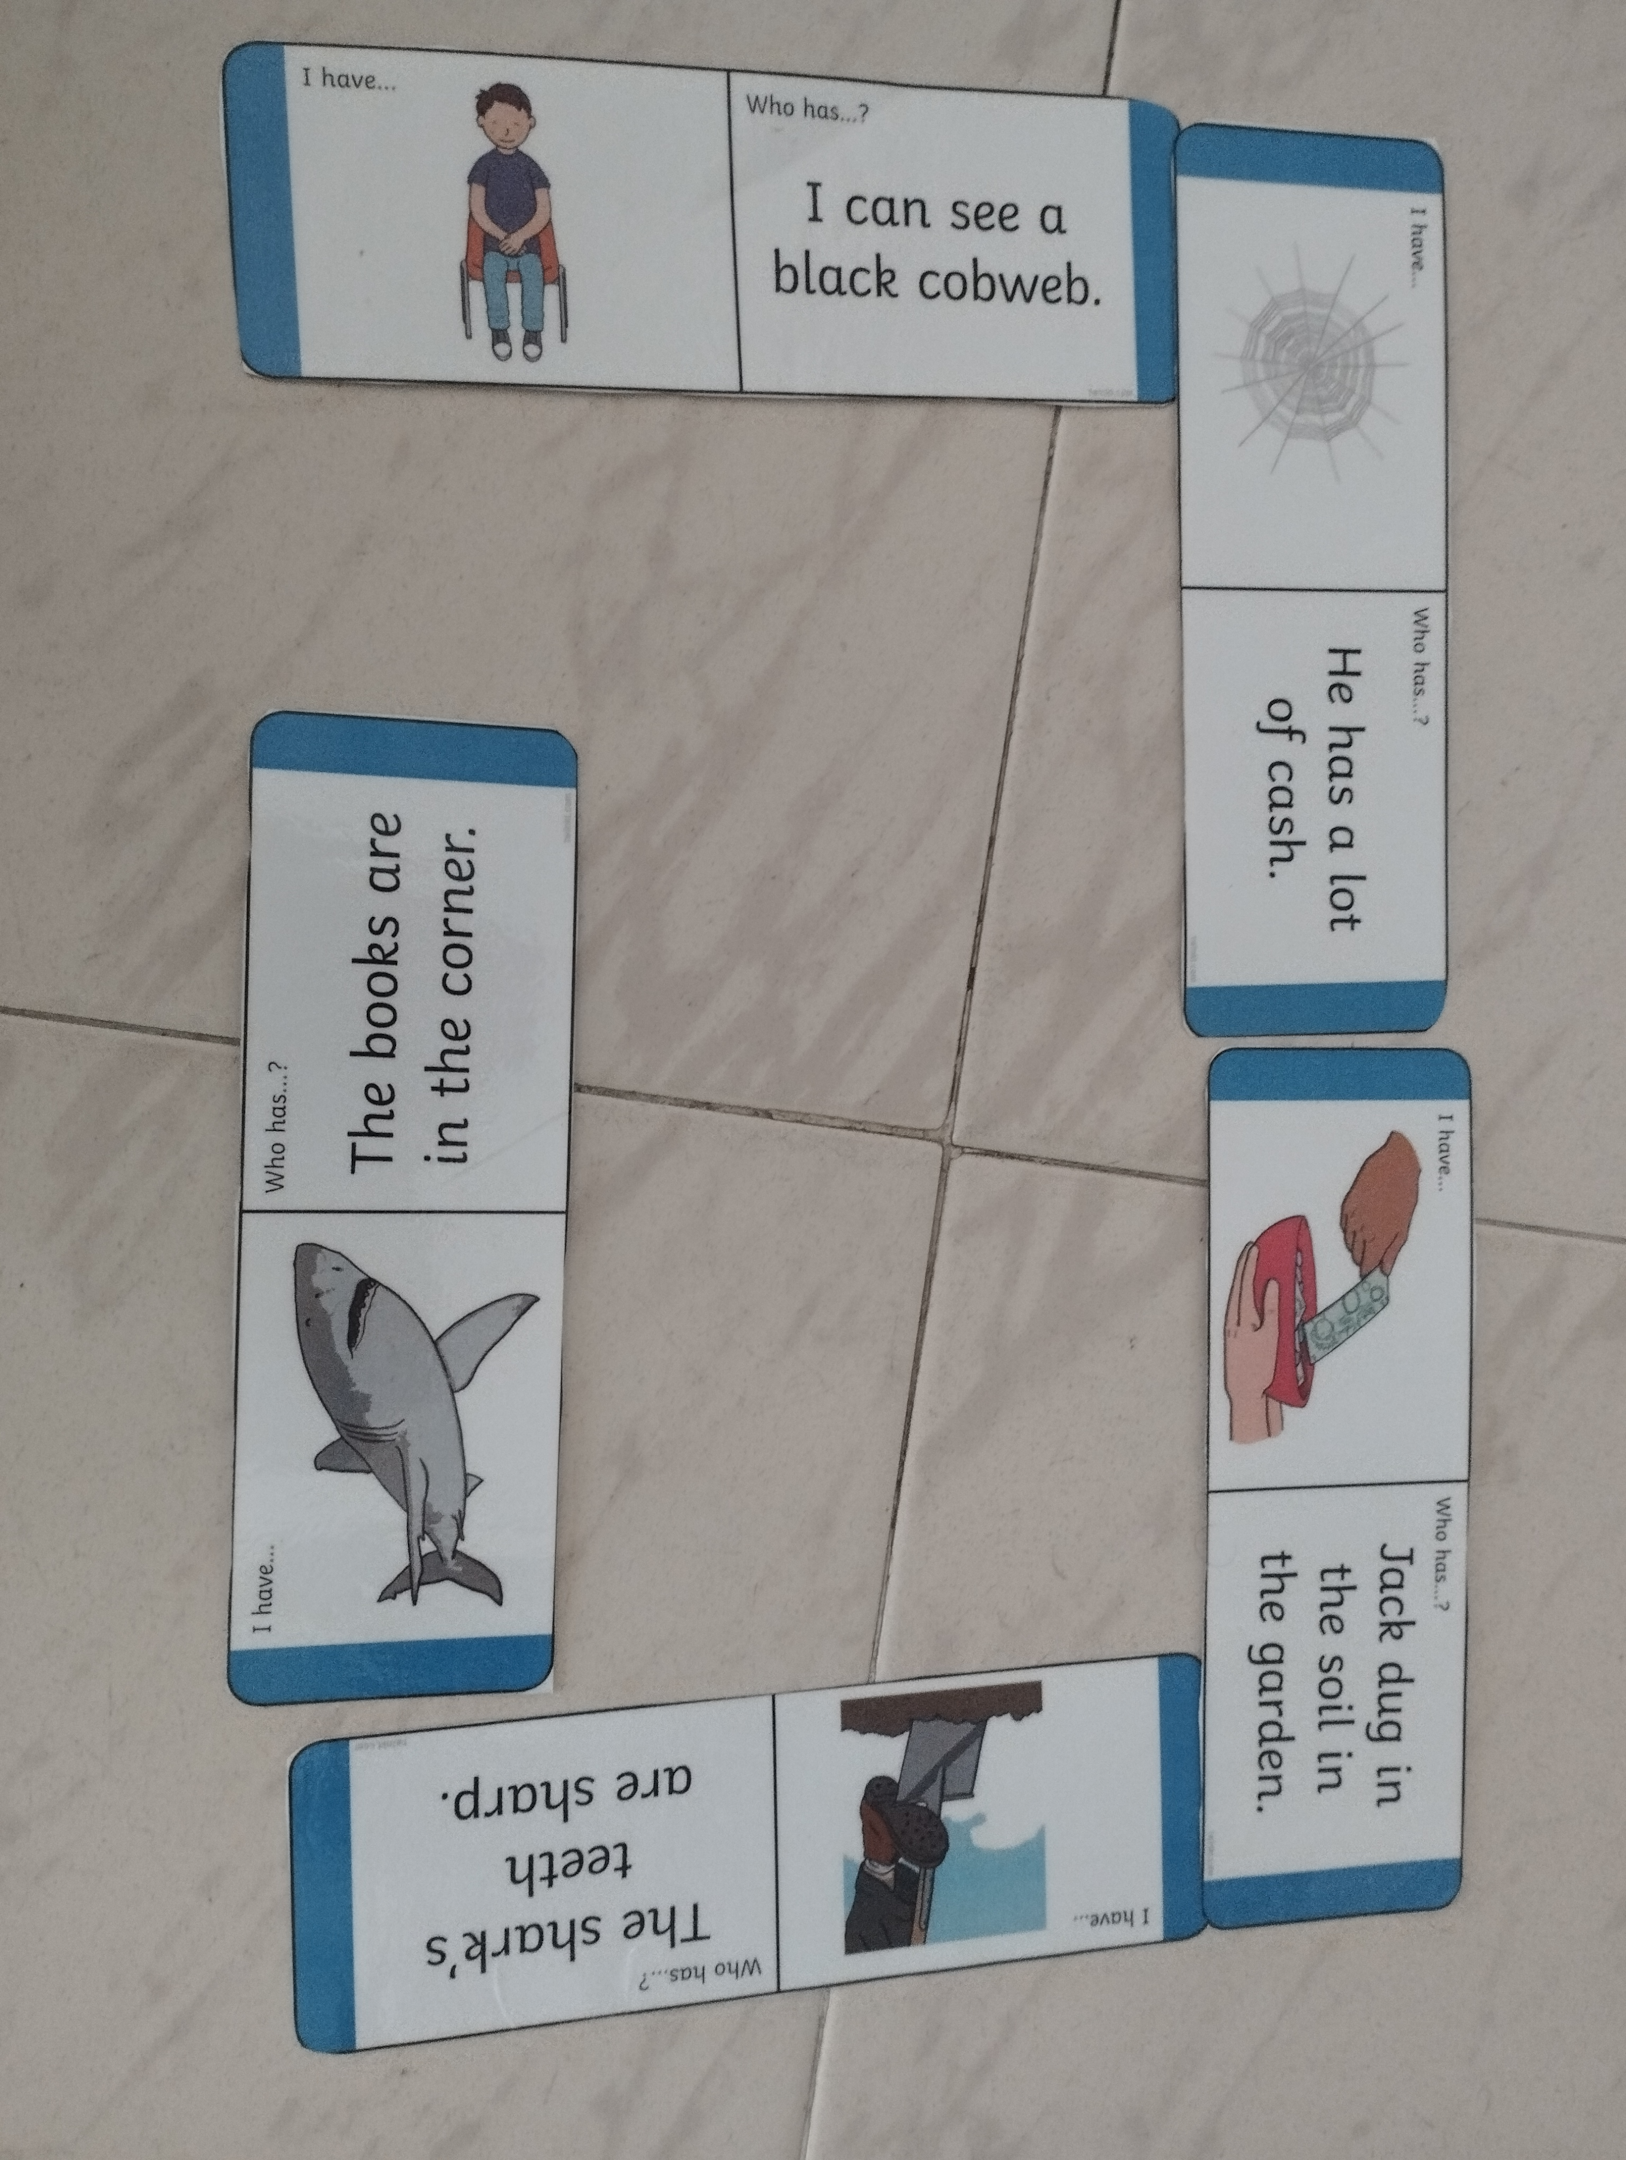

Teaching Ideas for Blending Sounds Together
Here are some ideas to help you teach the sounds, guide children to blend them when reading, and apply the sounds when writing them. All these games and resources are a great way to raise your child’s phonemic awareness and improve their blending skills.
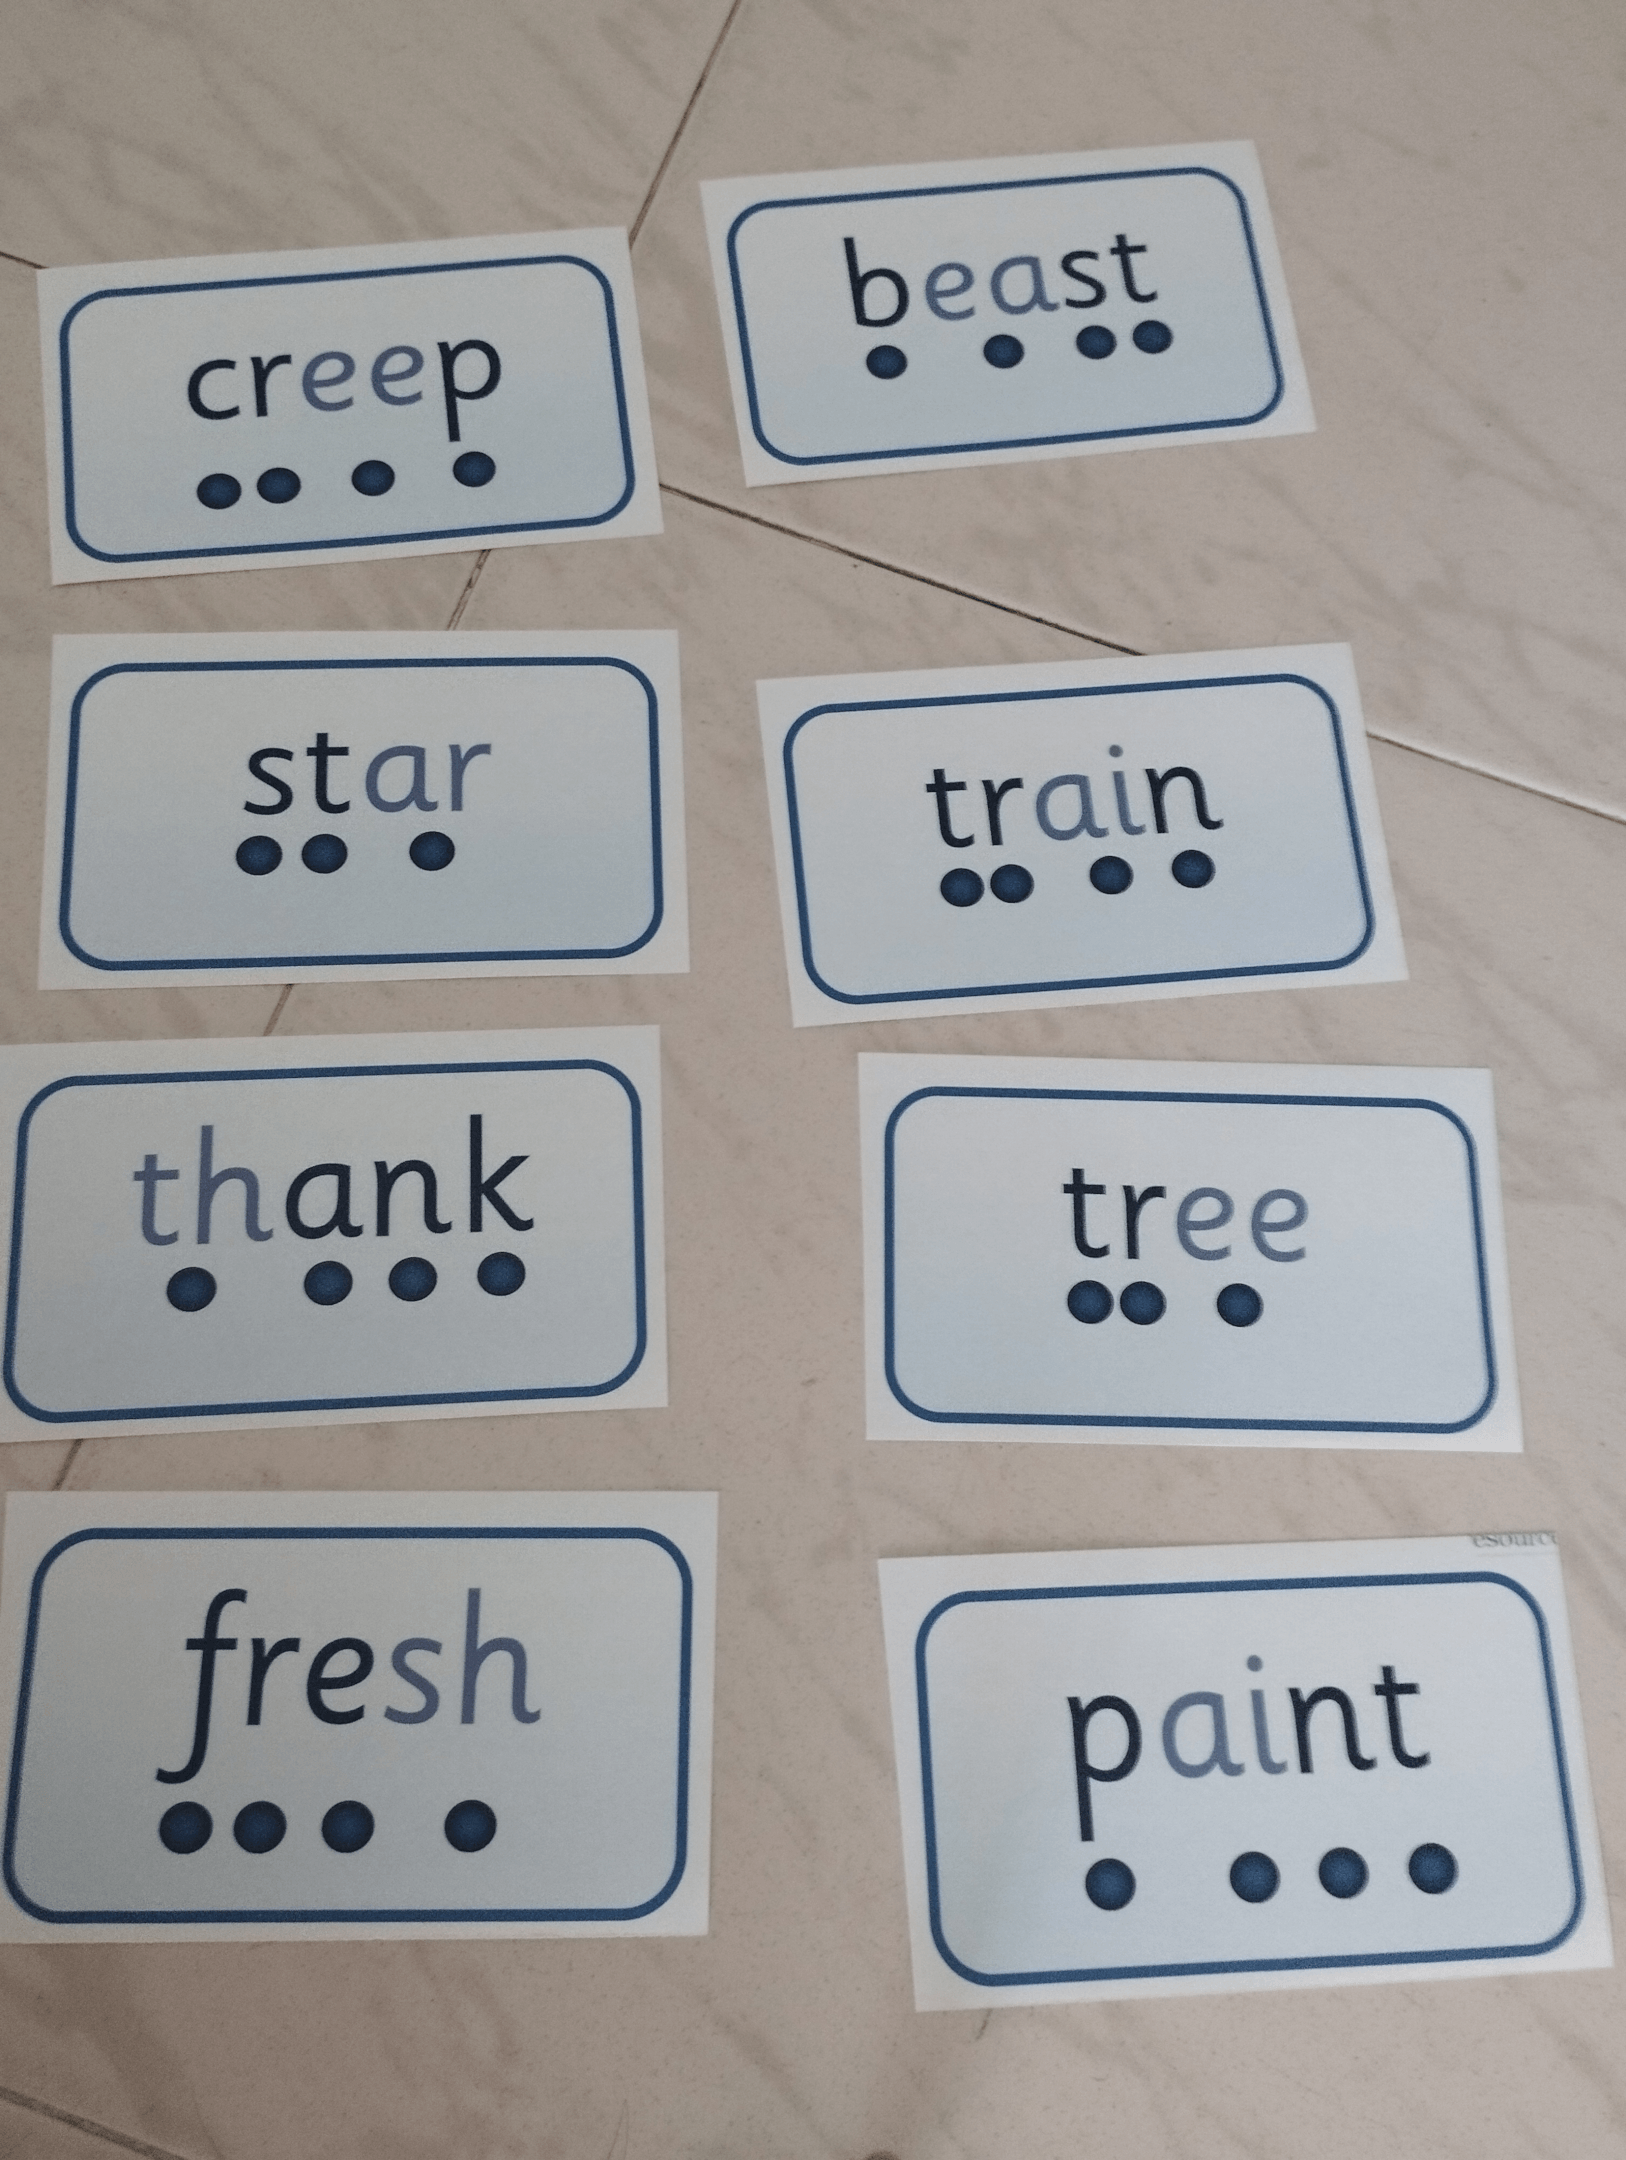
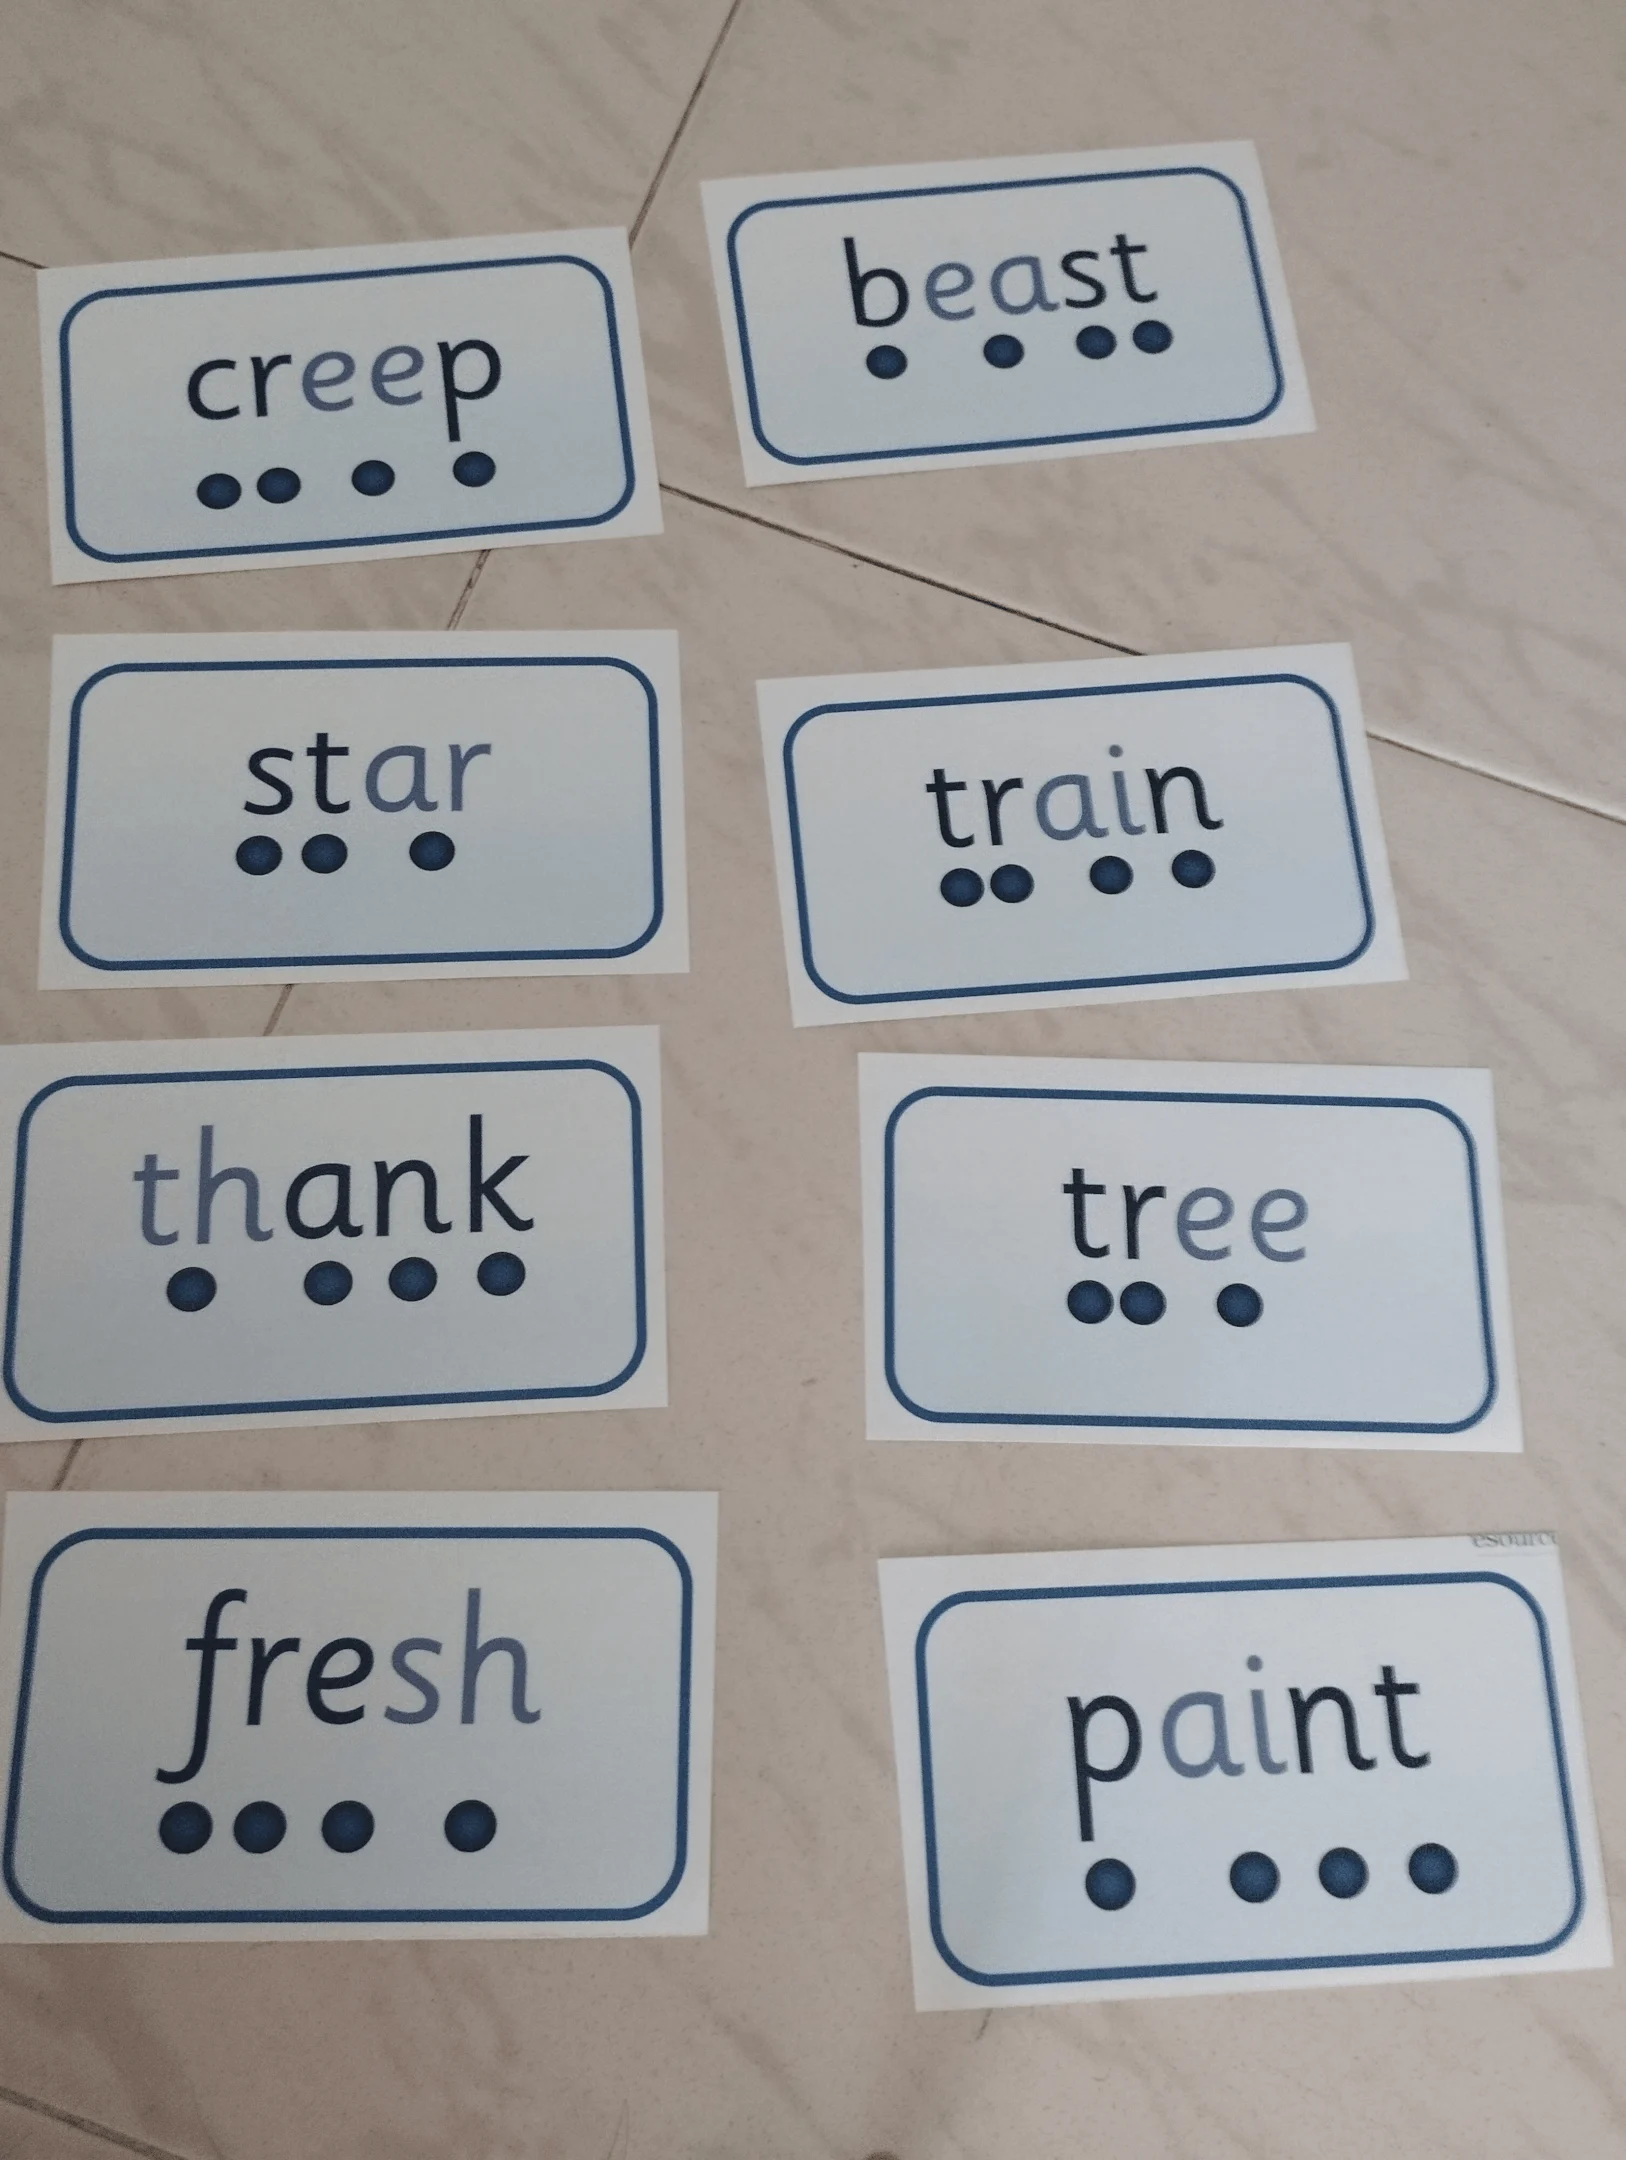
Word Lists
Here, the children have to apply the sounds learned to read words. These flashcards are a great way to practice oral blending using a target word. To begin with, teach children to blend sounds in simple words like the ones below, making sure that they also learn the meaning of each word.
Quick Recall
The quick recall teaching method for phonics flashcards involves rapid-fire exposure to a set of cards containing words or sounds. This develops children’s phonics knowledge of different sounds and words.
Show the flashcards to students in quick succession, as many times as you feel necessary to develop fluency when recalling the sounds.
Try to link the sound to an action. Children will be able to memorize quickly if the sound is linked to an action. Below are some examples:
j (as in “jelly”): Pretend to wobble like jelly with your hands.
v (as in “van”): Pretend to steer a car’s steering wheel.
w (as in “wig”): Pretend to brush your hair with your hand.
x (as in “box”): Cross your arms over your chest to form an ‘X.’
y (as in “yellow”): Pretend to hold an umbrella in the rain.
z (as in “zip”): Make a zipping motion with your fingers.
zz (as in “buzz”): Make a buzzing sound while moving your hand like a bee.
qu (as in “quick”): Pretend to hold a queen’s crown on your head.
ch (as in “chip”): Clap your hands together.
sh (as in “ship”): Place your index finger over your lips to make the ‘sh’ sound.
th (as in “thin”): Put your index fingers together and make a blowing sound.
ng (as in “song”): Pretend to strum a guitar and sing a note.
ai (as in “rain”): Wiggle your fingers as if rain is falling.
ee (as in “feet”): Point to your feet.
igh (as in “night”): Pretend to shield your eyes from the bright light.
oa (as in “boat”): Pretend to row a boat with your hands.
oo (as in “moon”): Make a circular shape with your arms to represent the moon.
oo (as in “book”): Pretend to read an imaginary book.
ar (as in “car”): Pretend to turn a car steering wheel.
or (as in “fork”): Pretend to eat with a fork.
ur (as in “turn”): Pretend to twist your body like turning around.
ow (as in “cow”): Pretend to milk a cow’s udders.
oi (as in “coin”): Pretend to flip a coin.
ear (as in “ear”): Point to your ear.
air (as in “hair”): Pretend to brush your hair.
Read and Match Words to Pictures
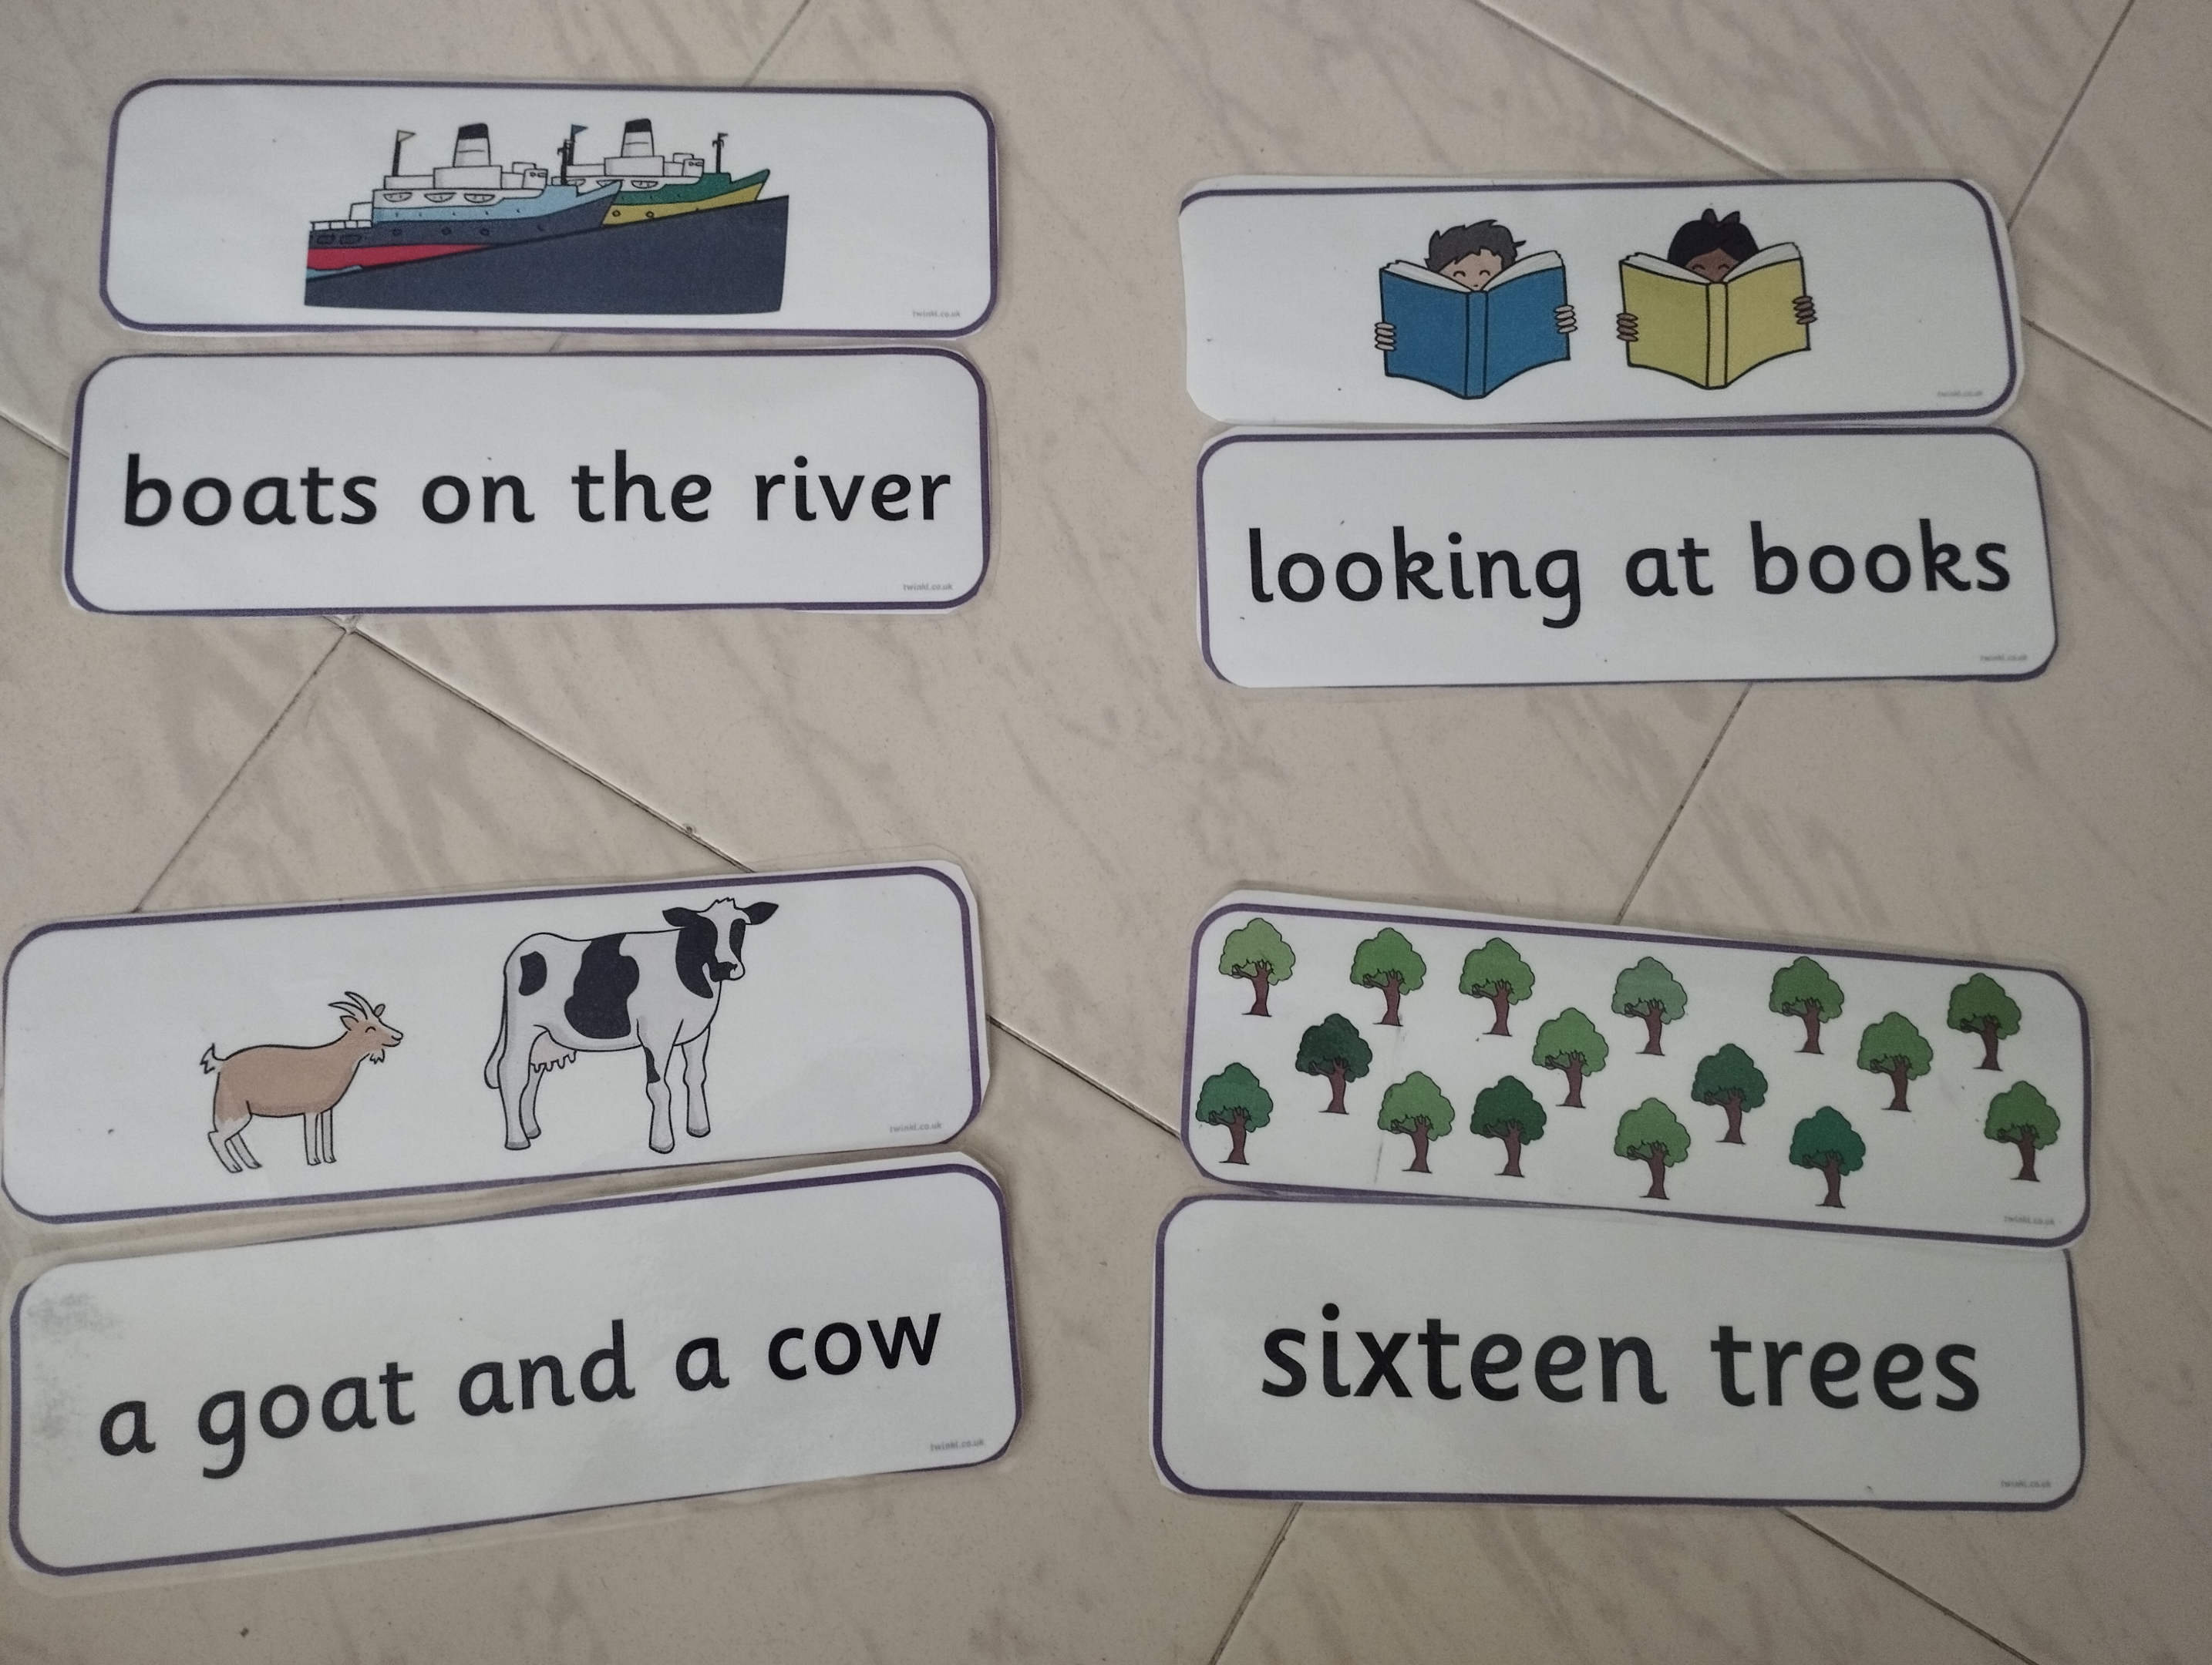

Twinkl is a great resource bank for matching games. You can find PowerPoint slides, cutouts, words that have to be matched to pictures, and so much more.
Write Graphemes
Provide practice sheets where children can trace the graphemes.
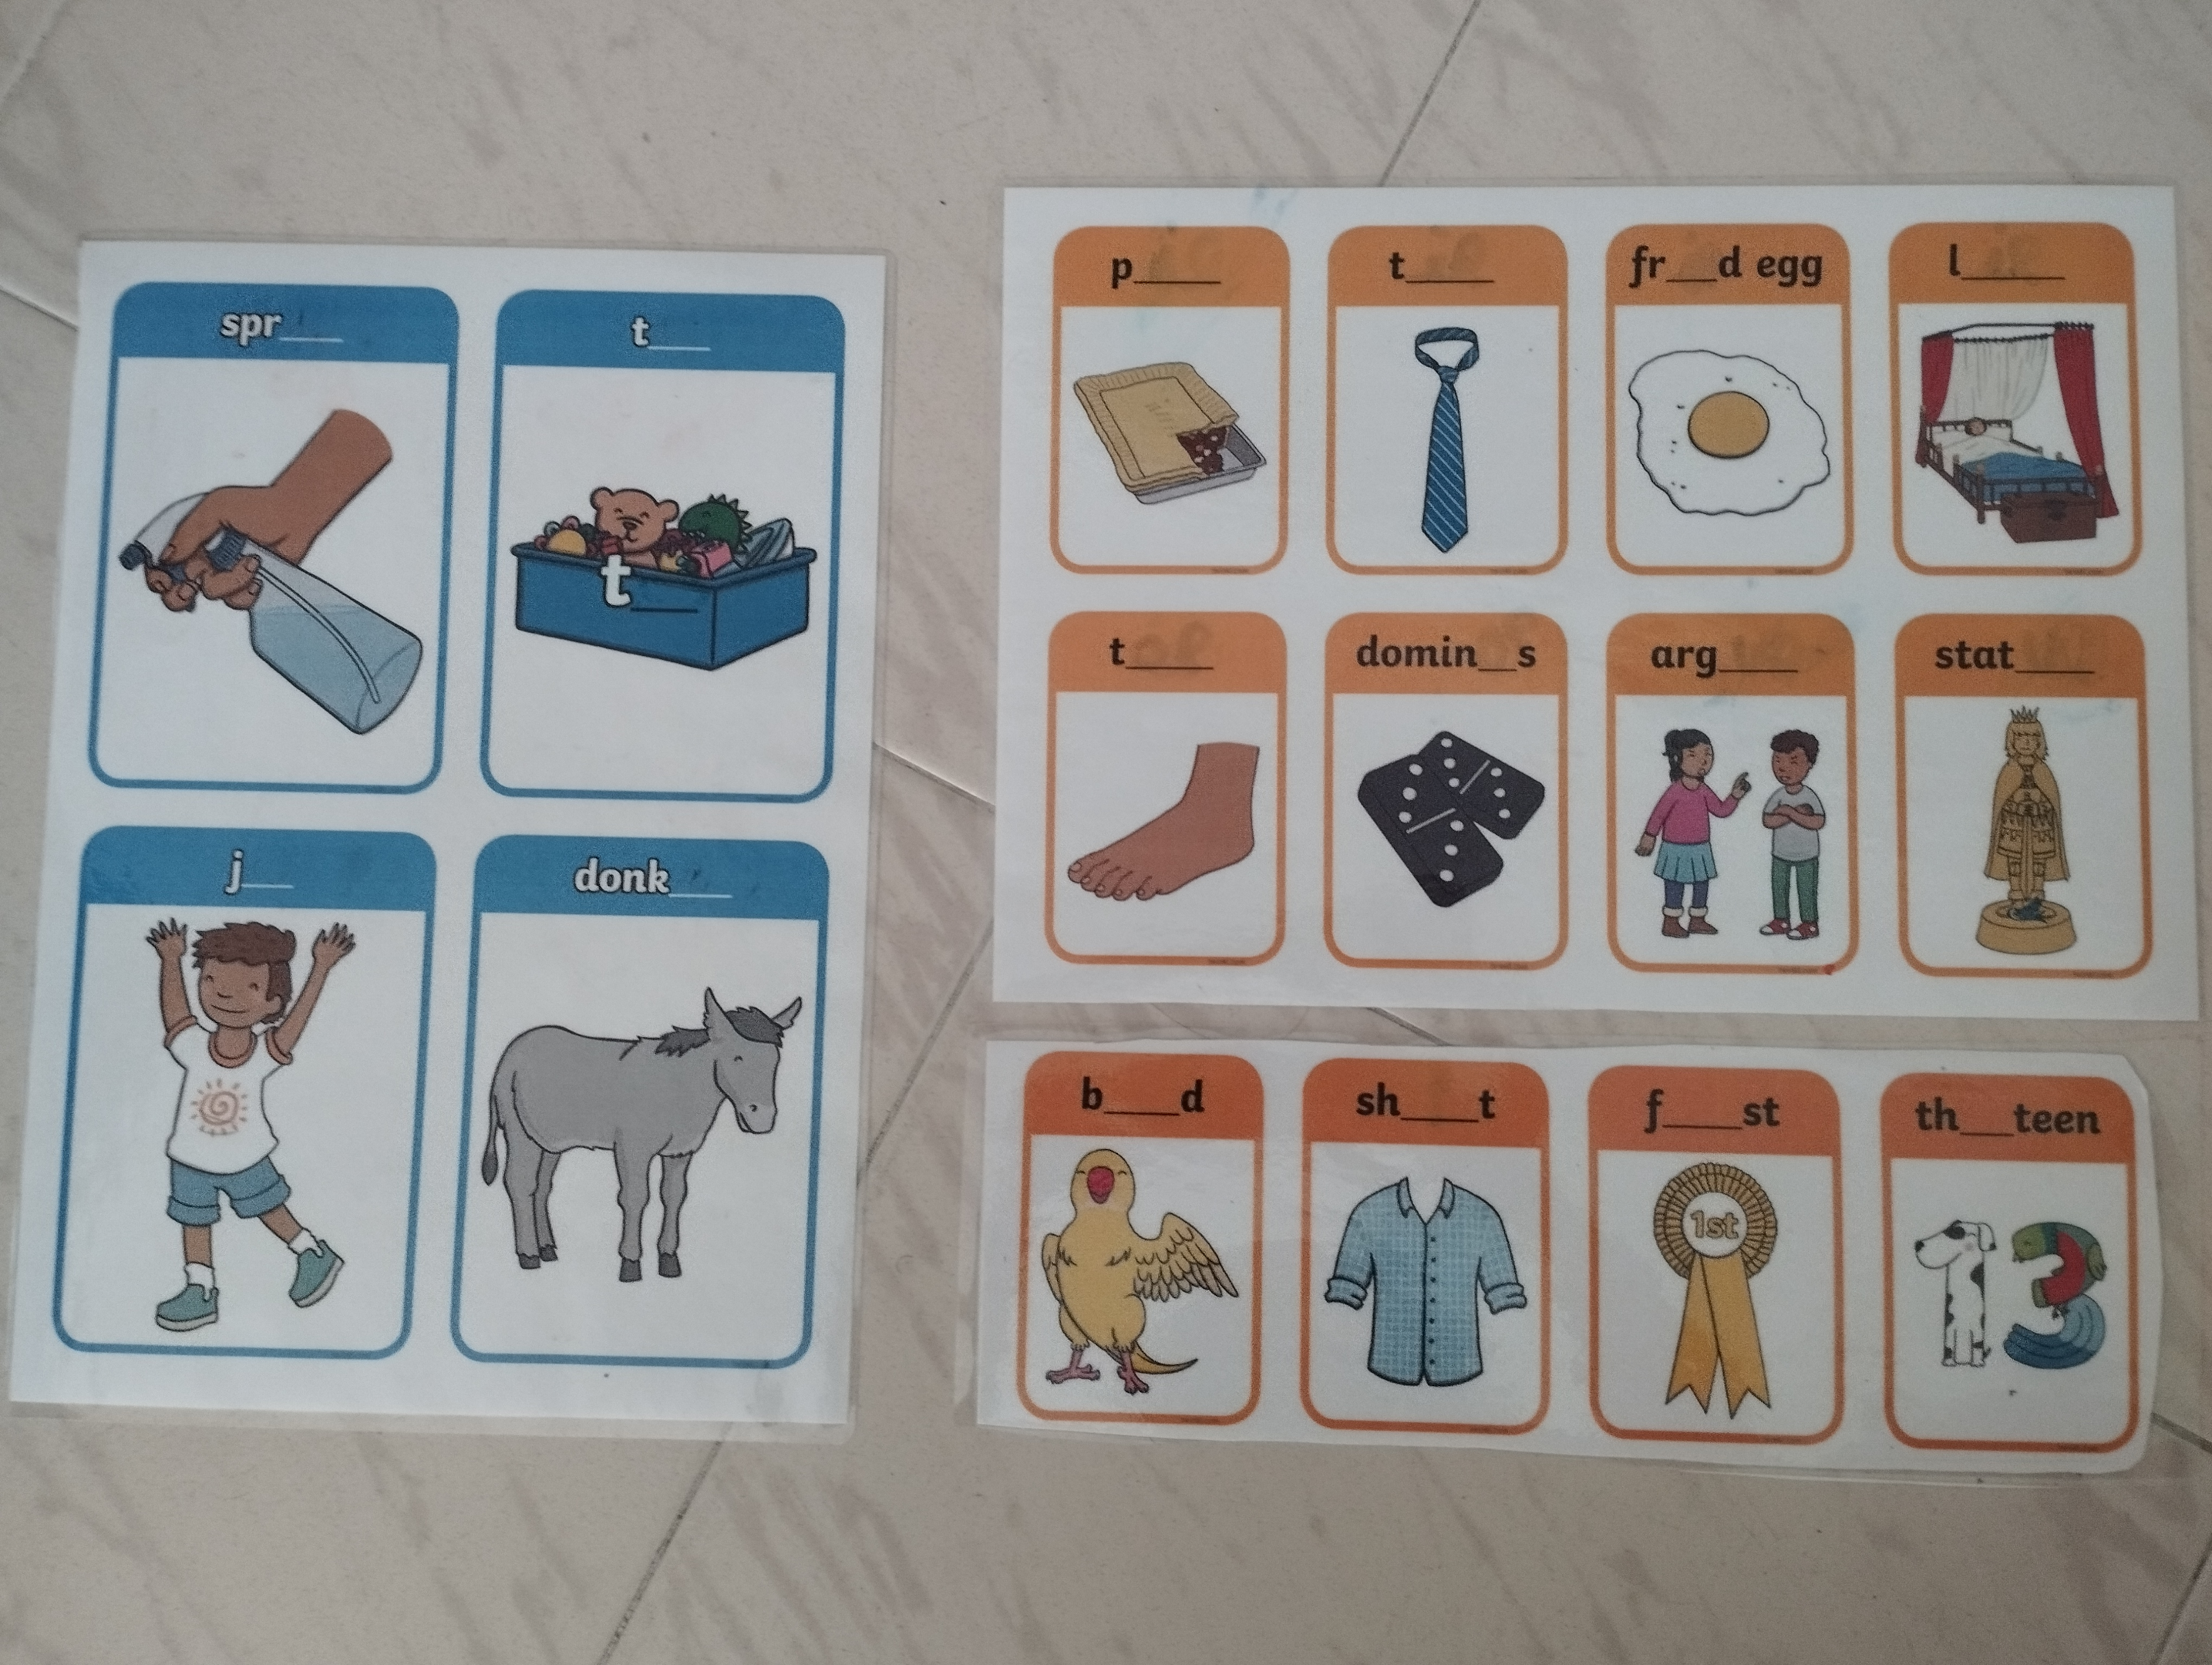

Progress to writing simple words using the graphemes they’ve learned. Use word cards that include both pictures and words, or words with missing sounds. Have them identify the graphemes in the words by underlining them. Ask children to write them independently, then check the spelling.


Create word-building games where they arrange magnetic letters or tiles to form words.
Use sand or textured surfaces for a sensory experience, allowing them to write graphemes with their fingers.
Highlight the connection between reading and writing by having children read words they’ve written. Can they identify graphemes in the books they are reading?
Phonics Programs
There are many many programs out there you can buy into, here are our recommendations.
Jolly Phonics
The Jolly Phonics program is a comprehensive and multisensory approach to teaching phonics. Through a structured curriculum, it combines phonemic awareness, letter recognition, and sound-symbol relationships, engaging students with actions, songs, and hands-on activities to promote effective language acquisition.
What is great about Jolly Phonics is that there is a small rhyme for each sound. Children absolutely love this as they get stuck in their heads. The order for teaching the sounds is very different from Letters and Sounds.
Letters and Sounds
It breaks the sounds up into six progressive phases (Phases 1 to 6) that guide students through the systematic acquisition of phonemic awareness, phonics skills, and blending strategies.
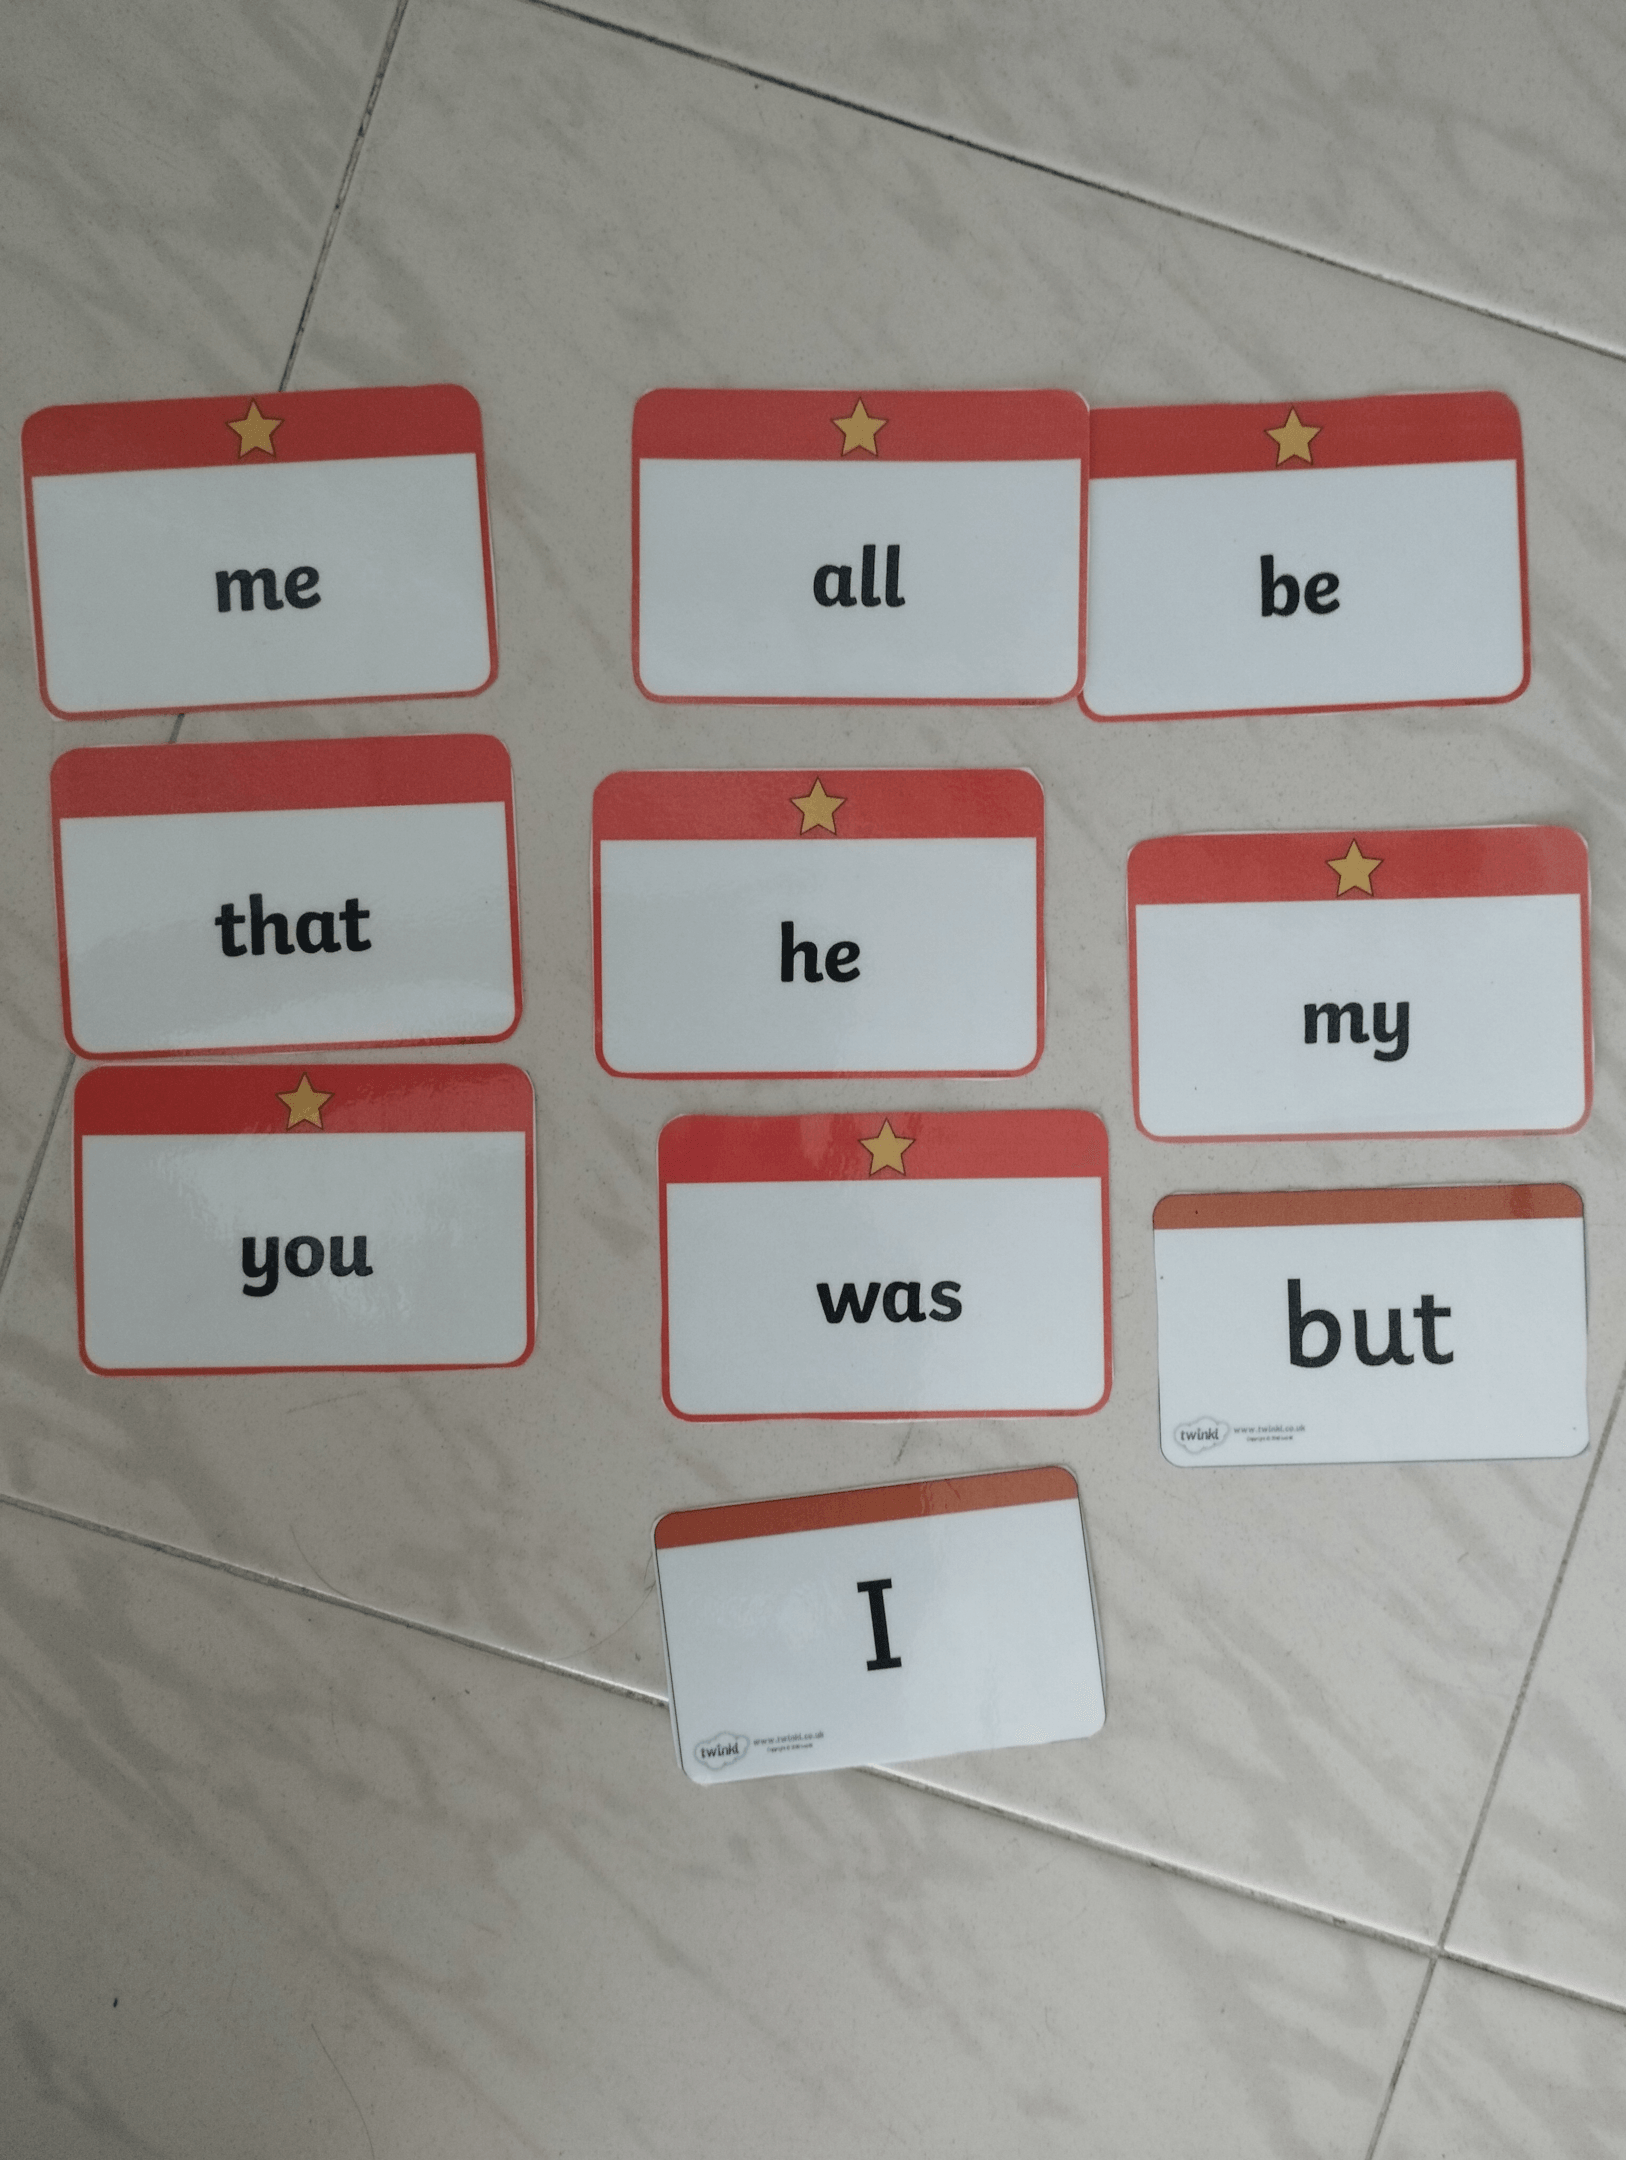
Tricky Words
Tricky words, often referred to as sight words or irregular words, are those that cannot be easily decoded using regular phonetic rules. When teaching phonics, it’s important to introduce and emphasize these words as exceptions: “the,” “said,” and “was.”
By explicitly teaching these irregular words, students develop their oral language. Can they sort words into their sound families and tricky words?
How to Teach Tricky Words
Teaching tricky words involves a strategic approach. Begin by introducing the word’s irregular nature and explaining that it cannot be decoded using typical phonics rules.
Use visual aids and repetition to help students memorize the word’s spelling and meaning, and incorporate it into context-rich sentences or short stories to promote comprehension and usage.
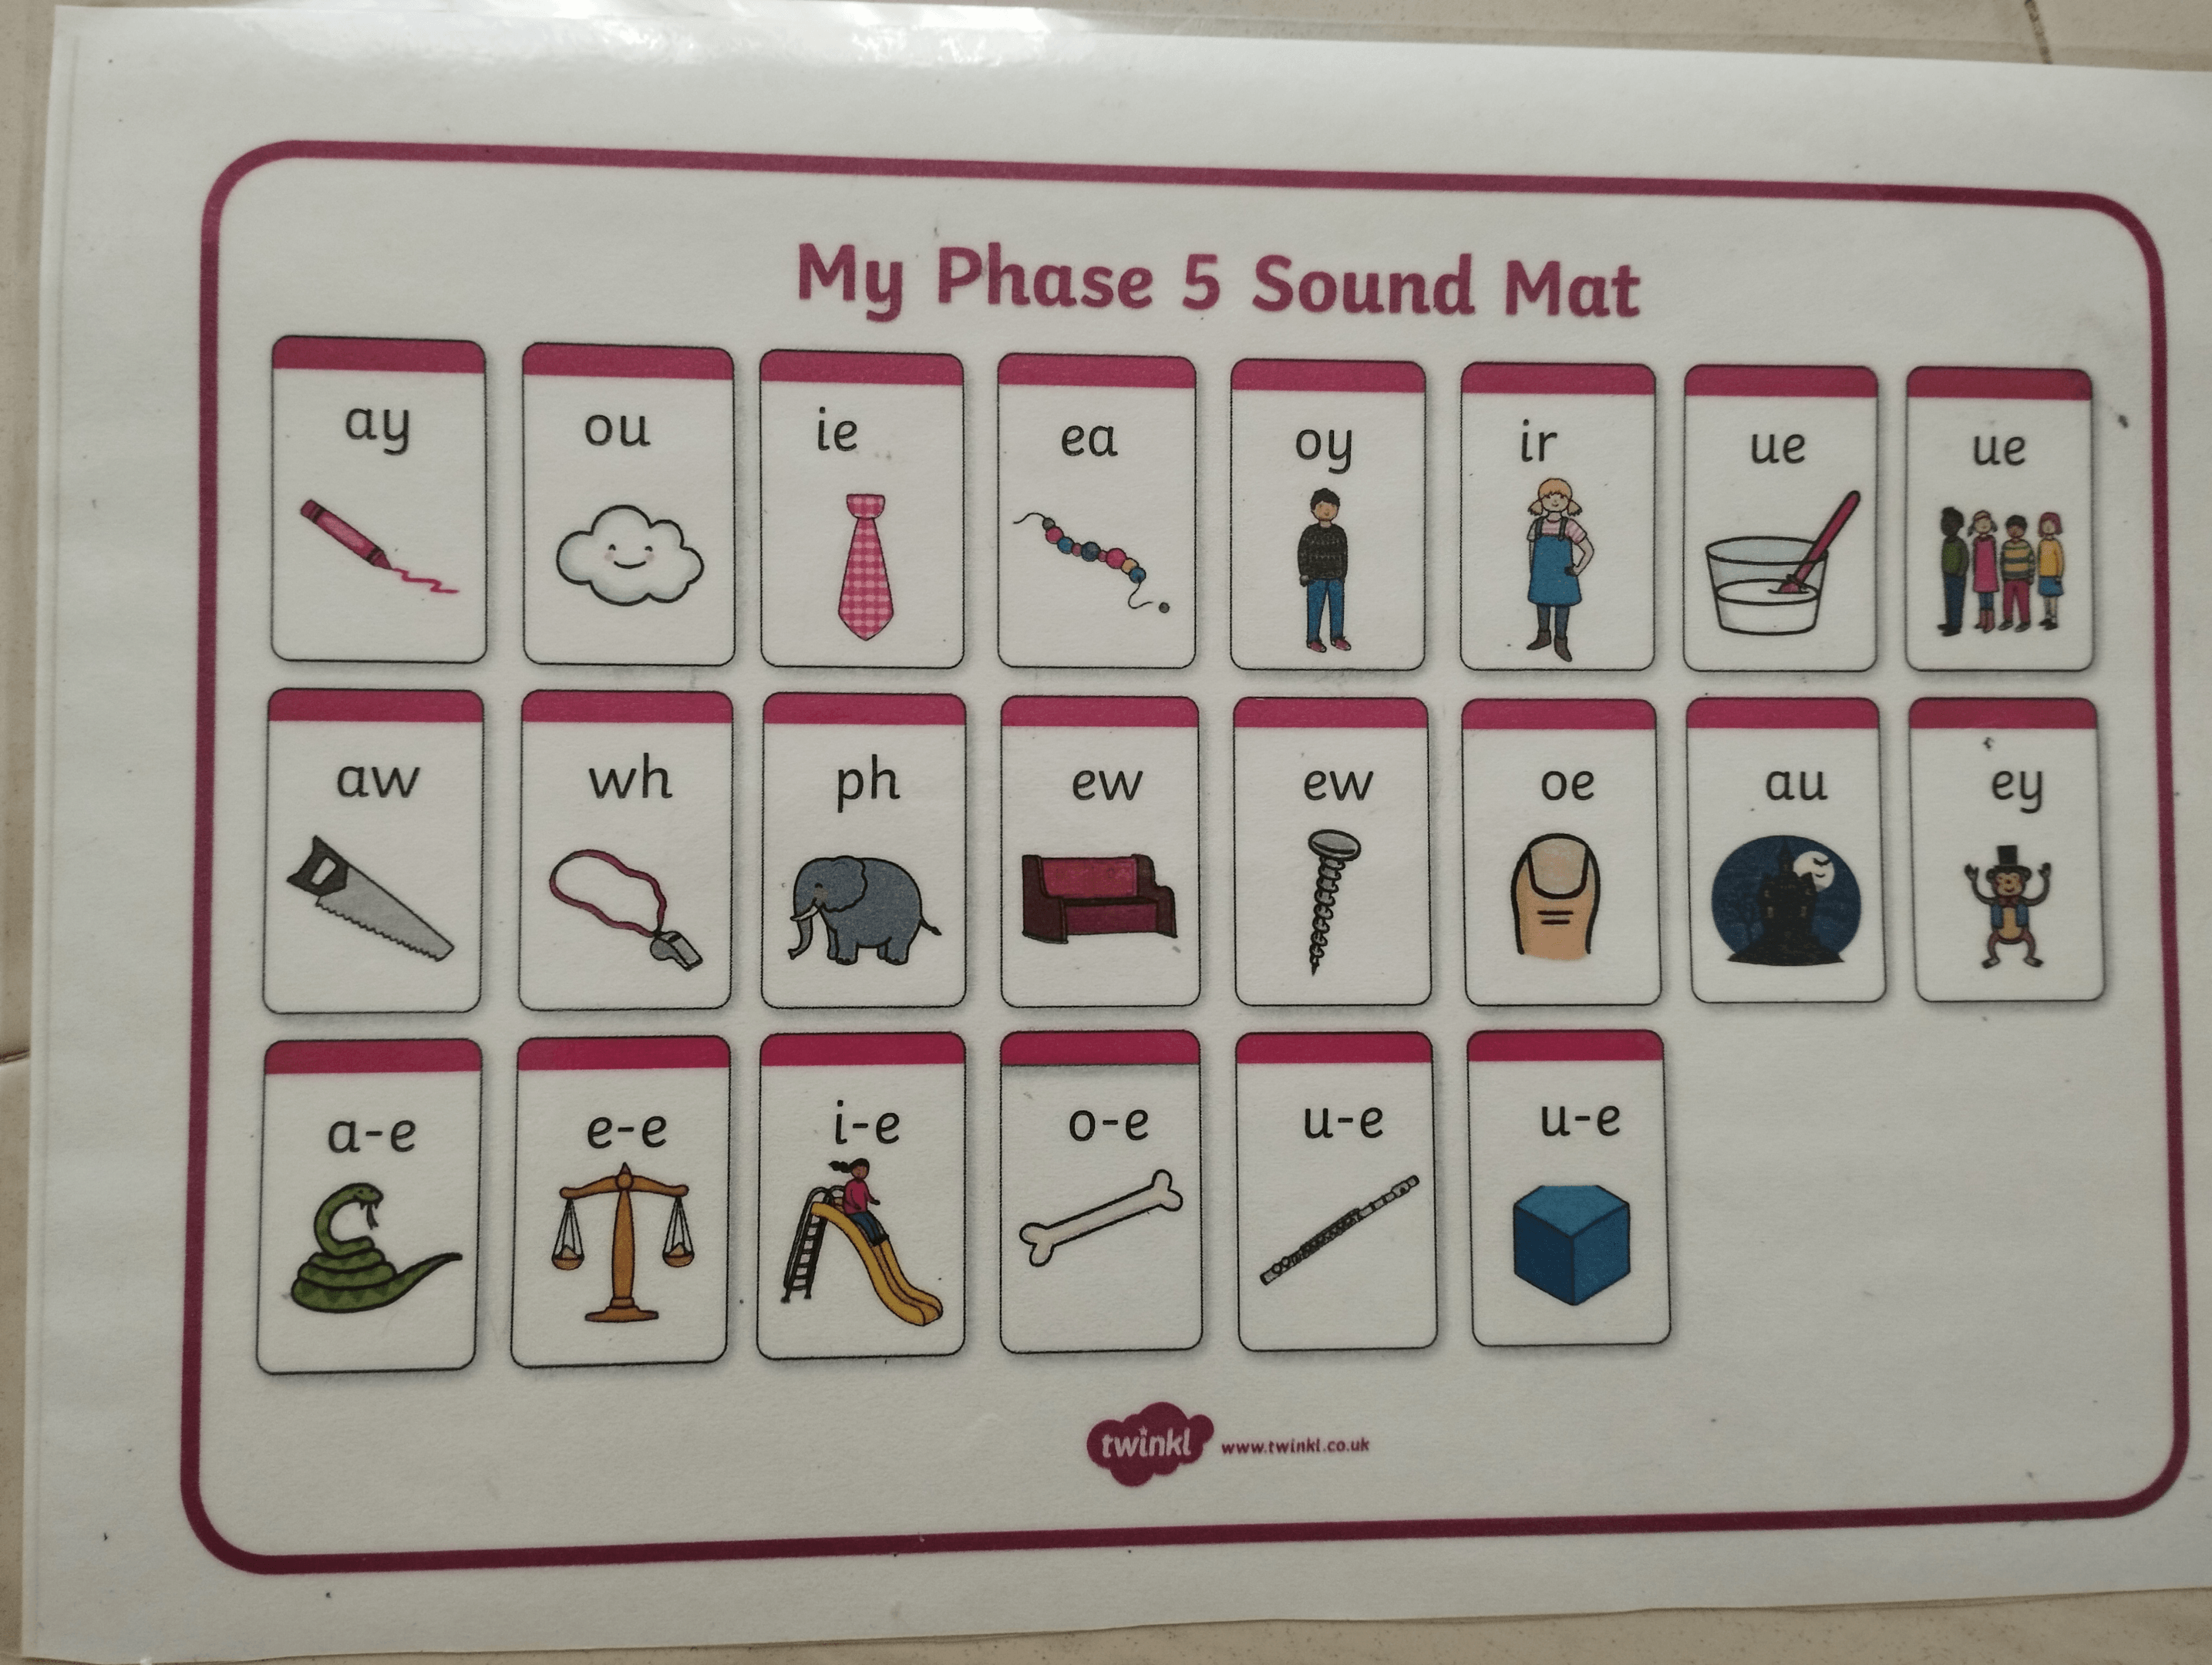
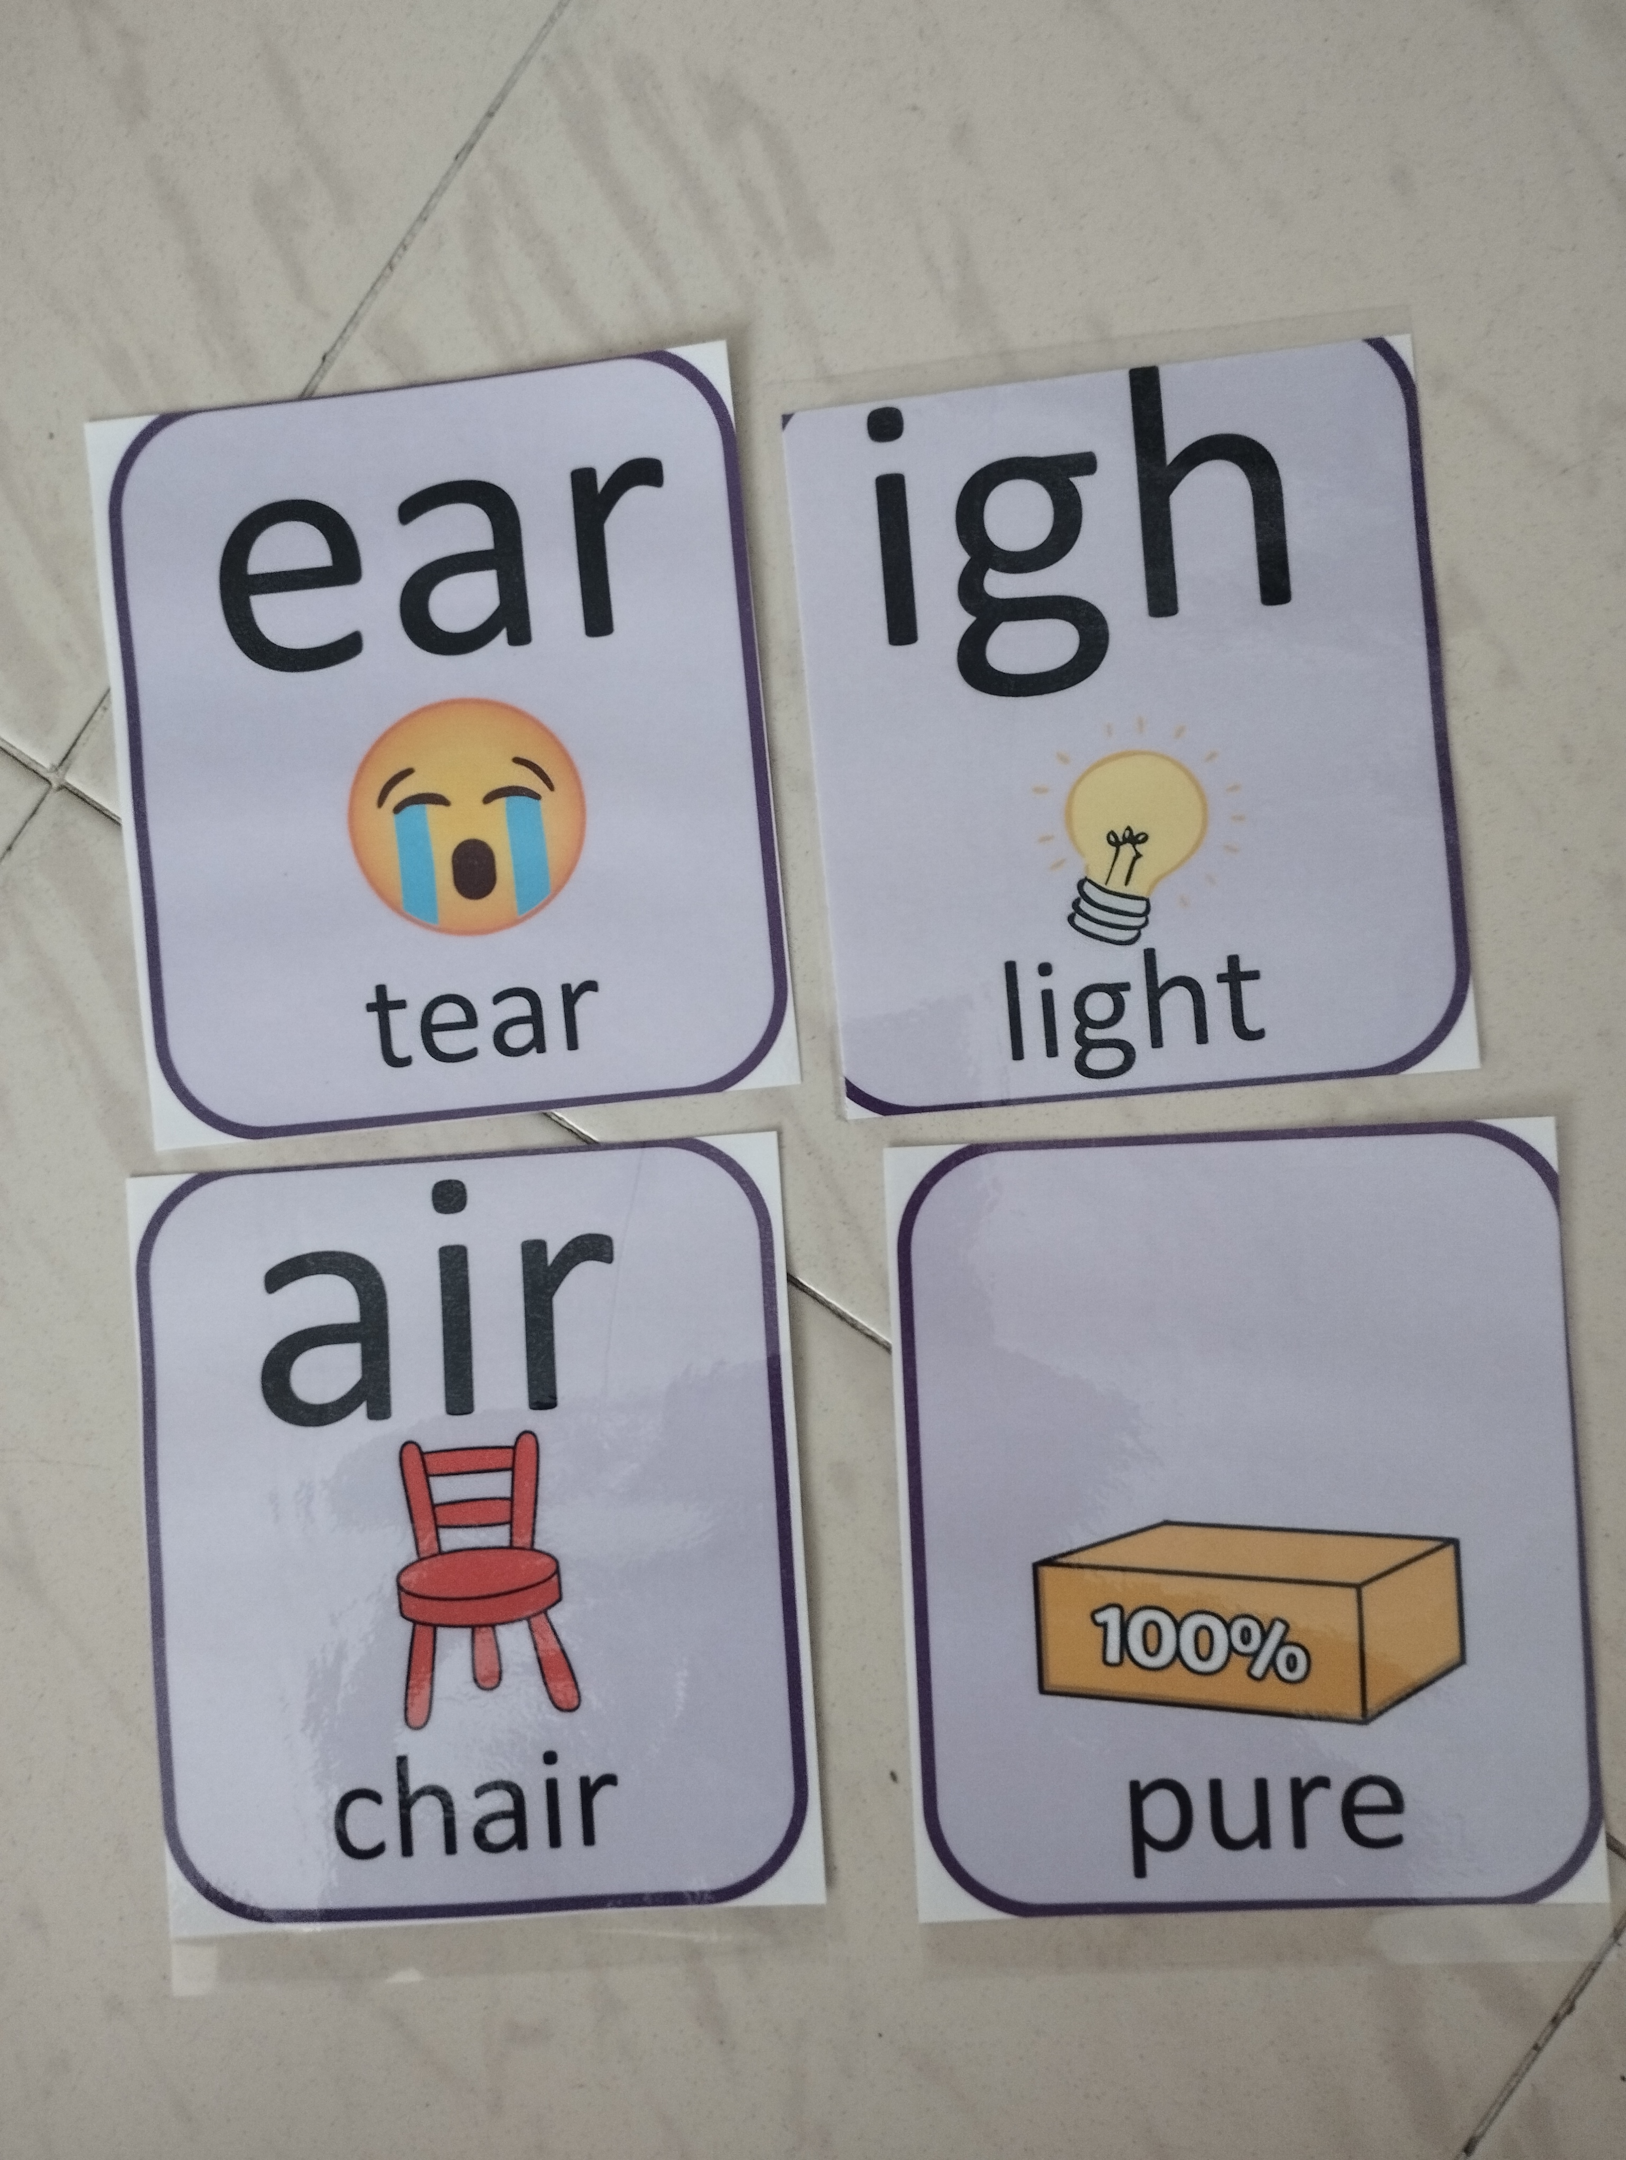
Trigraphs
Trigraphs are combinations of three letters that make a single sound. They introduce unique phonetic elements in reading and writing.

Examples include:
‘igh’ Trigraph: Pronounced as /igh/, found in words like “high,” “night,” and “sigh.”
‘dge’ Trigraph: Pronounced as /j/, found in words like “edge,” “badge,” and “judge.”
‘tch’ Trigraph: Pronounced as /ch/, found in words like “itch,” “catch,” and “match.”
‘ure’ Trigraph: Pronounced as /yoor/, found in words like “pure,” “cure,” and “secure.”
‘air’ Trigraph: Pronounced as /air/, found in words like “air,” “chair,” and “fair.”
‘ear’ Trigraph: Pronounced as /eer/, found in words like “ear,” “fear,” and “tear.”
Split Digraphs
Split digraphs, also known as magic e or silent e digraphs, occur when a vowel digraph is separated by a consonant.
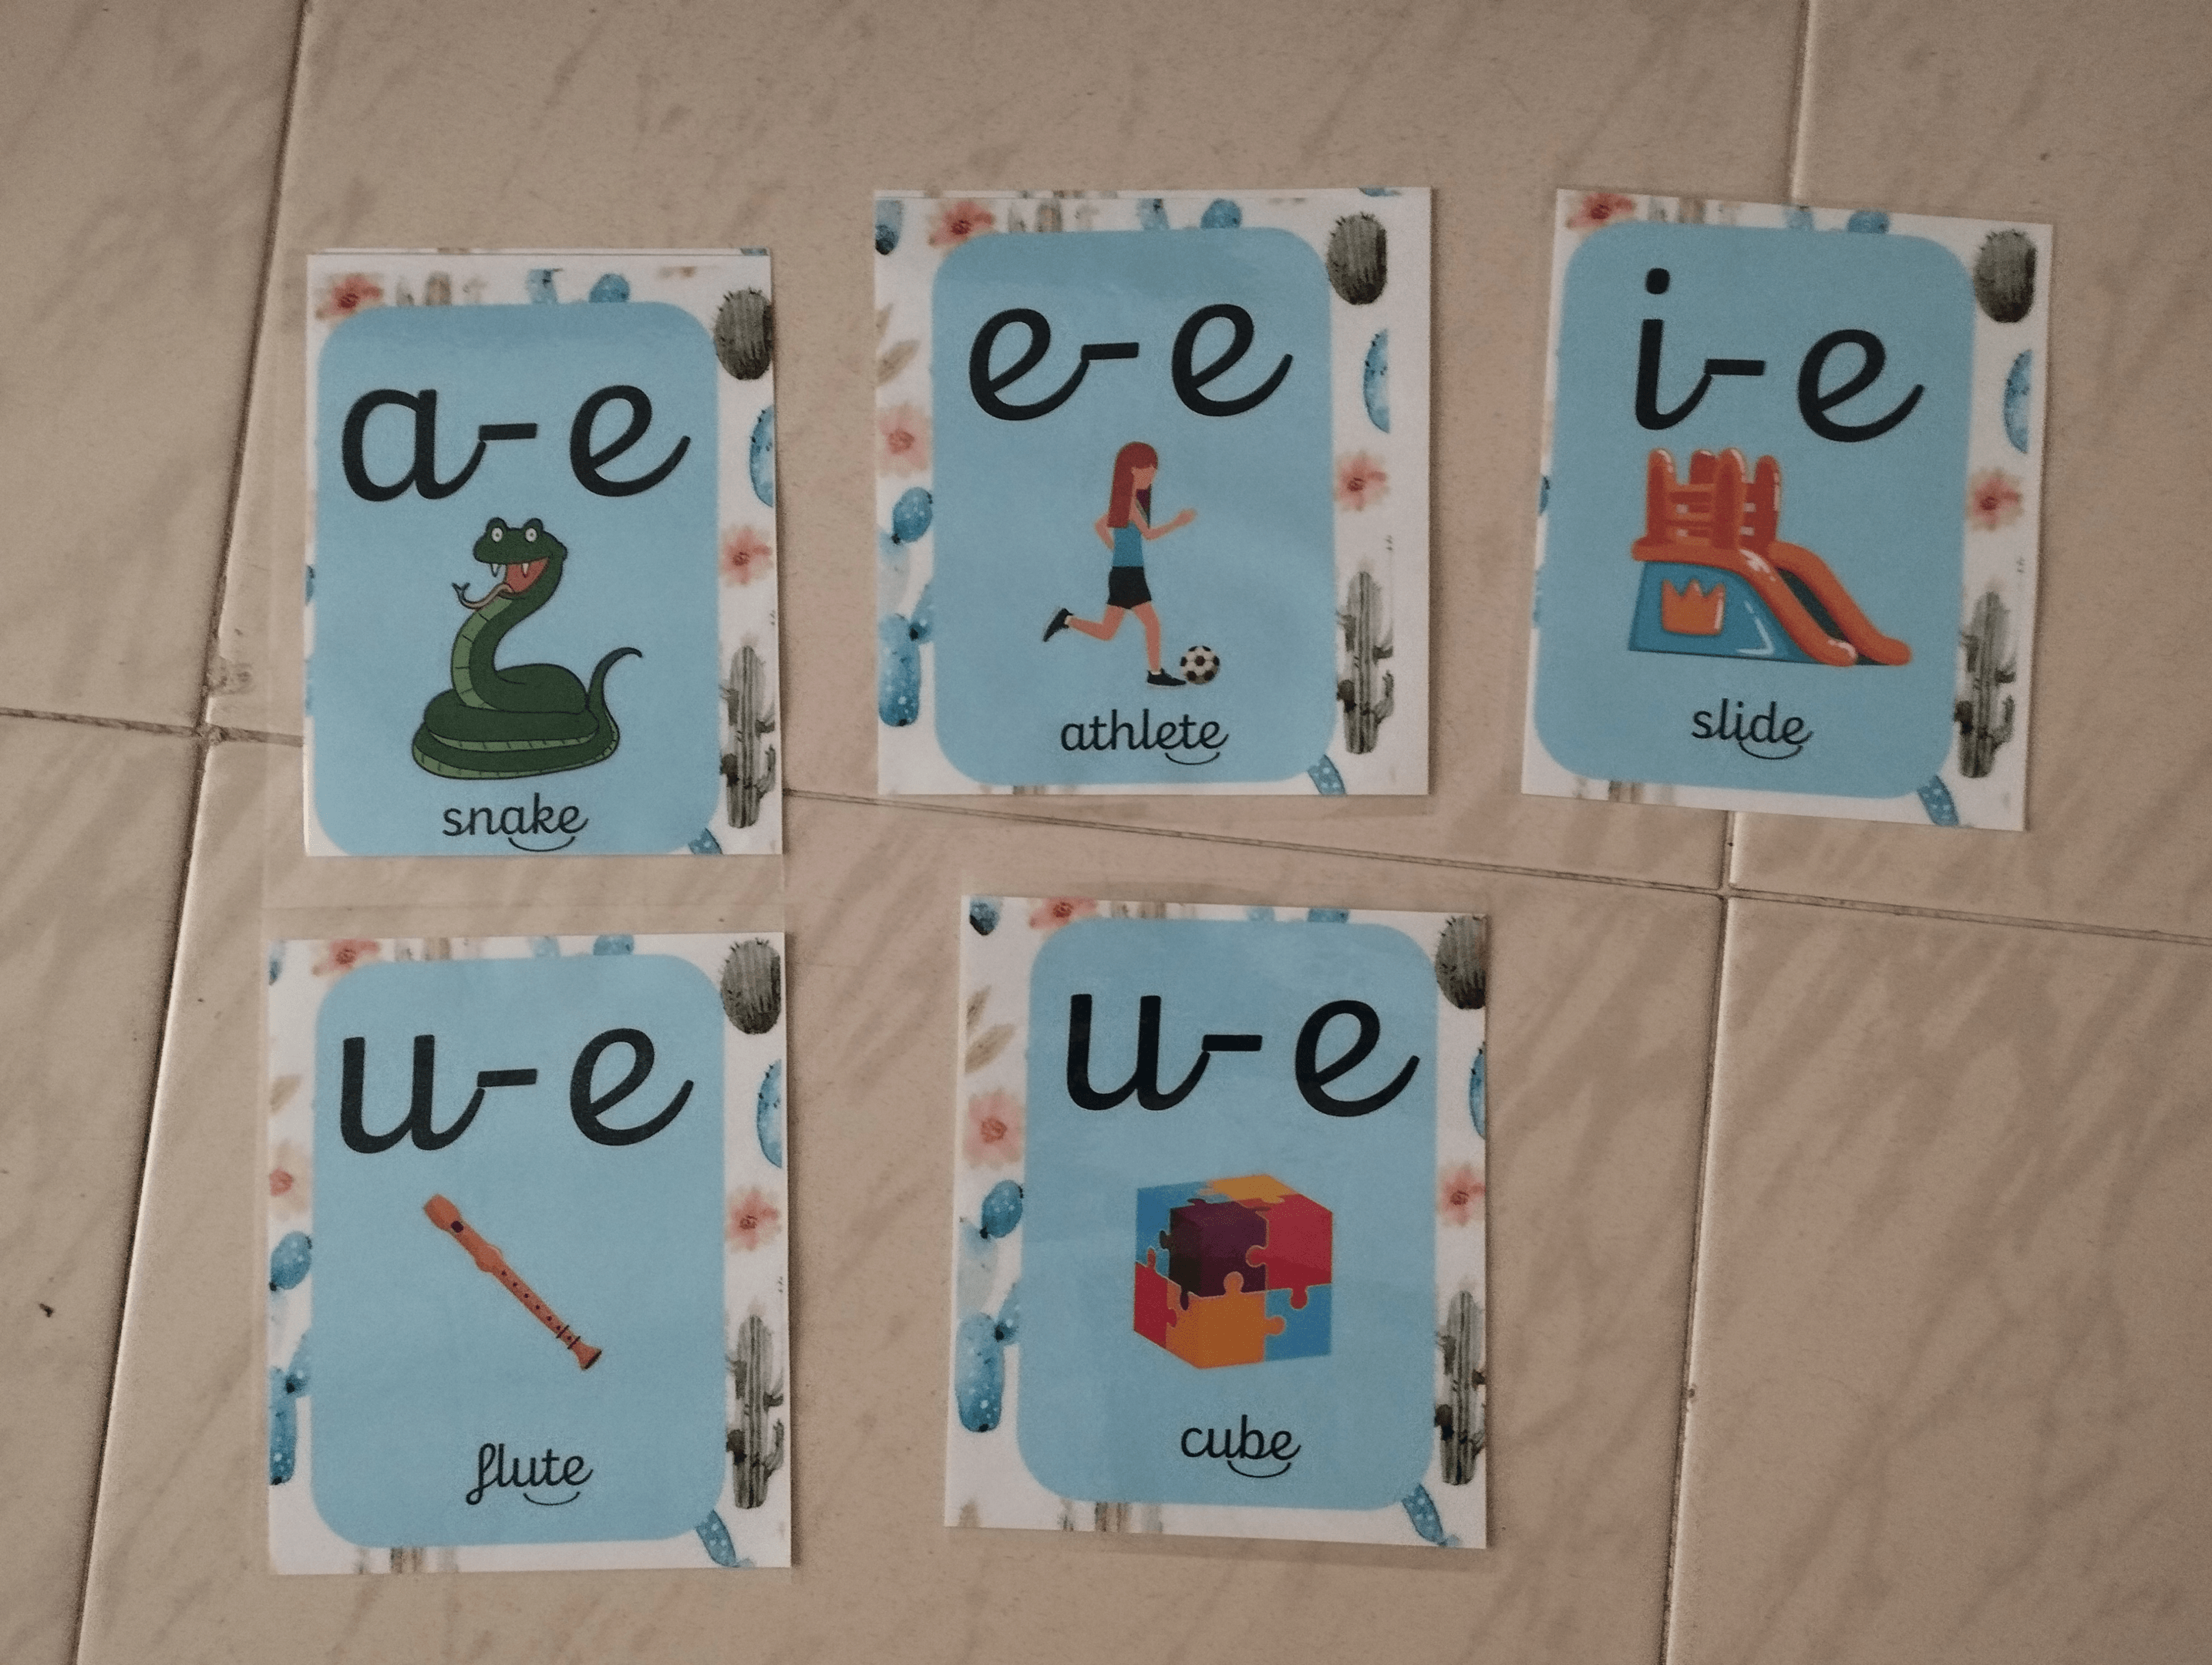

Here are some examples:
‘a-e’ Split Digraph: In words like “cake,” “gate,” and “lake,” the ‘a’ and ‘e’ are split by a consonant.
‘i-e’ Split Digraph: Found in words like “bike,” “time,” and “slide,” where the ‘i’ and ‘e’ are separated.
‘o-e’ Split Digraph: Present in words like “bone,” “cone,” and “stone,” where the ‘o’ and ‘e’ are split by a consonant.
‘e_e’ Split Digraph: Seen in words like “theme,” “scene,” and “complete,” where the ‘e’ and ‘e’ are split by a consonant.
‘u_e’ Split Digraph: Encountered in words like “cube,” “tube,” and “rule,” where the ‘u’ and ‘e’ are split by a consonant.
These can be taught by writing the split digraph first, then completing the words with the rest of its letters.
Homophones
Homophones are words that sound the same but have different meanings and spellings. It is very important to teach homophones from an early age so that children can develop their spelling.
Some of the most common homophones that should be taught first as they include the first high-frequency words:
‘their’ and ‘there’
‘its’ and ‘it’s’
‘your’ and ‘you’re’
‘to,’ ‘too,’ and ‘two’
‘they’re,’ ‘their,’ and ‘there’
‘where’ and ‘wear’
‘here’ and ‘hear’
‘our’ and ‘hour’
‘buy’ and ‘by’
‘break’ and ‘brake’
Conclusion
As children gain confidence in blending sounds, introduce more complex graphemes and digraphs. Guide them through the process of writing words that involve these advanced graphemes.
Provide a variety of words to practice with, ensuring they encounter the new graphemes in different contexts.
Practice and repetition are essential. Schedule regular sessions where children review previously learned graphemes and words. Consistent exposure and reinforcement will help reinforce their memory and mastery of writing graphemes.