Article by Esther Evans and Meghan Caissie
There has never been a better time to use the outdoors for learning!
Connecting with nature and being creative are both proven ways to improve children’s wellbeing. (Source)
As seasoned forest school teachers, we know that children are eager learners in any environment and any weather, which is why many parents and caregivers are turning to forest schools to inspire hands-on learning in outdoor educational settings.
The spirit of forest schools is that children can enjoy and learn about the kinds of plants and creatures around them and can develop self-esteem and confidence from learning with others and being prepared.
Forest school crafts are a key and beautiful part of this experience.
So here are the ultimate 12 forest school craft activities.

1. Natural Paint Brushes
Tell the children that you are running out of paintbrushes and ask them to find lots of new kinds of paintbrushes from the forest. You could show different kinds of paintbrushes first and talk about wide, narrow, fat, thin, bristly, and pointed.
Ask the children to search for natural paintbrushes like twigs, long grasses, ferns, and flowers.
Provide joining materials like string /masking tape. This is useful to bind the sticks and leaves into different sized and shaped “paintbrushes.”
Talk about the different sizes and shapes of the brushes the children have made and let them predict what kind of paintings they will make.
Creative time!
Lay out a large roll of paper and let the children have fun using their natural brushes.
They can experiment with printing, splattering, flicking, rolling, and drawing.
(This makes a lovely background to display Forest school photographs on).
Keep a few “natural paintbrushes” next to the painting easel for the children to experiment with when they are mark-making.
2. Nature Frames
Explain to the children that they are going to make beautiful frames for their artwork but first they need to collect some treasure from the forest to decorate their frame.
It’s a good idea to model this first so have a collection of treasure ready such as little pine cones, sycamore helicopters, seeds, dandelion flowers, interesting leaves, feathers, or anything seasonal.
Provide the children with a treasure box/bag (recycled containers work well here), then let the children explore the forest site for any interesting treasures they can find.
When everyone has found some treasures, come back together. Look at the colors, smells, textures, and shapes.
You could also count how many objects the children found.
Getting Creative
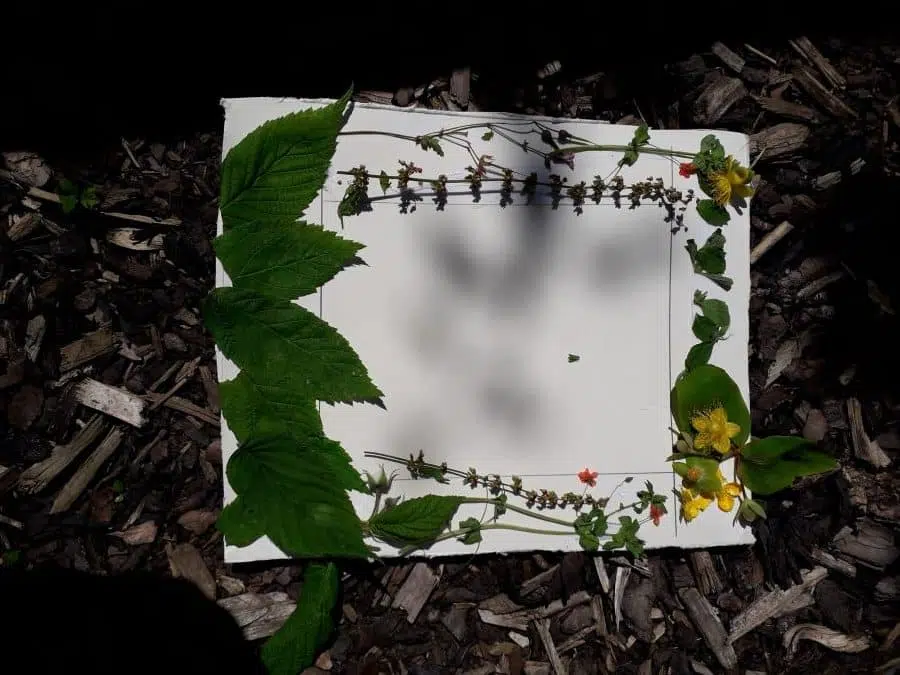
Each child will need a cardboard frame. Recycled cereal boxes can easily be cut into frames (like the one in the picture).

You could also use frames cut in different shapes: squares, rectangles, and ovals work best – just let the children decide.
Use self-adhesive strips or glue sticks and encourage the children to lay out their treasure on their frame to decorate them.
3. King / Queen Of The Forest.
This is similar to Nature frames but can be linked to a favorite fairy tale or nursery rhyme.
Provide the children with a treasure tub/ box. Again, recycled boxes/tubs are great to use here.
Ask the children to search and collect treasures to decorate their special crown. They can then be a king/queen of the forest.
What will you find?
Look for special leaves (Autumn is a lovely time to do this activity), feathers, ferns, flowers, seeds, or any other interesting objects you come across on your scavenger hunt.
Talk about the treasures the children have found. Again, this is a good chance to count objects, introduce new colors, sizes, patterns, and shapes in nature.
Let the children lay out their treasure onto a strip of recycled cards. (You could do this in the forest setting or back indoors).
The children could break or tear their treasure into tiny parts if you want to encourage ripping or tearing skills. Bend the completed crowns to fit each child’s head and fasten them in place with a stapler.
Have a royal parade to show off their creations.
This is particularly lovely in Autumn with all the different shades of changing leaves.
4. Hedgehog House.
Show the children a hedgehog toy or puppet and explain that his home was lost in a storm and so he needs the children to help build him a new shelter to live in.
(There are lots of lovely children’s stories about hedgehogs that you could use as a starting point here).
Talk with the children about the type of house a hedgehog would live in. Ask for their ideas first and explain that it will need to be warm, safe, cosy, and needs to be big enough for him to fit in.
Let the children explore the woodland freely. Encourage them to collect twigs and start to build up little shelters.
Get Crafty
Once their hedgehog den is finished, ask the children if they can find ways of camouflaging or waterproofing the den to keep the hedgehog safe from harm. Can they decorate their shelters with leaves or moss?
You don’t have to stick to hedgehogs. If you have a favorite story about a frog, for example, this would also work.
5. Crafty Spider Webs
There is a little bit of preparation for this activity but it is worth it as it keeps the children interested and helps develop skills of perseverance and dexterity.
Collect some strong, long twigs of roughly the same length or 4 bamboo garden canes.
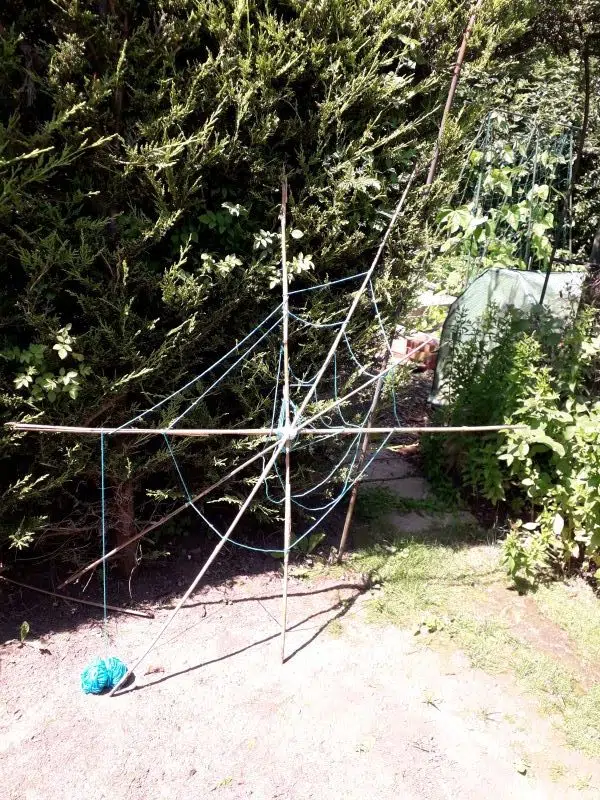
Cross 2 canes together and bind them with string or masking tape. Repeat this and join the two crosses together at the point of intersection. You should now have the beginning of a spider’s web.
Tie a ball of string or wool to the center of the web. Show the children how to weave the ball around the canes in a circle, just like a spider’s thread.
Weave in and out of the canes, wrapping the ball around each cane as you do to build up the web.
You can do this on a giant scale like the one in the picture, or individually on a smaller scale.

A good follow-up activity is to ask the children to make spiders using their imagination and the materials they can find in the forest.
(They might even find some real spiders!)
6. Color Collage
Provide some large sheets of colored card in green, yellow, purple, brown, and red.
Let the children explore the forest and bring their findings back to the colored cards. Give plenty of time to look at and talk about the natural objects the children find.
Help them to color match their objects, and talk about all the different shades of colors.
Were they able to find all the colors? Did they find any colors they weren’t expecting? Did they find darker or lighter colors?
Working Together
Encourage the children to use all the colored objects they found to create a joint collage. It’s a good idea to provide the children with a frame first so that they have a boundary to work in.
You can do this by making a giant square with garden canes or by using string, pegged into the ground.
The collage could be on any theme. My class made a beautiful big yellow sun and moon from piles of dandelion flowers once.
The important thing is to get creative, be outdoors in the fresh air and have lots and lots of forest fun.
7. Cardboard Leaf Creatures
This is a great way to include reusing and recycling into a craft.
Draw an outline of a butterfly or bee (or any other bug friends you can think of!) on some thin cardboard and go on a hunt for leaves to fill out the wings and twigs to add lines and details.
Small stones or berries could be eyes – it’s up to the children to choose colors and shapes to make it special!
This is a great way to observe the different shapes of leaves and to talk about what is safe to touch and what children should ask about before touching or picking.
Adding in white school glue builds fine motor strength as they squeeze, or for tiny hands, you can pre-squeeze into an egg cut and “paint” on the glue with twigs or leaves.
It’s fun to create a whole swarm of these creatures and display them on a forest-themed wall or board in the house or classroom. Children will be full of wonder as the materials dry and shrink over time.
8. Observational Painting
Children will love the process of picking out their favorite wildflower to paint in this fun craft that encourages noticing details.
This challenges little minds to ask themselves questions about what they see, not what they know and helps build visual-motor connections and fine motor skills.
Let this be a child-centered art process – no guided drawing, and every painting will be wonderfully unique!
Grab a piece of recycled cardboard and fold it in half to make a triangular “easel”. Once your learners have found their flower, tape it to the easel and ask them to describe the shape of different parts of the flower.
Before they paint, ask them to use their finger to trace the shape and size onto the easel and imagine the lines they traced and use describing words to help think about it.
Is the stem long? Short? Thin?
Encourage them to use non-standard measures – is it about as long as their thumb?
They’ll love making connections and trying more than once to paint their flowers.
Do a gallery walk for the little artists to show off their work and explain their process. This helps build listening skills and lets them share how they made decisions and to learn from each other!
9. Photo Frame Shadow Drawing
For an amazing way to explore how the sun is a light source and how opaque objects block light to make shadows, then look no further than empty photo frames, clipboards, and leaves!
This craft blends science and drawing skills and is sure to be a hit on a sunny day when the sun is lower in the sky – wait until morning or afternoon and not when the sun is directly overhead.
Remember sunscreen, sunglasses, and hats!
Take the photo and cardboard backing out of a photo frame that has a lip for a clipboard clip to hold up at a 90° angle and use clear tape to attach 1-3 leaves on the glass.
Put a piece of drawing paper on the clipboard then clip in the frame standing straight up and make sure it’s secure.
These clipboard-drawing-tables can be moved around to any comfortable place and to see where the best shadow is cast! Children who try this out under a shady tree might discover that they need to explore a bit more.
It’s a bonus if clouds move across the sun and the tracers get to see the shadows disappear for a moment and wonder where the shadow went.
This is a great opportunity for experiential learning!
10. Watercolor Rain Paint
For a fun way to encourage patience and focus, wait for a rainy day to break out the watercolors.
For this delightful collaboration between young artists and the weather, you’ll need cookie sheets, white construction paper or watercolor paper, watercolors or food coloring, and a good downpour!
First, in a dry location, the children can spot or dot their paper with color. Encourage them to leave lots of white space on the page and not fill it all up for the magic to happen!
Then put on rain gear to stay nice and dry and head out into the downpour.
Have the children place their cookie sheets and paper on the ground and watch as the rain transforms their art into something even more incredible!
Encourage them to make their own decision about how much time is enough and when to take them in to dry. Then enjoy some puddle jumping as they wait for their art to dry off!
11. Natural Shape Puzzles
If you want to help build fine motor skills and spatial awareness, then challenge your learners to stay inside the lines with found objects.
This is an engaging challenge that can be a fun partner activity too, to add in decision-making and working together.
You’ll just need some dry dirt or sand you can draw a simple shape in, like a square or circle, and some found objects like pebbles, leaves, twigs, or moss.
Draw the shape in the dirt and let the children have fun putting the objects in. It will get more challenging as the space fills up and pieces don’t fit, so discuss strategies like judging size and looking for shapes that might fit.
12. Ice Suncatcher
Is there anything more beautiful than a sunny winter day?
With proper cold-weather clothes, crafting can be done and displayed outside to add extra wonder to a winter wonderland.
For this craft, you’ll need a cake pan, some string, a plastic cup weighted down with pebbles or coins, and a container for water that children can easily pour from without spilling.
Then it’s up to their imagination to find objects to add to their suncatcher!
Bright natural objects from outside like pine or fir branches look great or raid the kitchen for orange slices or berries to add vivid shades.
You can even add food coloring, but try to keep it natural as these will melt and drop onto the ground below.
Have the children assemble their objects into the cake pan and take turns pouring water in once they’re happy with their collection.
This is a great way to work together and to build gross motor control. Place the cup near the top of the cake pan with enough room to make a hole, then leave it outside for 3-5 hours in a shady spot.
The children can check back in and once it’s frozen, bring it inside for a few minutes (or place it carefully in some warm water in the sink) to loosen the ice.
Carefully lift it out, thread the string through, then find the best place to hang it outside and marvel as the light shines through!
Remember that when using water outside, soaked mittens can be a bit of trouble, so remember to talk to your children about why it’s important to keep dry!
I hope these fun activities inspire you to go outside and enjoy seeing kids be creative no matter the weather!
Check First!
It’s always a good idea to do a risk assessment of the site before you start.
- Look out for any prickly or poisonous plants like thistles or nettles. There’s no need to remove them. You can either rope off the area, or explain how these plants can sting us. Make sure the children understand they shouldn’t go near them.
- Be careful not to pick any protected flowers or species. Remember some wildflowers are lovely to look at and smell, but shouldn’t be removed. (There is lots of guidance on the internet if you aren’t sure).
- Remember to take everything back with you. Leave nothing but footprints.
